Before you deploy and test all your user functionality you just built, you'll need to set up a live database and a MySQL user which will have access to this database.
Load up cPanel (You may find it via http://yourdomain.com:2083; if not, check your web host settings for the URL).
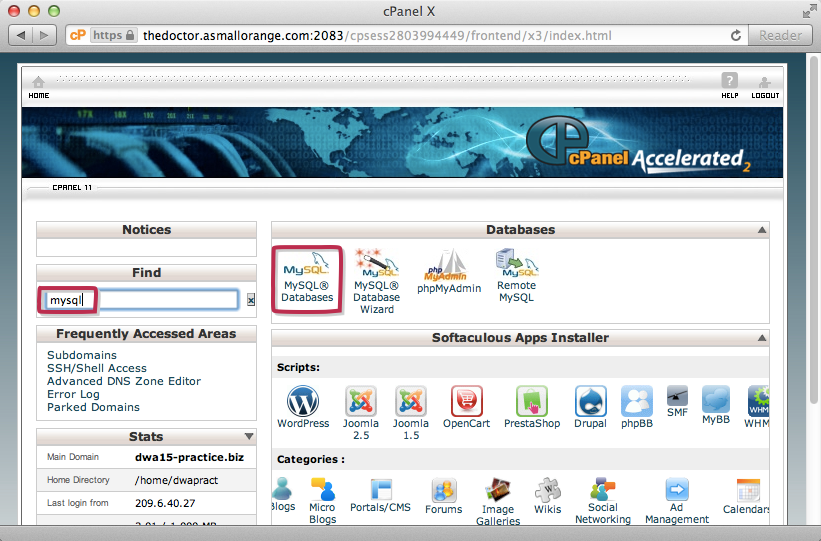
Via cPanel, find the MySQL Databases section
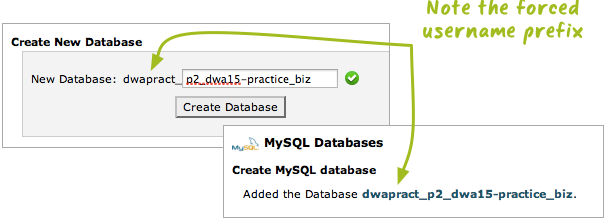
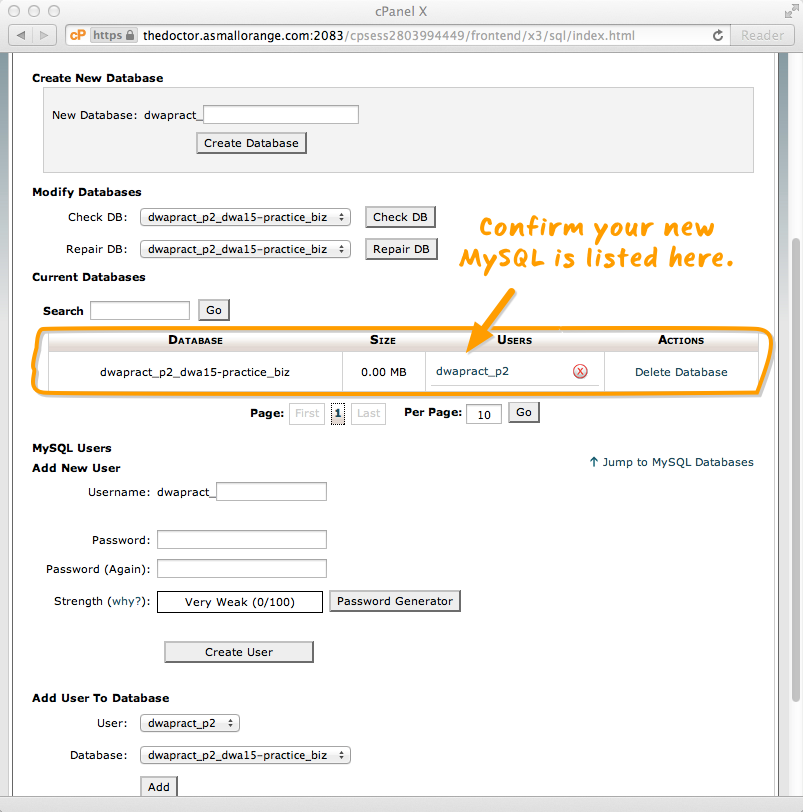
Then, create a new database:
Important Note: some servers force your database name to be prefixed with your username. If this is the case, you'll have to do this and then change your database name on your local server to match. This is done via the Operations tab in phpMyAdmin
You'll also have to change the DB_NAME constant in /app/config/config.php to reflect this change.
# Default DB name for this app
define('DB_NAME', 'dwapract_p2_dwa15-practice_biz');
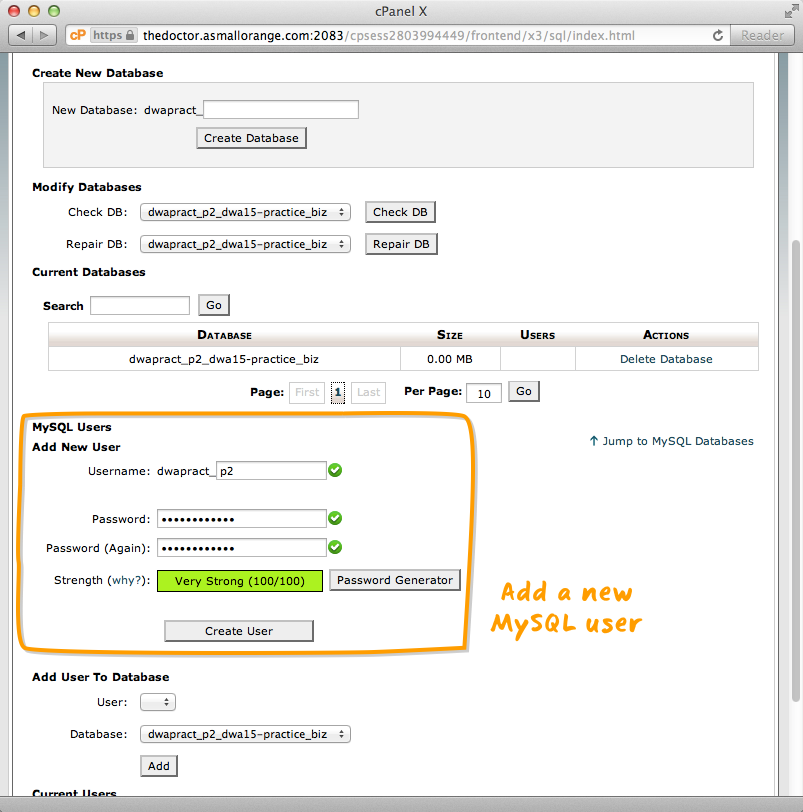
Next, returning to the MySQL Databases page, find the section to create a new MySQL User. Record the username (full username, including any prefixes) and password you create— you'll need it again shortly.
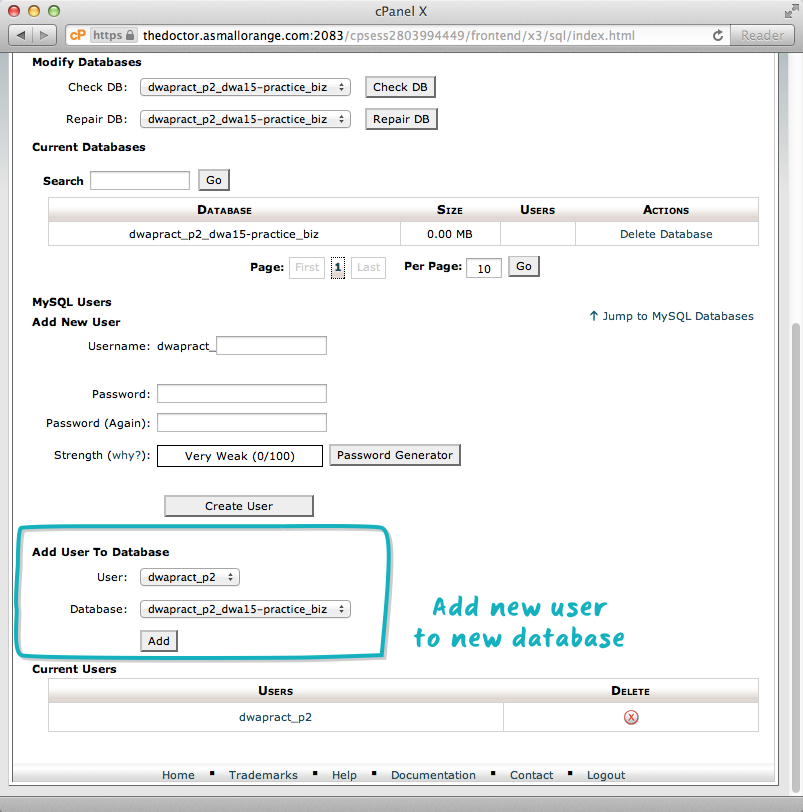
Finally, you need to grant this new MySQL user access to your new database:
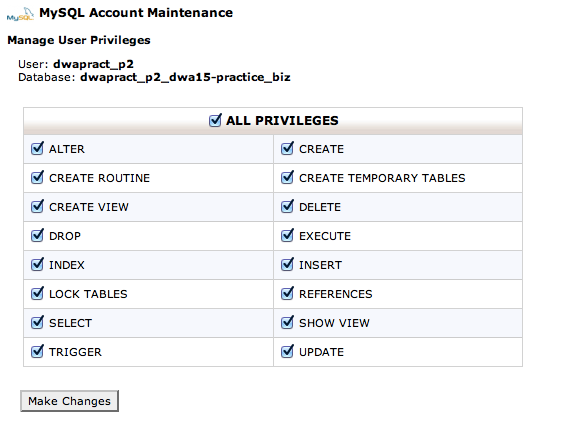
When granting access, you'll be asked to define what priveleges this user should have to the database in which you are adding it to:
For this project, we'll grant full access, but you should read more about the different priveledges as well as a discussion of the principle of least priveleges.
Once your user has been added to the database, you're ready to move on.
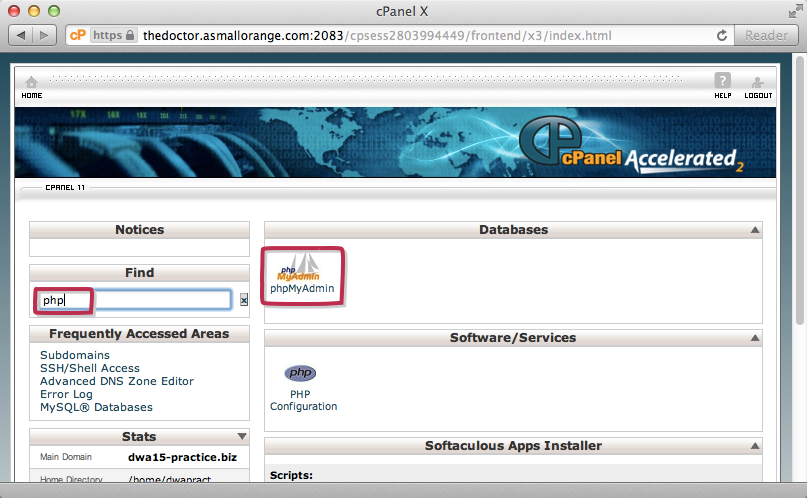
To edit this new database, lets find phpMyAdmin on your live server— it can also be located from cPanel:
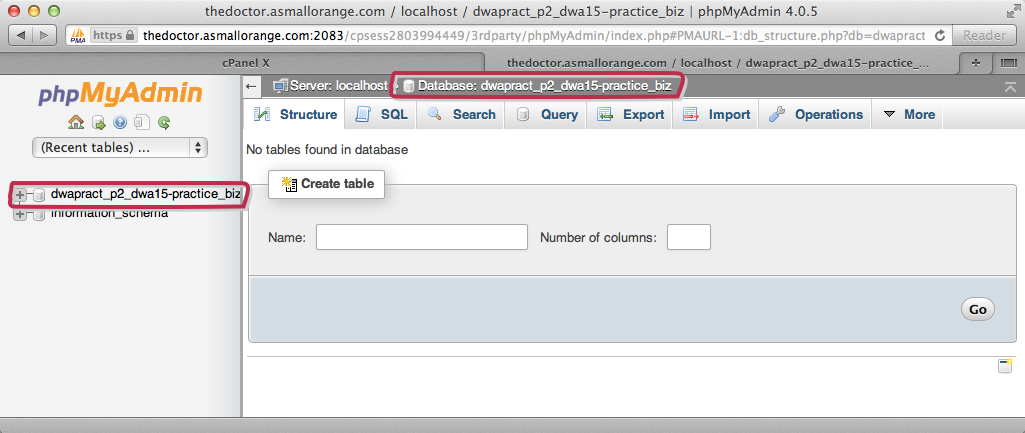
In phpMyAdmin You should see the database you created in the previous steps. Click on it so it's the active database:
Finally, you need to add your users table to the live database. To do this, you could manually recreate the fields as we did when first setting up the local database, but this is tedious and prone to errors.
Instead, let's export export the database as one long SQL command which can then be imported to the live database.
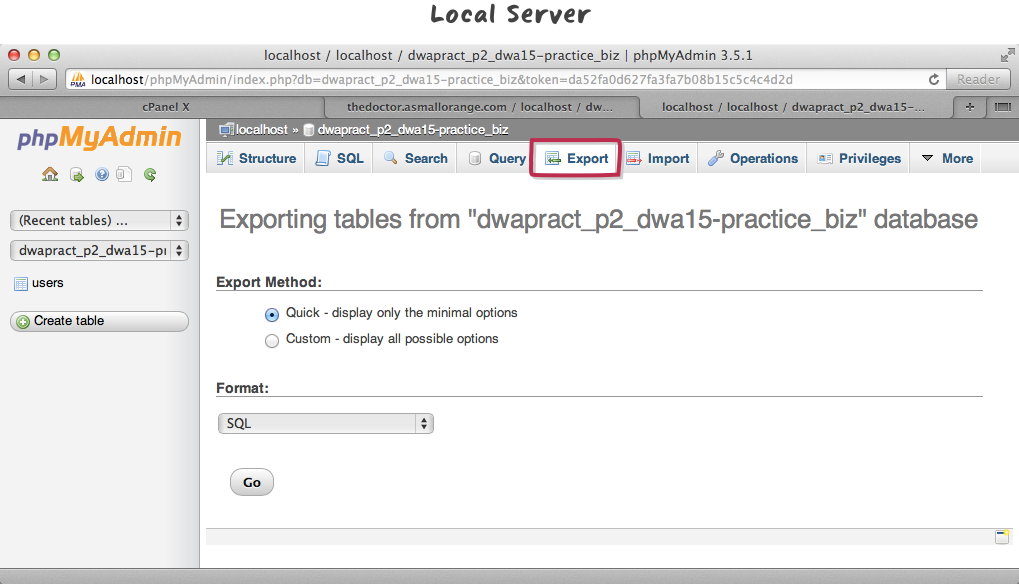
On your local phpMyAdmin, choose your database and find the Export tab. For now, the Quick export Method will do; the export format you want is SQL:
For WAMP users, when you press Go your browser will download a .sql file, which you can open in a code editor to see the SQL code.
For MAMP users, upon hitting Go, the SQL code will just show up on the next page.
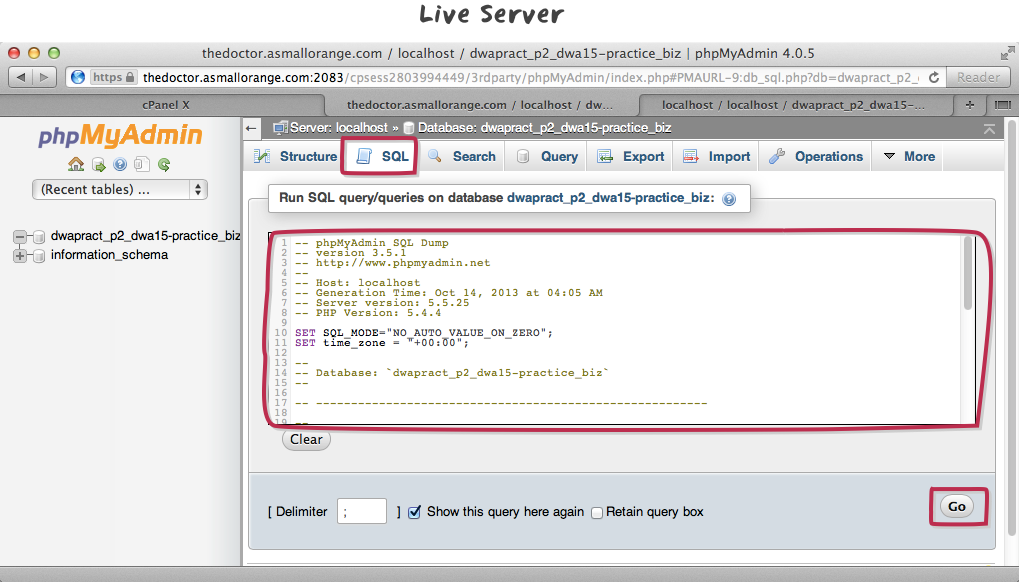
Regardless of how it outputs, you're looking to copy a bunch of SQL code that looks similar to this:
-- phpMyAdmin SQL Dump
-- version 3.5.1
-- http://www.phpmyadmin.net
--
-- Host: localhost
-- Generation Time: Oct 15, 2012 at 01:56 AM
-- Server version: 5.5.25
-- PHP Version: 5.4.4

SET SQL_MODE="NO_AUTO_VALUE_ON_ZERO";
SET time_zone = "+00:00";

--
-- Database: `p2_dwa15-practice_biz`
-- --------------------------------------------------------
-- Table structure for table `posts`
--

CREATE TABLE `posts` (
  `post_id` int(11) NOT NULL AUTO_INCREMENT,
  `created` int(11) NOT NULL,
  `modified` int(11) NOT NULL,
  `user_id` int(11) NOT NULL,
  `content` text NOT NULL,
  PRIMARY KEY (`post_id`),
  KEY `user_id` (`user_id`)
) ENGINE=InnoDB  DEFAULT CHARSET=utf8 AUTO_INCREMENT=91 ;

[...etc...]
Note, if your generated SQL code includes commands for creating the actual database, in addition to the tables, you'll likely need to delete these lines.
Example:
CREATE DATABASE IF NOT EXISTS `p2_dwa15-practice_biz` DEFAULT CHARACTER SET utf8 COLLATE
The reason is because on most shared servers the user you use to login to phpMyAdmin does not actually have priveledges to create databases. Alternatively, databases have to be created from cPanel (as outlined above); attempts to create databases from phpMyAdmin directly may result in an Access Denied error.
With your SQL code ready to go, copy it and paste it into the SQL tab on your Live phpMyAdmin:
Just as you edited your local environment.php file to connect to the local database, you now need to edit the live environment.php file.
Don't forget, to make any edits to your live environment.php file, it has to be via FTP or a Command Line editor. Because you don't keep the environment.php file in the Git repo, it can't be edited via the local->git->live workflow.
Live /public_html/dwa/environment.php:
# Always connect to live database
define('DB_HOST', 'localhost');
define('DB_USER', 'dwapract_p2');
define('DB_PASS', 'topsecret');
Most often, the DB_HOST should be localhost, but if that doesn't work, you may have to dig around your host settings or contact your provider to see if it's something different.
Make sure you've deployed your latest changes, then test all the user's features you built:
- http://p2.yourdomain.com/users/signup
- http://p2.yourdomain.com/users/login
- http://p2.yourdomain.com/users/logout
- http://p2.yourdomain.com/users/profile
Because your live server is marked as IN_PRODUCTION, any problems related to MySQL, whether it be a bad query or a bad connection, will display a generic error message rather than the actual MySQL error. This is a security measure that prevents users from seeing sensitive information.
The MySQL errors are not completely disregarded though; instead, the framework pipes them all to whatever system email you have set. Given that, make sure SYSTEM_EMAIL is filled out in /app/config/config.php.
define('SYSTEM_EMAIL', '[email protected]');
