- File / New / Configure Azure Active Directory in a new project.
- Show the GeekQuiz solution with Azure Active Directory Authentication.
- Deploy and show portal configuration.
In this demo, you will see how to:
- Create an application in Visual Studio that is automatically integrated with an Azure Active Directory tenant.
- Deploy an existing application using Visual Studio to an Azure Web App and have it automatically integrate with an Azure Active Directory tenant.
Follow these steps to setup your environment for the demo.
-
Create a new Azure Active Directory tenant.
-
Create a new Web App in Azure.
-
Configure an Azure SQL Database following the steps provided in this link. Copy the ADO.NET connection string value.
-
In the Application settings of your new Web App, update the connection string key for the DB to DefaultConnection and value copied from previous step. Save the changes.
Default connection
-
Download the publish profile. This is required for segment #2.
Important: At the time of writing, you can only create one AD per subscription and it cannot be deleted.
-
Open Visual Studio 2015.
This demo is composed of the following segments:
-
Open the File / New / Project dialog and select the Visual C# / Web templates.
-
Select the ASP.NET Web Application template, name the application GeekQuiz and click OK.
Creating a new project
-
Select the Web Application template under ASP.NET 5 Templates.
-
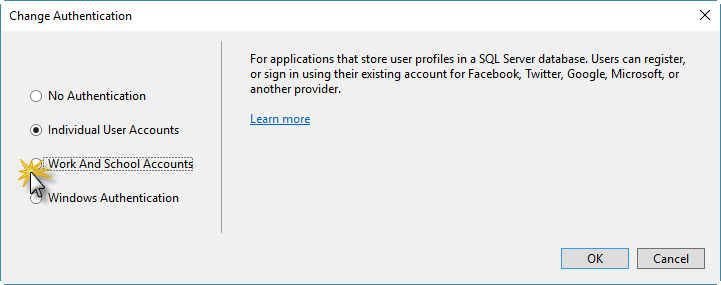
Click Change Authentication.
Updating the authentication method
Speaking Point: VS tooling allows you to enable AAD authentication easily. All you need is to provide your tenant domain name and administrator credentials, the two-way trust between your AAD tenant and your web application is automatically configured.
-
In the Change Authentication dialog box, select Work And School Accounts.
Selecting Work And School Accounts
-
Expand the first combo box to show the different options.
Showing the organization account types
-
Enter your domain (e.g.: "mydomainname.onmicrosoft.com") as Domain.
Setting the domain name
-
Click the button with the chevron to see more options.
Showing more options
-
Click OK to continue.
Completing the authentication update
-
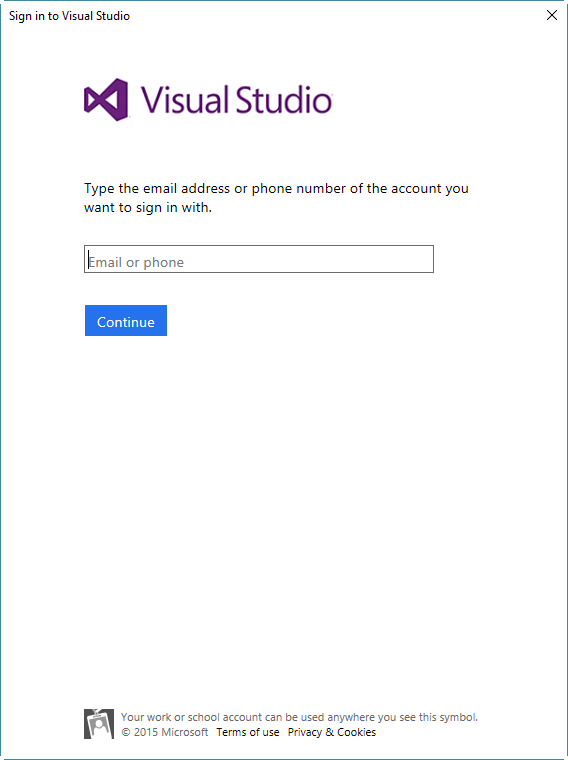
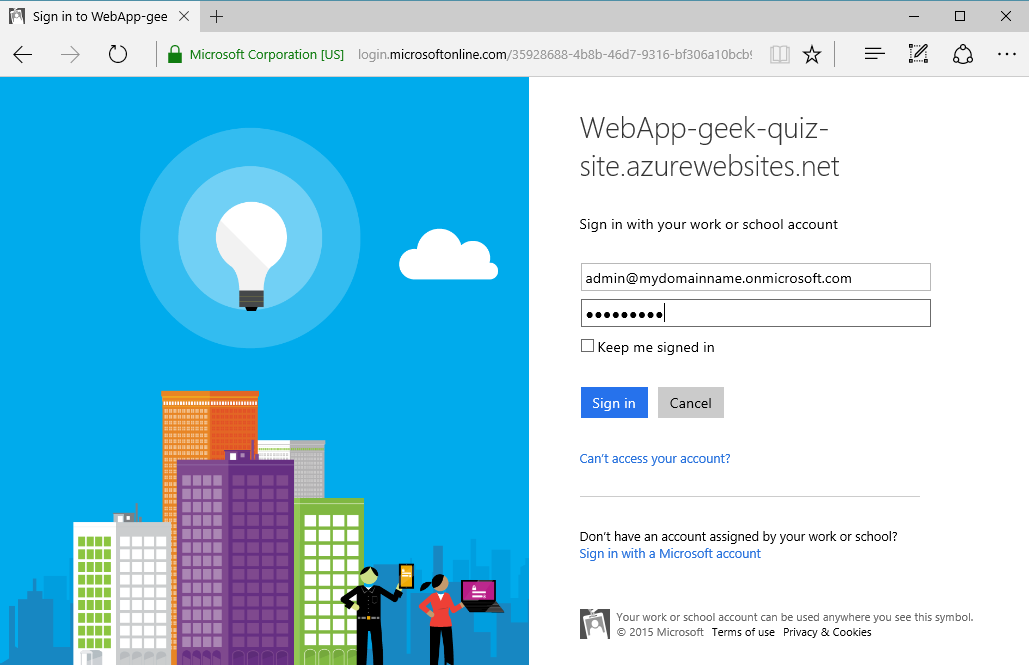
Sign in using an admin account for your organization (e.g.: "[email protected]")
Signing in with an organization admin account
-
Back in the New ASP.Net Project dialog box, click OK.
Completing the project creation
Speaking Point: VS tooling configures two-way trust relationship between your app and your AAD tenant. Your app is registered as a Relying Party in the tenant; and the tenant is configured as an Identity Provider for the app.
-
Press CTRL+F5 to run the web site.
-
If a certificate error is displayed, click Continue to this website.
-
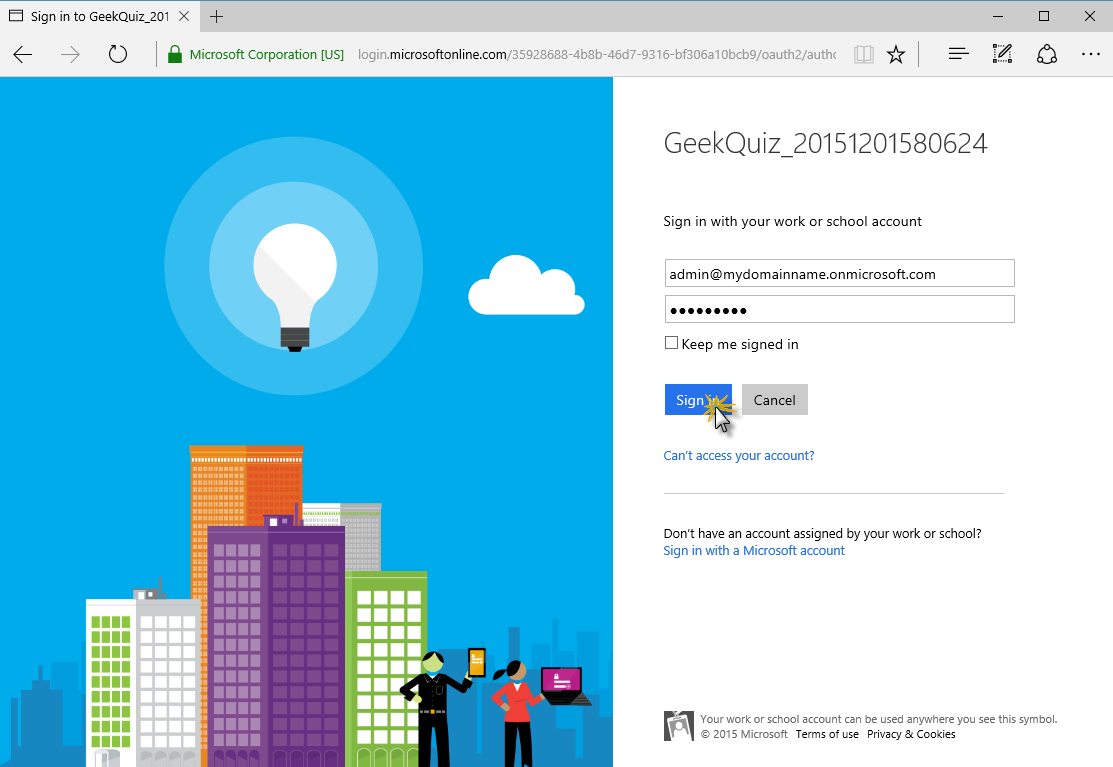
Sign in using a user account for your organization (e.g.: "[email protected]")
Signing in using one of the organization's user account
-
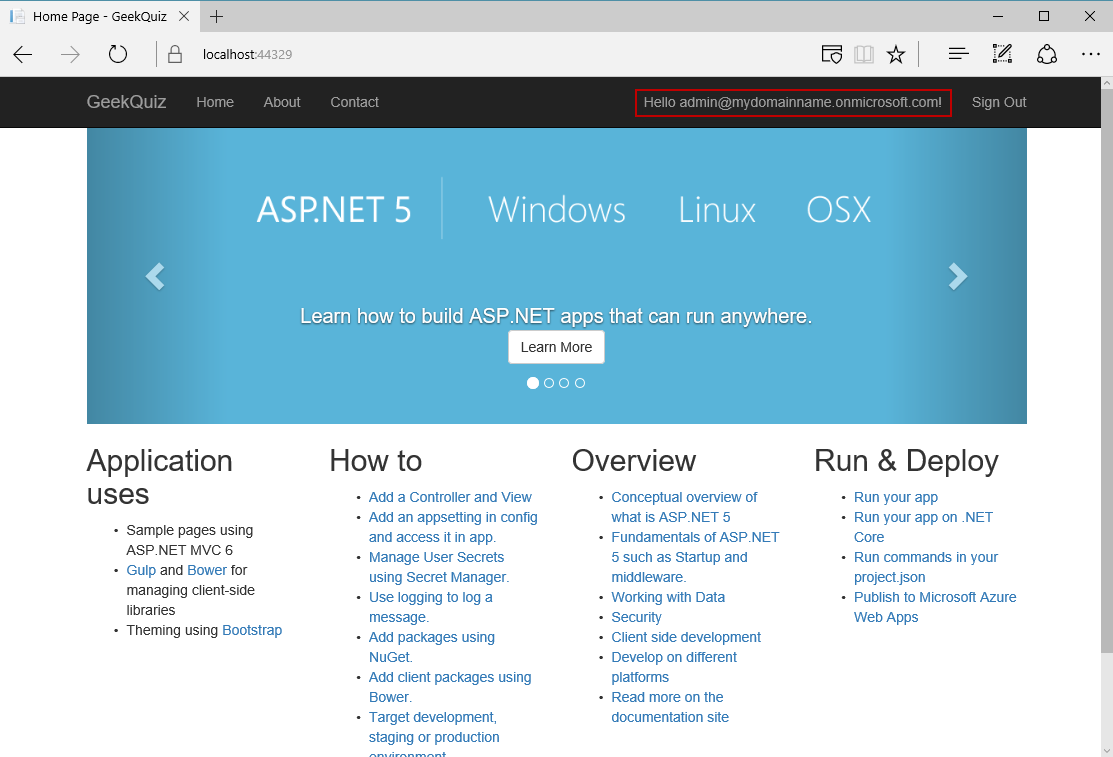
Show that you are logged as the organization's user.
Showing that you are logged as the organization's user
-
Close the browser.
-
Open the GeekQuiz.sln solution located under source\end-segment2.
-
Right-click the GeekQuiz project and select Publish.
Publishing the Website
-
In the Publish Web dialog box, click Import.
Importing the publish profile
-
In the Import Publish Settings dialog, click Browse... to select the previously downloaded publish profile file and click OK.
Selecting the publish profile file
-
Back in the Publish Web dialog, click Publish.
Reviewing the connection settings to deploy
Note: If Visual Studio prompt you with the Sign in dialog box, just sign in using an admin account for your organization (e.g.: "[email protected]")
Signing in with an organization admin account
-
Once the deployment is completed and the browser is opened, sign in using an admin account for your organization (e.g.: "[email protected]")
Signing in with an organization admin account
-
In the Authorization page, click Accept.
Accepting the application permissions
-
Show that you are logged as the organization's user.
Showing that you are logged as the organization's user
-
Switch to the Azure Classic Portal.
-
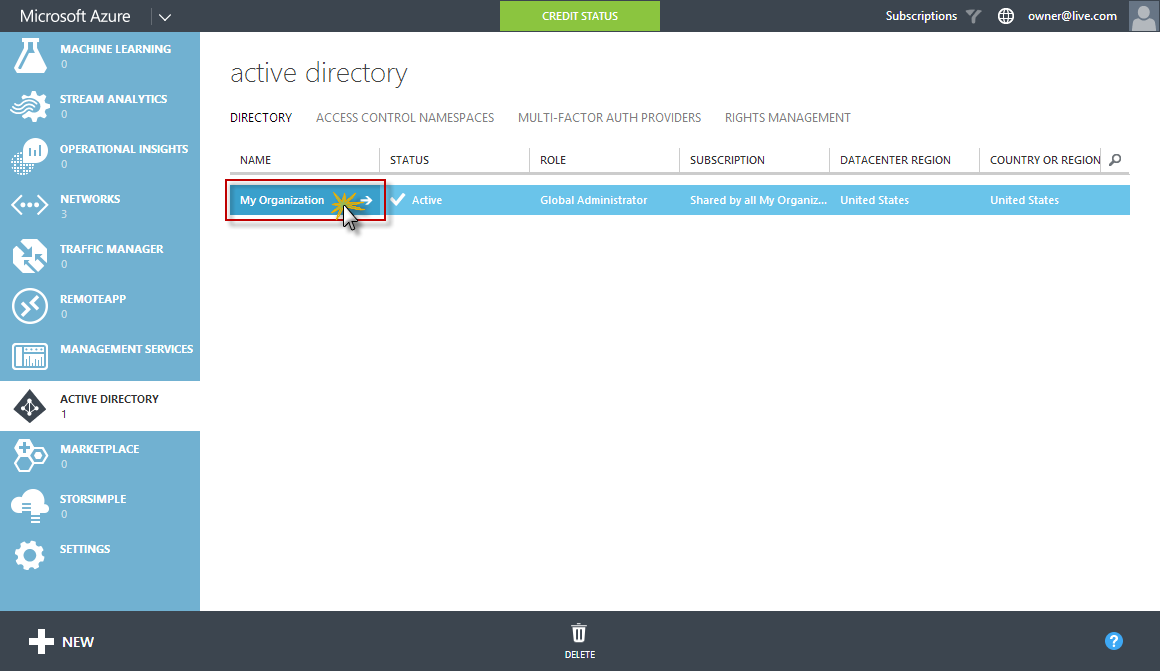
Navigate to the Active Directory section and select the one used for this demo.
Selecting your active directory
-
Navigate to the USERS tab and show the users that you used for the demo.
Showing the organization's users
-
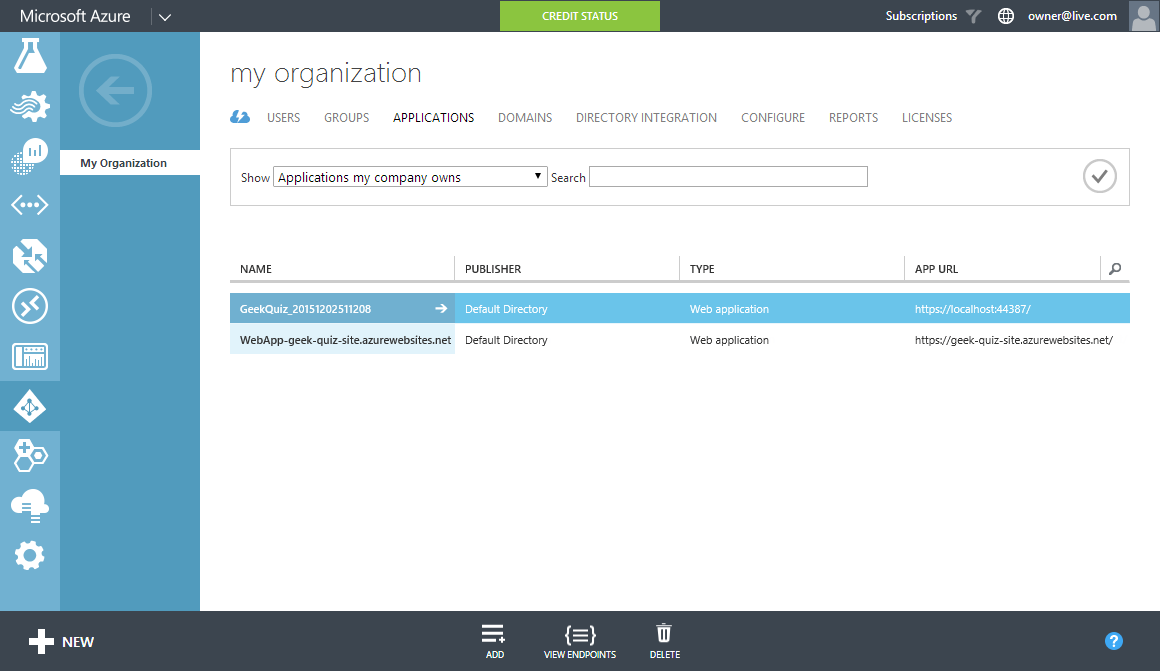
Navigate to the APPLICATIONS tab and filter them by Application that my company owns to show the new two applications, which were automatically created.
Showing the organization's applications
By completing this demo you learned how to integrate your website with an existing Azure Active Directory tenant.


