-
Notifications
You must be signed in to change notification settings - Fork 22
Spriting with Aseprite
Aseprite is one of the best tools available for making pixel art and animations. More importantly, it's one of the few modern programs which can save files with the palette that CC requires. It has lots of features (don't worry, nothing crazy like Photoshop or GIMP), but you'll only need to know a few basics to start working on Cortex Command graphics.

You can buy it from Itch.io, Humble Bundle, or Steam, or from the Aseprite website (which includes a Steam key). It's also on Github if you'd like to compile it yourself.
All hotkeys in this tutorial are the defaults; they be changed in Edit > Keyboard Shortcuts (Ctrl-Alt-Shift-K).
First, you'll need a copy of the game's palette. Download this file and extract it to Aseprite/data/palettes/: Cortex Command Palette for Aseprite.zip
You may also want to check Edit -> Preferences to configure things to your liking. Lots of settings in there, such as changing your background colors:

Editing an existing sprite is easy since they already use the right palette. Most sprites have a transparent background which the game represents with color #0 (magenta). For sake of convenience (and less eye strain), you can work with real transparency in Aseprite and put the magenta back when exporting. Start by hitting TAB to bring up the Timeline (the layers/frames panel, at the bottom by default), right-click the layer that says Background and click Layer from Background. Now you can use the erase tool, layers, etc. like you'd expect in a normal graphics application.

Aseprite has a few handy tools that you may find useful for editing sprites:
-
Edit > Replace color(Shift+R) replaces every pixel of a given color with another color. It can be used on multiple layers/frames at the same time by selecting them in the Timeline. -
Edit > Adjustments > Hue/SaturationandColor Curve(Ctrl+UandCtrl+M) can be used to adjust the color of all pixels at once. If you don't want the entire image adjusted, you can select the area you want (with the Rectangular Marquee Tool, etc.) and pixels outside the selection will be unchanged.
One thing I find convenient is leaving a copy of the original sprite as a layer (you can click the tiny lock icon next to a layer's name to prevent any accidental changes) and putting my new pixels in a new layer. Shift-N is the hotkey to add a layer (Alt-Shift-N for a new layer group), or you can right-click on a layer in the Timeline and Duplicate it.
See Export Checklist below when you're ready to save your edited sprite.
-
File -> New(Ctrl-N) New images can have whatever settings, since size / color mode / etc. can all be changed later. (I'd recommend giving yourself way more room then you think you'll need and cropping when you're done.) - Double-click the
_CortexCommandpalette (make sure you downloaded/extracted it, see#Setupabove).

- Switch to indexed color with
Sprite > Color Mode > Indexedif it isn't already. This tells Aseprite to ONLY use colors that are in the palette. (Ie., this sets the image to 8-bit color mode)

- You can press
TABto bring up the Timeline andShift-Nto add new layers, or right-click on a layer for more options.
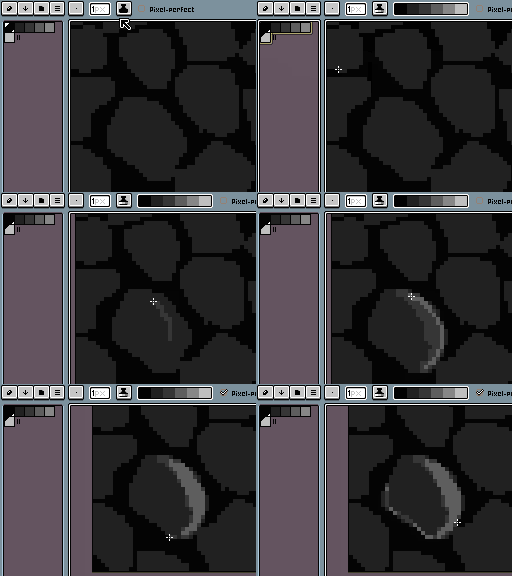
Aseprite has a convenient tool for automatically adding outlines, Edit > FX > Outline (Ctrl+O). This can work across multiple layers/frames if selected in the Timeline. Note that CC's graphic style uses shaded outlines instead of a flat color. If you're having trouble matching CC's shading style, here's a style guide:

See Export Checklist below when you're ready to save your edited sprite.

TAB, left and right arrows Enter, preview window F3
- Save the original as .aseprite to preserve your layers and other fancy stuff.
-
Make sure you're still using original
_CortexCommandpalette (just load it again if you're not 100% sure). -
Make sure the image is still using Indexed color (
Sprite > Color Mode > Indexed). -
Make sure you have a magenta background layer (If not: right-click color 0 (magenta) in the palette, press
Shift-Nto make a new layer, right-click the new layer in the Timeline and chooseBackground from Layer. It should be get filled with magenta and moved to the bottom) - Make sure magenta background layer is visible (the little eye icon left of the layer's name toggles visibility; you can hide it again after exporting).
- Put the sprite back to its normal orientation if you've been editing it rotated/flipped around.
-
File > Export(Ctrl-Alt-Shift-S) as.png. The default settings (100%, Visible layers, All frames, Forward) are correct in 99% of cases, otherwise you're probably doing something very strange. -
If your sprite is animated, name it something like
"MyThing000.png". (The "000" at the end tells Aseprite to name your frames as MyThing000.png, MyThing001.png, etc. the way Cortex Command needs them, saving you from having to do any manual/bulk renaming).