LIS3MDL Magnetometer Sensor Driver for STM32L0538-Disco Board, with On-Board LEDs indicating North.
The project follows standard files structure generated by STM32CubeIDE. All application files are located within the 'Src' and 'Inc' subdirectories of the core directory.
Datasheets used for working with LIS3MDL sensor: LIS3MDL documentation Datasheets for STM32L0538-Disco board: STM32L0538-Disco documentation
Pinout configuration for this project:
PB5 - used for external interrupt from LIS3MDL DRDY pin PB4 and PA5 - On-Board LEDs for indicating the North PA13 and PA14 - pins used for Serial Wire Debug I/O and Serial Wire Clock PB12-15 - pins used for Serial Peripheral Interface (SPI) PA9 and PA10 - pins used for Universal Asynchronous Receiver/Transmitter (UART)
Calibration of the LIS3MDL sensor is crucial to ensure accurate and reliable measurement data, as it compensates for manufacturing variations and environmental factors, guaranteeing more precise orientation and positioning information.
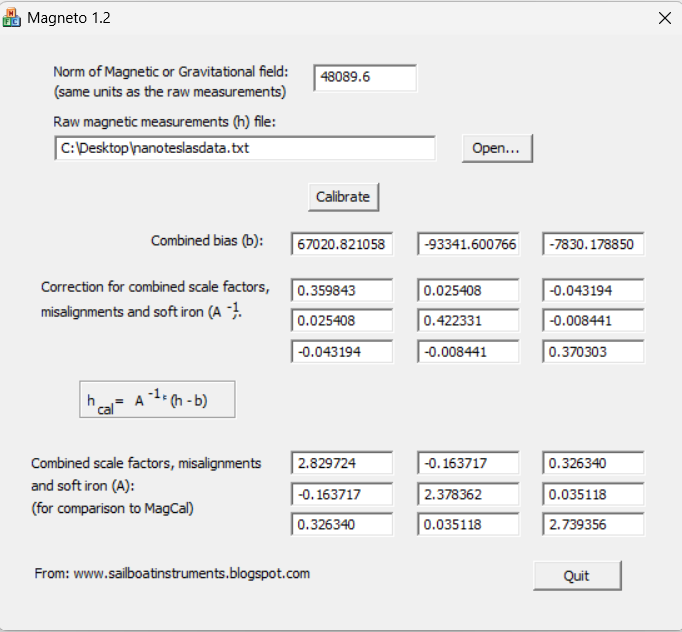
Magneto1.2 tool is used for finding offsets and soft-iron callibration values.
To get norms of magnetic or gravitational fields visit NOAA website.
Since measurement data and norms of magnetic or gravitational fields have to be in the same units, raw data is converted to nanoteslas before being used.
Here is a simple Python script for conversion:
input_file = "raw_data.txt"
output_file = "nanoteslasdata.txt"

X_factor = 100000.0 / 1100.0
Y_factor = 100000.0 / 1100.0
Z_factor = 100000.0 / 980.0

with open(input_file, "r") as file:
    lines = file.readlines()

with open(output_file, "w") as file:
    for line in lines:
        X, Y, Z = map(int, line.split())

        Xm_nanoTesla = X * X_factor
        Ym_nanoTesla = Y * Y_factor
        Zm_nanoTesla = Z * Z_factor

        file.write(f"{Xm_nanoTesla} {Ym_nanoTesla} {Zm_nanoTesla}\n")
Using Magneto1.2 application, these constants are obtained:
//Bias from magneto1.2 application
#define BIAS_X 67020.821058
#define BIAS_Y -93341.600766
#define BIAS_Z -7830.178850
#define MAG_DECLINATION 5  //Magnetic declination in Czech Republic

//Soft iron callibration data from magneto1.2
const float SOFT_IRON_MATRIX_X[] = {0.359843, 0.025408, -0.043194};
const float SOFT_IRON_MATRIX_Y[] = {0.025408, 0.422331, -0.008441};
const float SOFT_IRON_MATRIX_Z[] = {-0.043194, -0.008441, 0.370303};
Your specific Magnetic Declination can be acquired from here.
This driver can be used in both blocking and non-blocking modes.
In the blocking mode, polling method is used, continuously reading data from the status register (STATUS_REG) and monitoring for changes in data.
In non-blocking mode, an external interrupt signal is utilized from the LIS3MDL sensor DRDY pin. This pin sends an interrupt signal every time new data is available. Therefore, calculations only execute in response to the interrupt, allowing the processor to work on other tasks.
The application continuously sends heading data via the UART interface. You can also send configuration details back via the same UART.
The configuration consists of 4 symbols, in the form of "{Powermode}{Temp}{Blocking mode}"
Possible configurations:
- LP: Low power
- MP: Medium performance
- HP: High performance
- UH: Ultra high performance
- T: Temperature on
- F: Temperature off
- B: Blocking mode
- N: Non-blocking mode
An example of configuration: "LPFB" - Low power mode with temperature sensor off and blocking mode on.
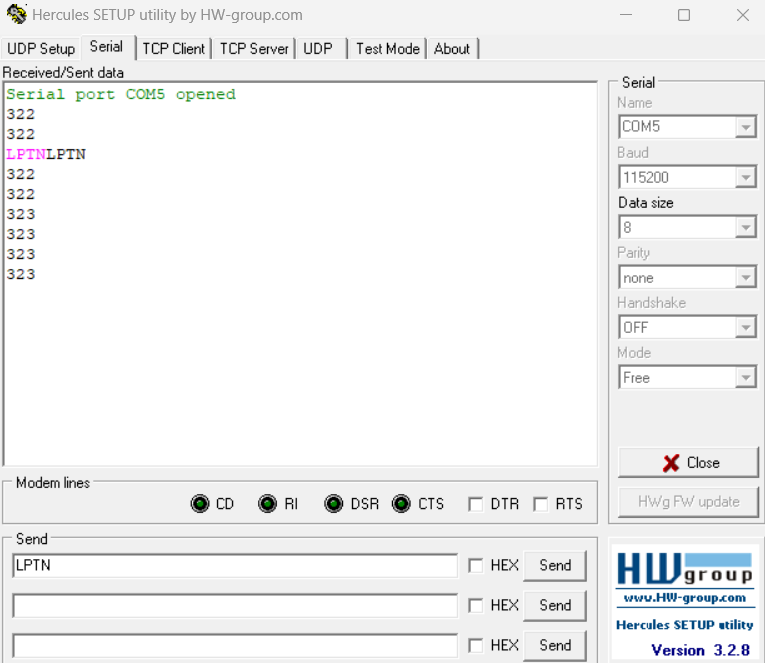
We send the command via UART, and if we receive the same command back, it confirms successful configuration. However, if we receive 'UHTN', which represents the default configuration, it indicates that the command was incorrect, and the application reverts to the default configuration.
Here, we simply send LPTN symbols via UART and receive back the same LPTN, indicating successful configuration setting. This means the configurations are now set, and the sensor will operate with these settings until powered off, then comeback to default configurations.


