It is recommended to run FMTM on a Linux-based machine.
This includes MacOS, but some tools must be substituted.
For Windows users, the easiest option is to use Windows Subsystem for Linux
Before you can install and use this application, you will need to have the following software installed and configured on your system:
If running Debian/Ubuntu, the install script below does this for you.
Git to clone the FMTM repository.
Docker to run FMTM inside containers.
Docker Compose for easy orchestration of the FMTM services.
This is Docker Compose V2, the official Docker CLI plugin.
i.e.
docker composecommands, notdocker-compose(the old tool).
On a Linux-based machine with bash installed, run the script:
Note: it is best to run this script as a user other than root.
However, if you run as root, a user svcfmtm will be created for you.
# Option A) If you already cloned the repo
bash src/frontend/public/install.sh

# Option B) Download the script & run
curl -L https://get.fmtm.dev -o install.sh
bash install.sh
# Alternative URL: https://fmtm.hotosm.org/install.sh

# Then follow the promptsIf more details are required, check out the dev docs
- Clone the FMTM repository
- Development: Setup Your Local Environment
- Start the API with Docker
- Setup ODK Central User (Optional)
- Import Test Data (Optional)
- Check Authentication (Optional)
Clone the repository to your local machine using the following command:
git clone https://github.com/hotosm/fmtm.git

# If you wish to deploy for production, change to the main branch
git checkout mainThese steps are essential to run and test your code!
The FMTM uses OAUTH2 with OSM to authenticate users.
To properly configure your FMTM project, you will need to create keys for OSM.
-
Login to OSM (If you do not have an account yet, click the signup button at the top navigation bar to create one). Click the drop down arrow on the top right of the navigation bar and select My Settings.
-
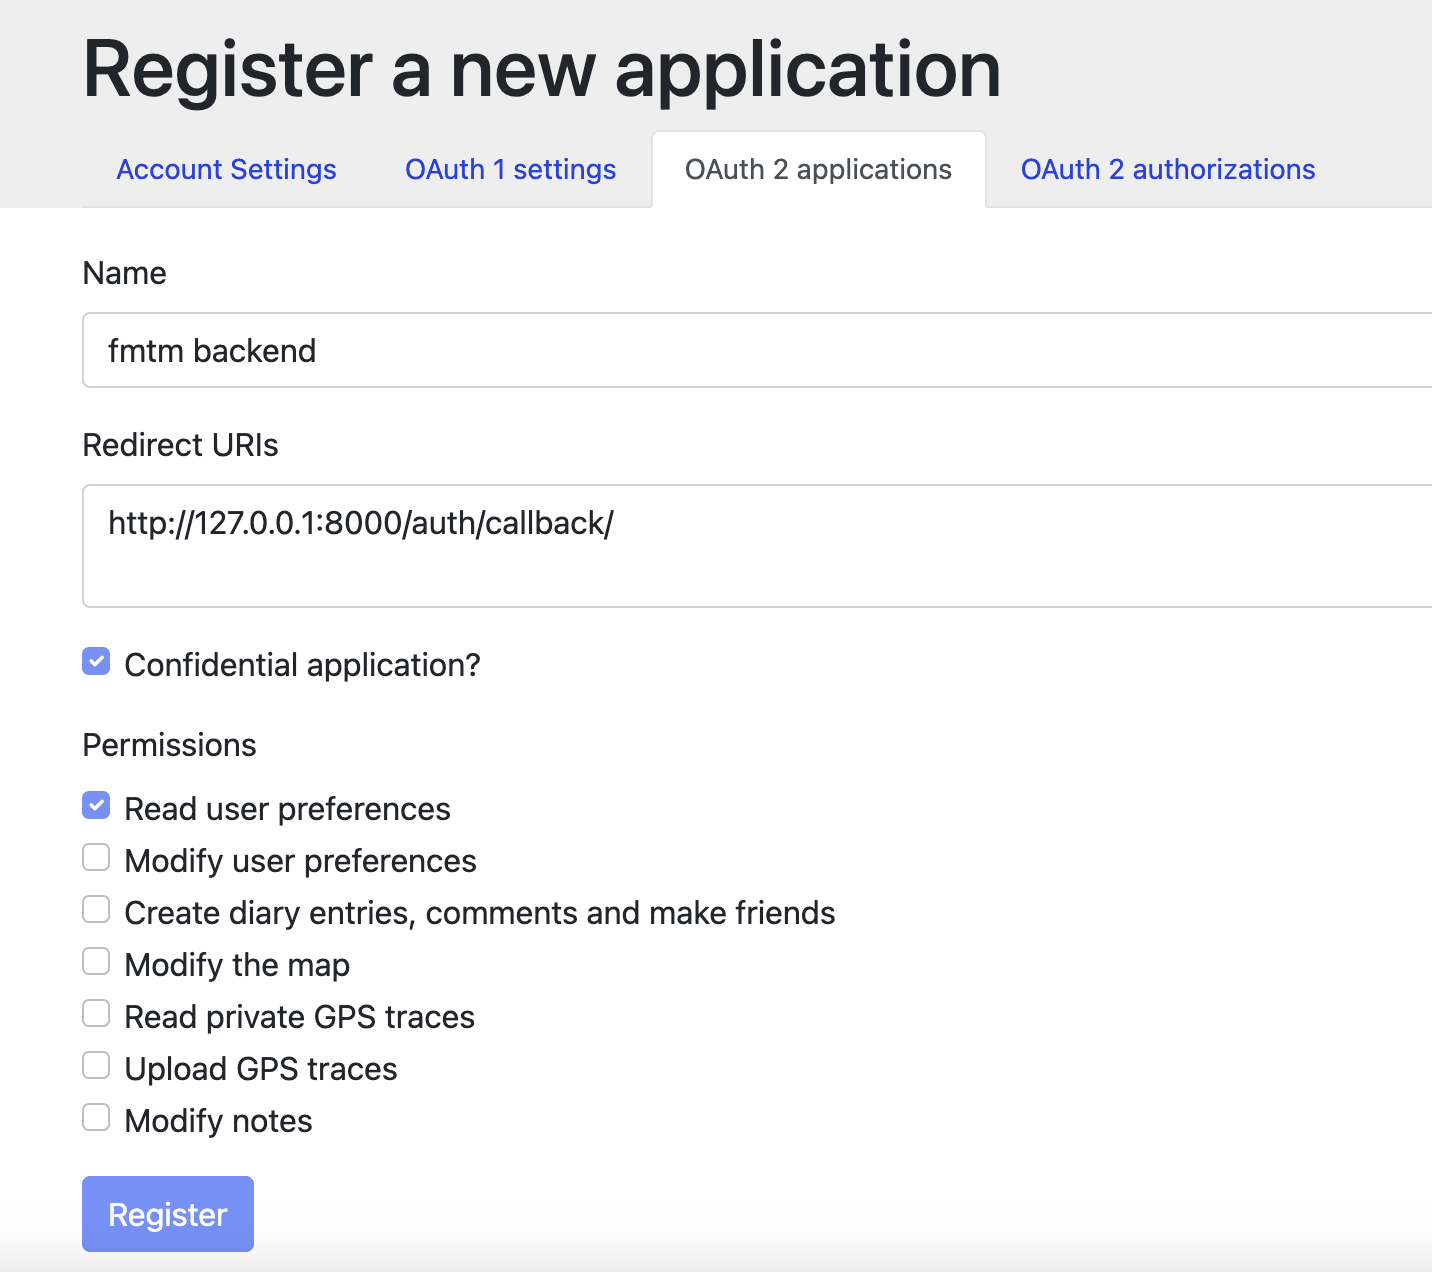
Register your FMTM instance to OAuth 2 applications. Put your login redirect url as
http://127.0.0.1:7051/osmauth/if running locally, or for production replace with https://{YOUR_DOMAIN}/osmauth/Note:
127.0.0.1is required for debugging instead oflocalhostdue to OSM restrictions. -
Only the read user preferences permission is required as of now.
-
Now save your Client ID and Client Secret for the next step.
Environmental variables are used throughout this project.
To get started, create .env file in the top level dir,
a sample is located at .env.example.
This can be created interactively by running:
bash scripts/gen-env.shNote: If extra cors origins are required for testing, the variable
EXTRA_CORS_ORIGINSis a set of comma separated strings, e.g.: http://fmtm.localhost:7050,http://some.other.domain
This is the easiest way to get started with FMTM.
Docker runs each service inside containers, fully isolated from your host operating system.
Determine the what type of FMTM install you would like:
main - the latest production
staging - the latest staging
development - the latest development (warning: may be unstable)
local test - used during development, or to start a test version
The corresponding docker-compose files are:
main - docker-compose.main.yml
staging - docker-compose.staging.yml
development - docker-compose.development.yml
local test - docker-compose.yml
Set your selection to a terminal variable to make the next step easier:
export GIT_BRANCH={your_selection}

# E.g.
export GIT_BRANCH=developmentdocker compose -f "docker-compose.${GIT_BRANCH}.yml" pullThis will pull the latest containers for the branch you selected.
Before we can run, you need to build your version of the frontend.
This is because the frontend contains variable specific to your deployment.
docker compose -f "docker-compose.${GIT_BRANCH}.yml" build uidocker compose -f "docker-compose.${GIT_BRANCH}.yml" up -dYou should see the containers start up in order.
Once complete, you should now be able to navigate to the project in your browser:
https://{YOUR_DOMAIN}

# For the local test setup, this will be
http://fmtm.localhost:7050
Note: If those link doesn't work, check the logs with
docker logs fmtm-api.Note: Use
docker psto view all container names.
The FMTM uses ODK Central to store ODK data.
- By default, the docker setup includes a Central server.
- The credentials should have been provided in your
.envfile to automatically create a user. - To create a user manually:
docker compose exec central odk-cmd --email [email protected] user-create
docker-compose exec central odk-cmd --email [email protected] user-promote
Note: Alternatively, you may use an external Central server and user.
If running a local test version, test data is available to get started quickly.
- Navigate to the
import-test-dataendpoint in the API docs page:
http://api.fmtm.localhost:7050/docs#/debug/import_test_data_debug_import_test_data_get
- Click
Try it out, thenexecute.
Once you have deployed, you will need to check that you can properly authenticate.
-
Navigate to your frontend (e.g.
http://fmtm.localhost:7050) -
Click the 'Sign In' button and follow the popup prompts.
-
If successful, you should see your username in the header.
-
If you see an error instead, double check your credentials and redirect URL in the openstreetmap.org settings.
That's it, you have successfully set up FMTM!!
Windows Subsystem for Linux (WSL) can be used to run Docker.
This will run a Linux machine inside Windows very efficiently.
To install follow the official instructions.
Then continue with the FMTM installation.
Colima is recommended
to run docker and docker compose commands.
Install colima, docker, docker compose using brew:
brew install colima
brew install docker docker-compose
Then configure the docker compose plugin to work on MacOS:
mkdir -p ~/.docker/cli-plugins

ln -sfn $(brew --prefix)/opt/docker-compose/bin/docker-compose ~/.docker/cli-plugins/docker-compose
Run Colima:
colima startThen continue with the FMTM installation.
Note: only tagged backend images are multi-architecture, supporting MacOS. The regular images for fast continuous deployment are not:
backend:development,backend:staging,backend:main.
While in theory FMTM should run using Docker-Desktop, it has not been tested.
The authors opinion is that the official Linux Docker Daemon should be installed in WSL or MacOS, instead of using Docker Desktop.
Colima is a wrapper to run the Docker Daemon.
Although Docker Desktop may have a user friendly GUI, it simply runs docker commands inside a Linux virtual machine underneath.
It is often easier and more flexible to do this yourself. Plus it gives you access to all other other tools available in a Linux operating system!
