fwd-edu-breakout=github:climate-action-kits/pxt-fwd-edu/fwd-breakout
sonar=github:climate-action-kits/pxt-fwd-edu
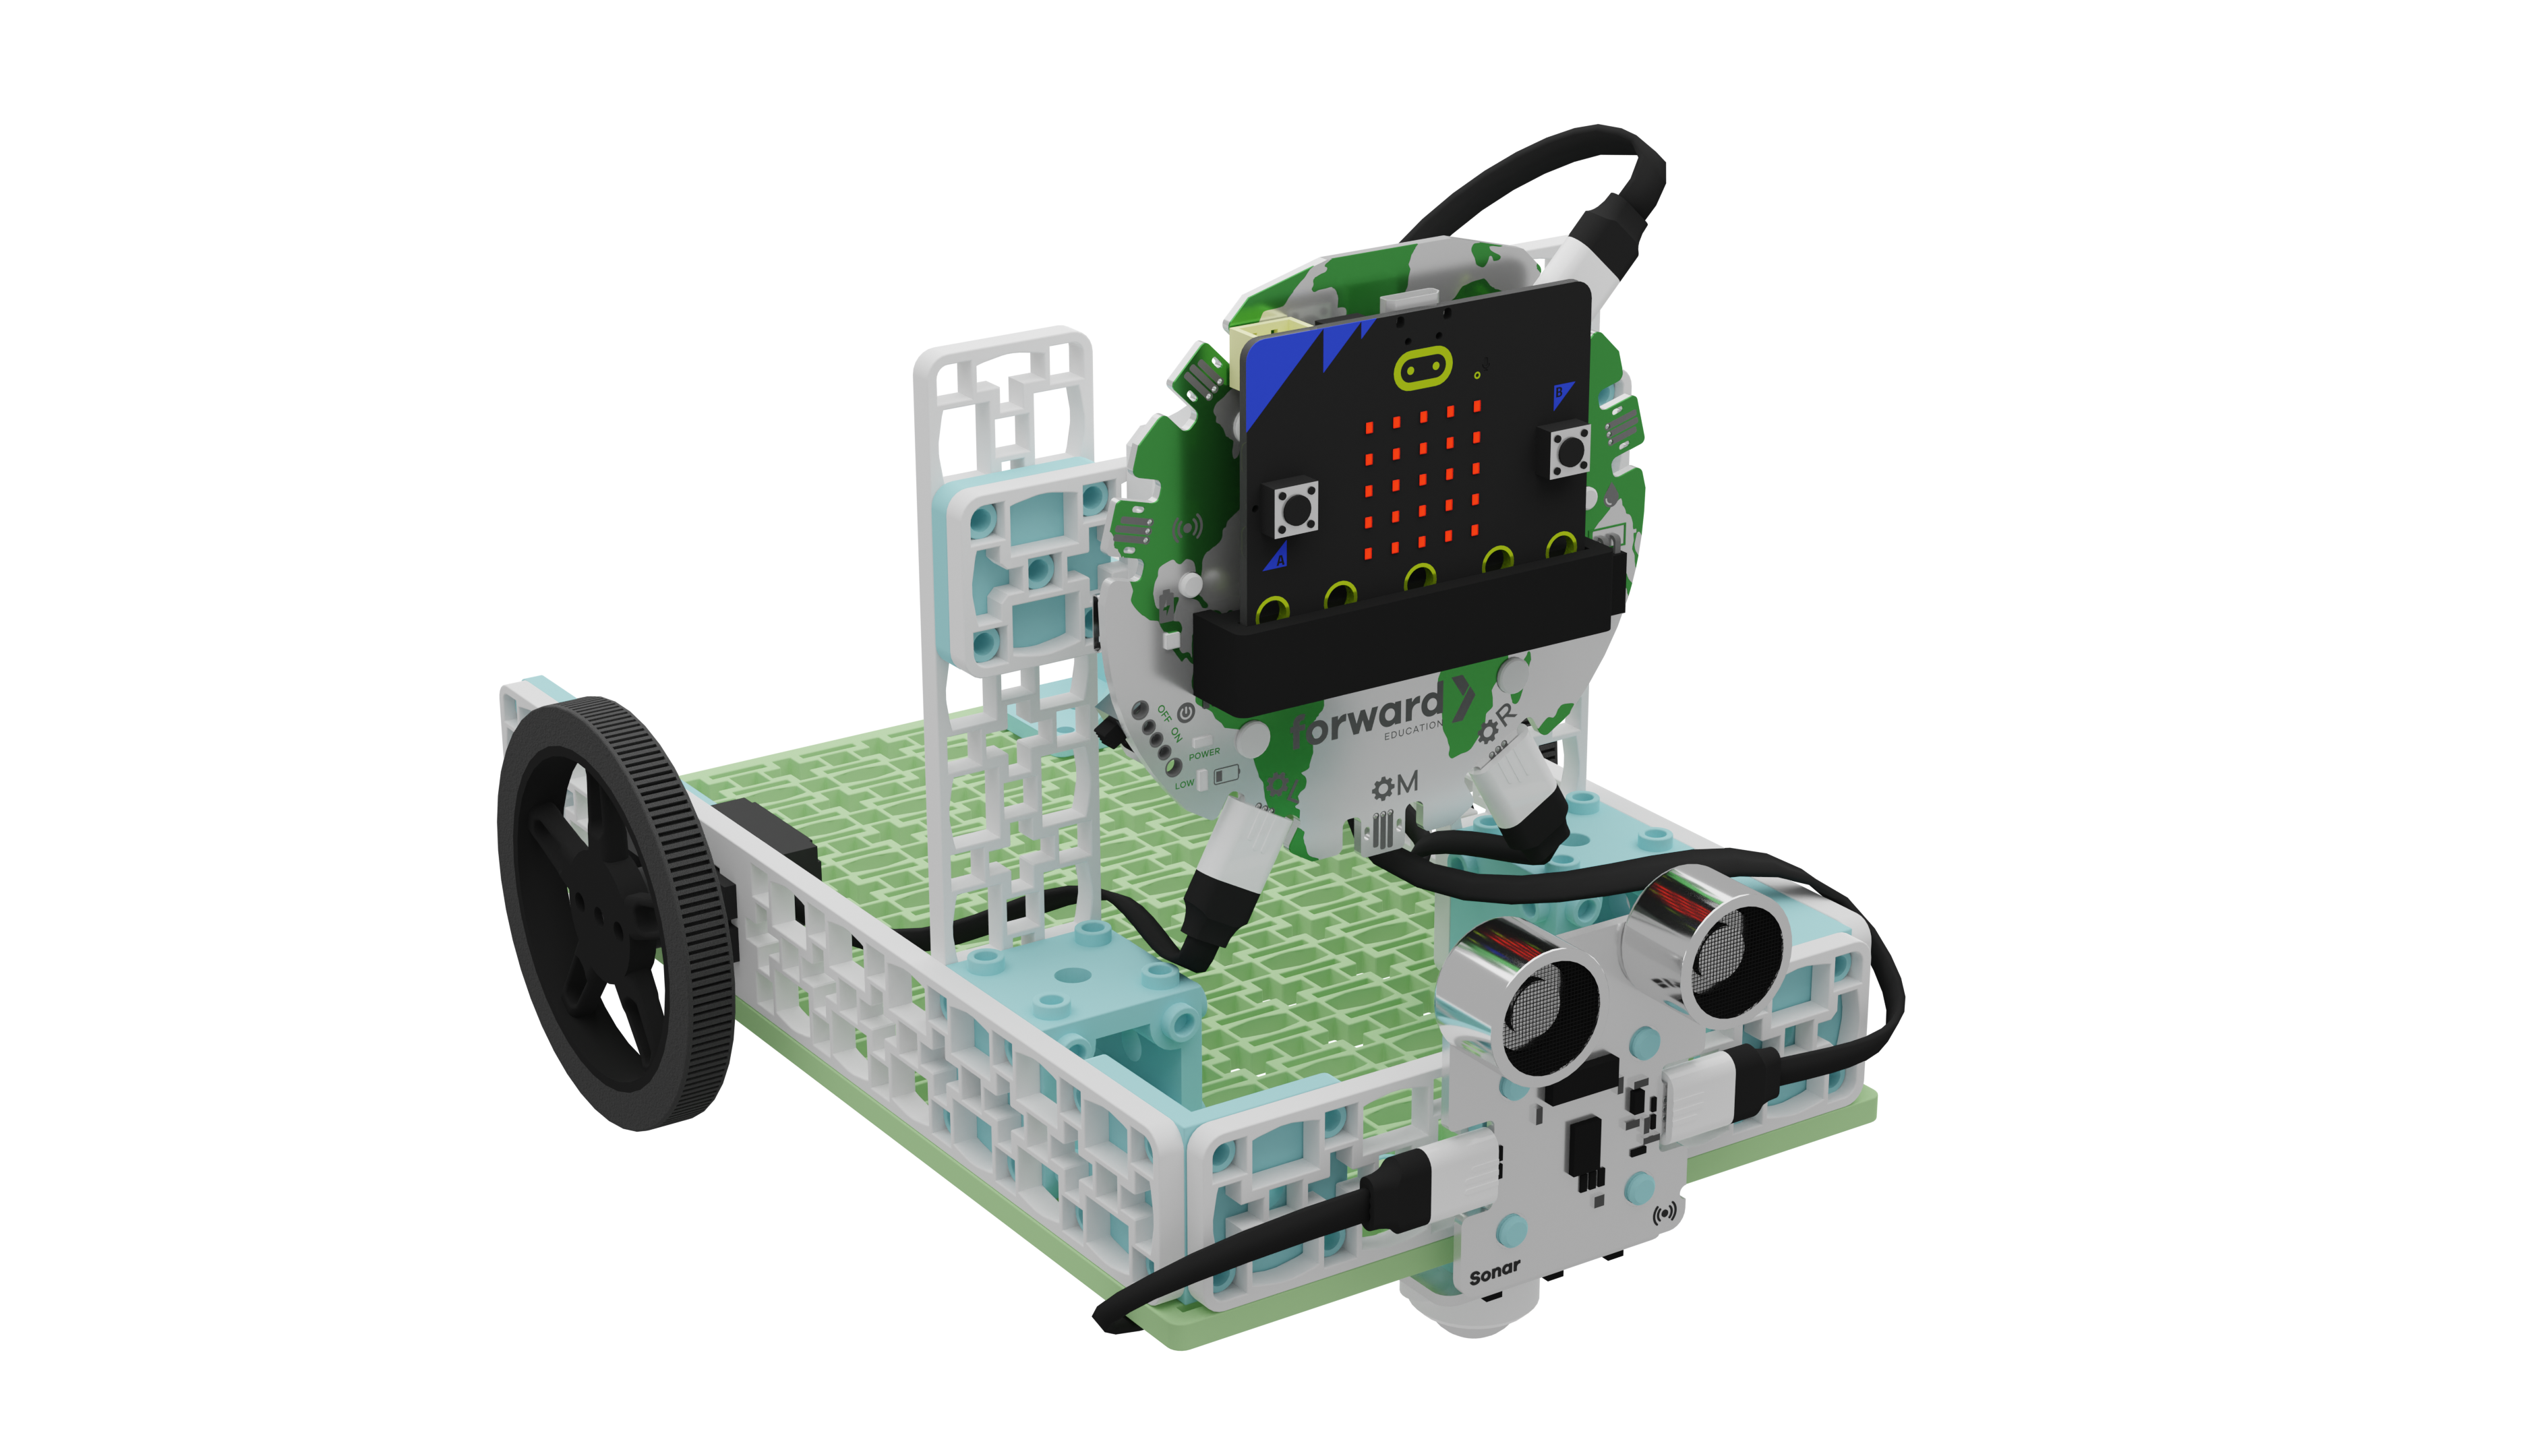
Let's build a wildfire detection vehicle! We are going to do this in 4 parts:
- Build our wildfire detection vehicle
- Add code to make it move
- Modify the code to learn how the vehicle works
- Complete a challenge to improve its function
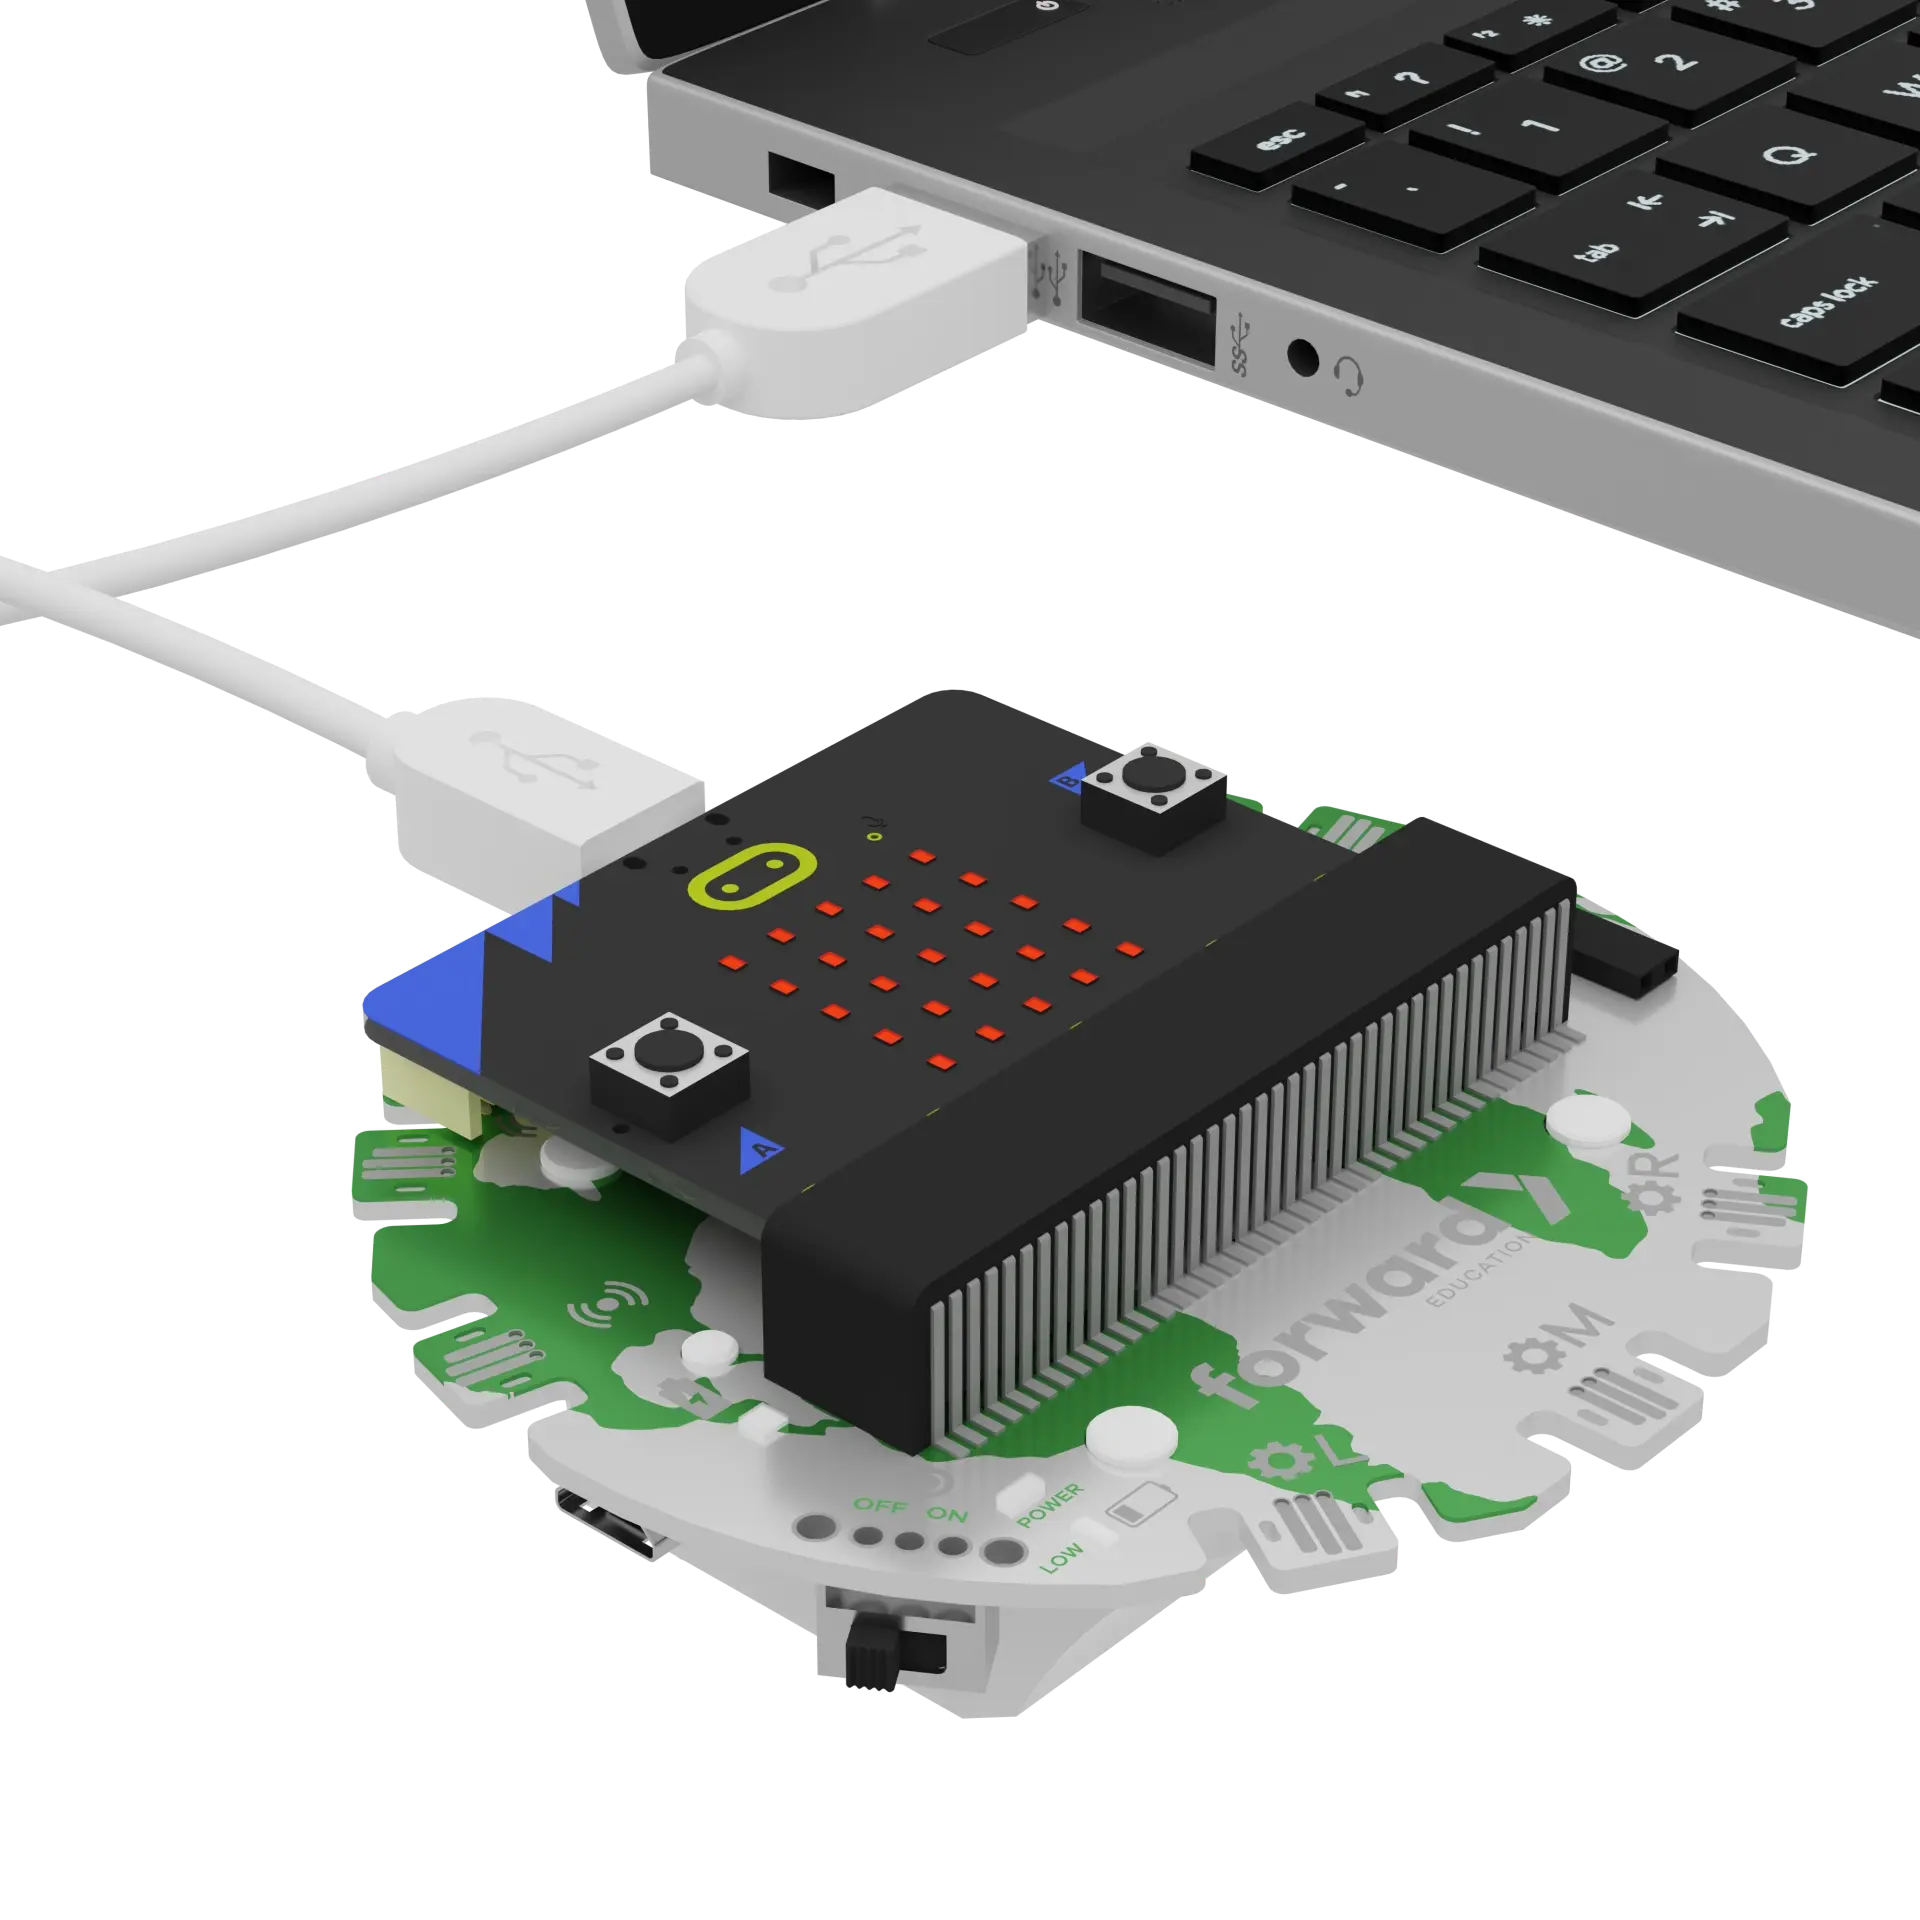
We need to connect our project to the computer to make it come to life with code!
The code will be the instructions that tell our micro:bit what to do.
basic.forever(function () {
    if (isDrivingEnabled) {
        fwdMotors.drive(fwdMotors.DrivingDirection.Forward, 50)
        if (input.lightLevel() > 135) {
            fwdMotors.stop()
            music.playTone(262, music.beat(BeatFraction.Breve))
            fwdMotors.turn(15)
        }
    } else {
        fwdMotors.stop()
    }
})

input.onButtonPressed(Button.A, function () {
    isDrivingEnabled = true
})

input.onButtonPressed(Button.B, function () {
    isDrivingEnabled = false
})

let isDrivingEnabled = false
isDrivingEnabled = false
fwdMotors.setupDriving(
fwdMotors.rightServo,
fwdMotors.leftServo
)
IMPORTANT! Make sure your Climate Action Kit Breakout Board is turned on and your micro:bit is plugged into your computer.
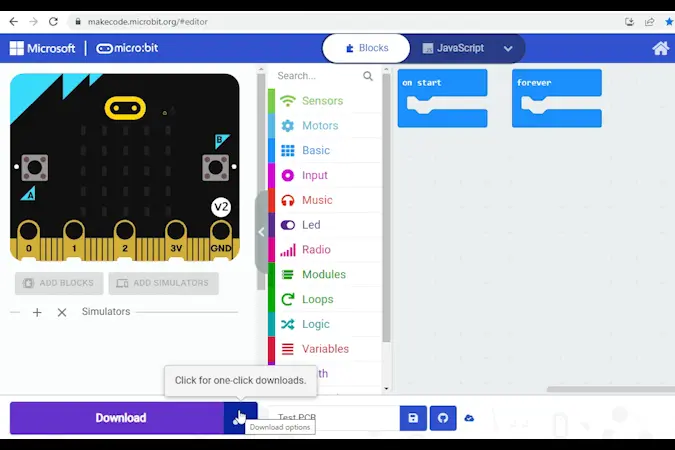
Click the three dots beside the |Download| button, then click on Connect Device. Next, follow the steps to pair your micro:bit.
Next, click the |Download| button to download the starter project.
We are ready to modify our wildfire detection vehicle!
Tips
- Follow the instructions at the top of the screen.
- When you are ready for more information, click 'Tell me more!'
- If you need help with the code, click the lightbulb!
- Don't forget to download and test out any changes you make!
Think about the purpose of a wildfire detection vehicle. What are 5 main tasks it should be able to complete?
~hint Tell me more! Our wildfire detection vehicle should be able to:
- Start (drive!)
- Stop (break!)
- Move through a forest to patrol an area
- Send out an alert if it detects a fire
- Avoid the fire! hint~
Let’s test it out! Unplug the vehicle from your computer and place it on an open floor. Press the A button on the micro:bit to start driving.
To simulate the bright light of a fire, shine a flashlight directly onto the micro:bit’s LEDs. What do you notice? Do this a few times. Then, press B to stop the vehicle and document your findings.
~hint Tell me more! The vehicle:
- Patrols the area using a conditional statement that says “If the
||variables:isDrivingEnabled||variable is||logic:true||, then||fwdMotors:drive forward||." - Sends out a fire alert using another conditional statement that checks if the micro:bit’s light sensor has detected a bright light (above '135'). If it has, the micro:bit makes a beeping noise using the
||music:play tone||block. - Avoids driving into the fire by automatically applying the breaks whenever it detects a bright light using the
||fwdMotors:stop motors||block. The vehicle also||fwdMotors:turns 15 degrees||after sending out the alert. hint~
if (isDrivingEnabled) {
        fwdMotors.drive(fwdMotors.DrivingDirection.Forward, 50)
        if (input.lightLevel() > 135) {
            fwdMotors.stop()
            music.playTone(262, music.beat(BeatFraction.Breve))
            fwdMotors.turn(15)
        }
    }
Right now, the wildfire detection vehicle is patrolling for fire using the micro:bit’s light sensor. If it detects a bright light above ‘135’, it will send out an alert. This is our light threshold.
Try changing the threshold value to something dramatically lower like ‘1’. Retest the vehicle. What happens?
~hint Tell me more!
- Decreasing the light threshold will make it so that the vehicle responds more sensitively to changes in light.
- If you are near a light or window, it will start sending out false alarms based on the background light levels in the room.
- If your aren't near a window, you might notice that your flashlight doesn't need to be as close to the micro:bit to trigger the alert.
- Don't forget to redownload your code. hint~
        if (input.lightLevel() > 1) {
            fwdMotors.stop()
            music.playTone(262, music.beat(BeatFraction.Breve))
            fwdMotors.turn(15)
        }
What might happen if you increased the threshold to '250'? Try it now!
Shine a light onto the micro:bit's LEDs. How does this affect the vehicle's behaviour?
~hint Tell me more!
- Increasing the light threshold makes the vehicle less sensitive to changes in light. It might even miss real fires now.
- You might notice that your vehicle doesn't respond to the flashlight at all anymore.
- Or you might notice that you have to place the flashlight really close to the LEDs to trigger the alert.
- It’s important to choose a threshold that is high enough to avoid false alarms, but reasonable enough to detect real fires.
- Note: The micro:bit’s light sensor only measures up to ‘255’. hint~
        if (input.lightLevel() > 250) {
            fwdMotors.stop()
            music.playTone(262, music.beat(BeatFraction.Breve))
            fwdMotors.turn(15)
        }
Change your threshold back to '135'.
        if (input.lightLevel() > 135) {
            fwdMotors.stop()
            music.playTone(262, music.beat(BeatFraction.Breve))
            fwdMotors.turn(15)
        }
Another way to improve the accuracy of our alarm system is adding another sensor.
If we send out an alert based on light alone, we might be responding inappropriately. For example, what if our vehicle just entered a particularly bright part of the forest? The vehicle might send out an alert even though there is no fire!
Our project has several other sensors that can collect information from its environment: an accelerometer to measure the micro:bit's movement, a temperature sensor, a sonar sensor to measure distance, a line sensor, a compass, a touch sensor, and a microphone sensor to measure sounds.
Which of these would be most appropriate to detect a fire?
~hint Tell me more!
- Fires are bright, noisy, and hot!
- We could use the light sensor, the microphone, and the temperature sensor to determine if there is a fire nearby.
- For safety reasons, we will focus on the light and microphone sensors today, but the temperature sensor would be really practical in real-life! hint~
Let’s add some code that will allow the alert to be triggered by loud noises.
Right click on the ||input:light level|| ||logic:> 135|| expression and select 'Duplicate'. Switch out the ||input:light level|| variable for the ||input: sound level|| variable under ||input:Input||.
~hint Tell me more!
- The block will be hashed. hint~
if (input.soundLevel() > 135) {
}
How might we add this expression into our existing code?
~hint Tell me more! We could:
- add another conditional statement, or
- use something known as a compound conditional statement to combine two expressions.
We'll try out the second option today! hint~
Drag an ||logic:or|| block from the ||logic:Logic|| category into the workspace.
Notice the shape of this block and the shape of the blank spaces. How can we use this block to combine our two expressions into one conditional statement?
~hint Tell me more!
- Add the
||input:light level||||logic:> 135||expression to the left side of this block. - Add the
||input:sound level||||logic:> 135||expression to the right side of this new block. hint~
if (input.lightLevel() > 135 || input.soundLevel() > 135) {
            fwdMotors.stop()
            music.playTone(262, music.beat(BeatFraction.Breve))
            fwdMotors.turn(15)
        }
Download and test your new code!
What happens when you shine the light on the LEDs or when you make a loud noise by clapping?
~hint Tell me more!
||logic:or||is a Boolean operator. It will allow us to combine and evaluate two expressions within one conditional statement.- In this case, the vehicle should send out an alert if it notices a bright light OR a loud sound. hint~
if (input.lightLevel() > 135 || input.soundLevel() > 135) {
            fwdMotors.stop()
            music.playTone(262, music.beat(BeatFraction.Breve))
            fwdMotors.turn(15)
        }
Select the down arrow next to ||logic:or|| and switch it to ||logic:and||.
Test out your new code. What happens when you shine the light on the LEDs or when you make a loud noise by clapping now?
~hint Tell me more!
||logic:and||is another Boolean operator.- With this change, the vehicle will only send out an alert when it senses a bright light AND a loud noise at the same time.
- This will reduce the number of false alarms and improve the accuracy of our detection system! hint~
if (input.lightLevel() > 135 && input.soundLevel() > 135) {
            fwdMotors.stop()
            music.playTone(262, music.beat(BeatFraction.Breve))
            fwdMotors.turn(15)
        }
Now that we’ve improved the accuracy of our detection system, we are going to customize and improve its alert.
Drag a ||loops:repeat 4 times|| loop, two ||basic:pause (ms) 100|| blocks, and two ||music:play tone middle C for 1 beat|| block into the workspace.
How can we combine these and add them to our existing code to create an alarm that alternates between two tones - similar to other emergency vehicles?
Check the lightbulb for one possible solution! Did you do something different?
~hint Tell me more!
- Change the note in one of the
||music:play tone||blocks. This will allow us to alternate between two notes. - Change the number of beats each tone plays for.
- Place the
||basic:pause (ms) 100||blocks between the||music:play tone||blocks. - Wrap the
||loops:loop||around these 4 blocks so that it repeats the sequence 4 times. This will make our alert more obvious. - Replace the original
||music: play tone middle C for 4 beats||block with this new chuck of code. hint~
if (input.lightLevel() > 135 && input.soundLevel() > 135) {
    fwdMotors.stop()
    for (let index = 0; index < 4; index++) {
        music.playTone(262, music.beat(BeatFraction.Double))
        basic.pause(100)
        music.playTone(523, music.beat(BeatFraction.Double))
        basic.pause(100)
    }
    fwdMotors.turn(15)
}
Are there any parts of the code you still don't understand? This is your time to explore!
~hint Tell me more! Follow these steps:
- Find a part of the code you'd like to learn more about
- Make a single change to this block (or remove it entirely)
- Download the new code
- Test it out and observe what changed
- Repeat hint~
You've completed the activity!
Think about something in this project that challenged you.
How did you overcome this challenge? How did that make you feel?
In the next step, you can click the |Done| button to finish the tutorial.


