fwd-edu-breakout=github:climate-action-kits/pxt-fwd-edu/fwd-breakout
sonar=github:climate-action-kits/pxt-fwd-edu
datalogger=datalogger
input.onButtonPressed(Button.A, function () {
    for (let index2 = 0; index2 < 4; index2++) {
        fwdMotors.drive(fwdMotors.DrivingDirection.Forward, 50)
        basic.pause(1000)
        fwdMotors.stop()
        fwdMotors.middleServo.fwdSetAngle(0)
        basic.pause(250)
        fwdMotors.middleServo.fwdSetAngle(45)
        basic.pause(250)
    }
    fwdMotors.stop()
})
// @collapsed
input.onButtonPressed(Button.B, function () {
    if (index < 3) {
        index += 1
    } else {
        index = 0
    }
})
let index = 0
index = 0
fwdMotors.middleServo.fwdSetAngle(45)
fwdMotors.setupDriving(
fwdMotors.leftServo,
fwdMotors.rightServo,
10
)
// @collapsed
basic.forever(function () {
    basic.showNumber(index)
})
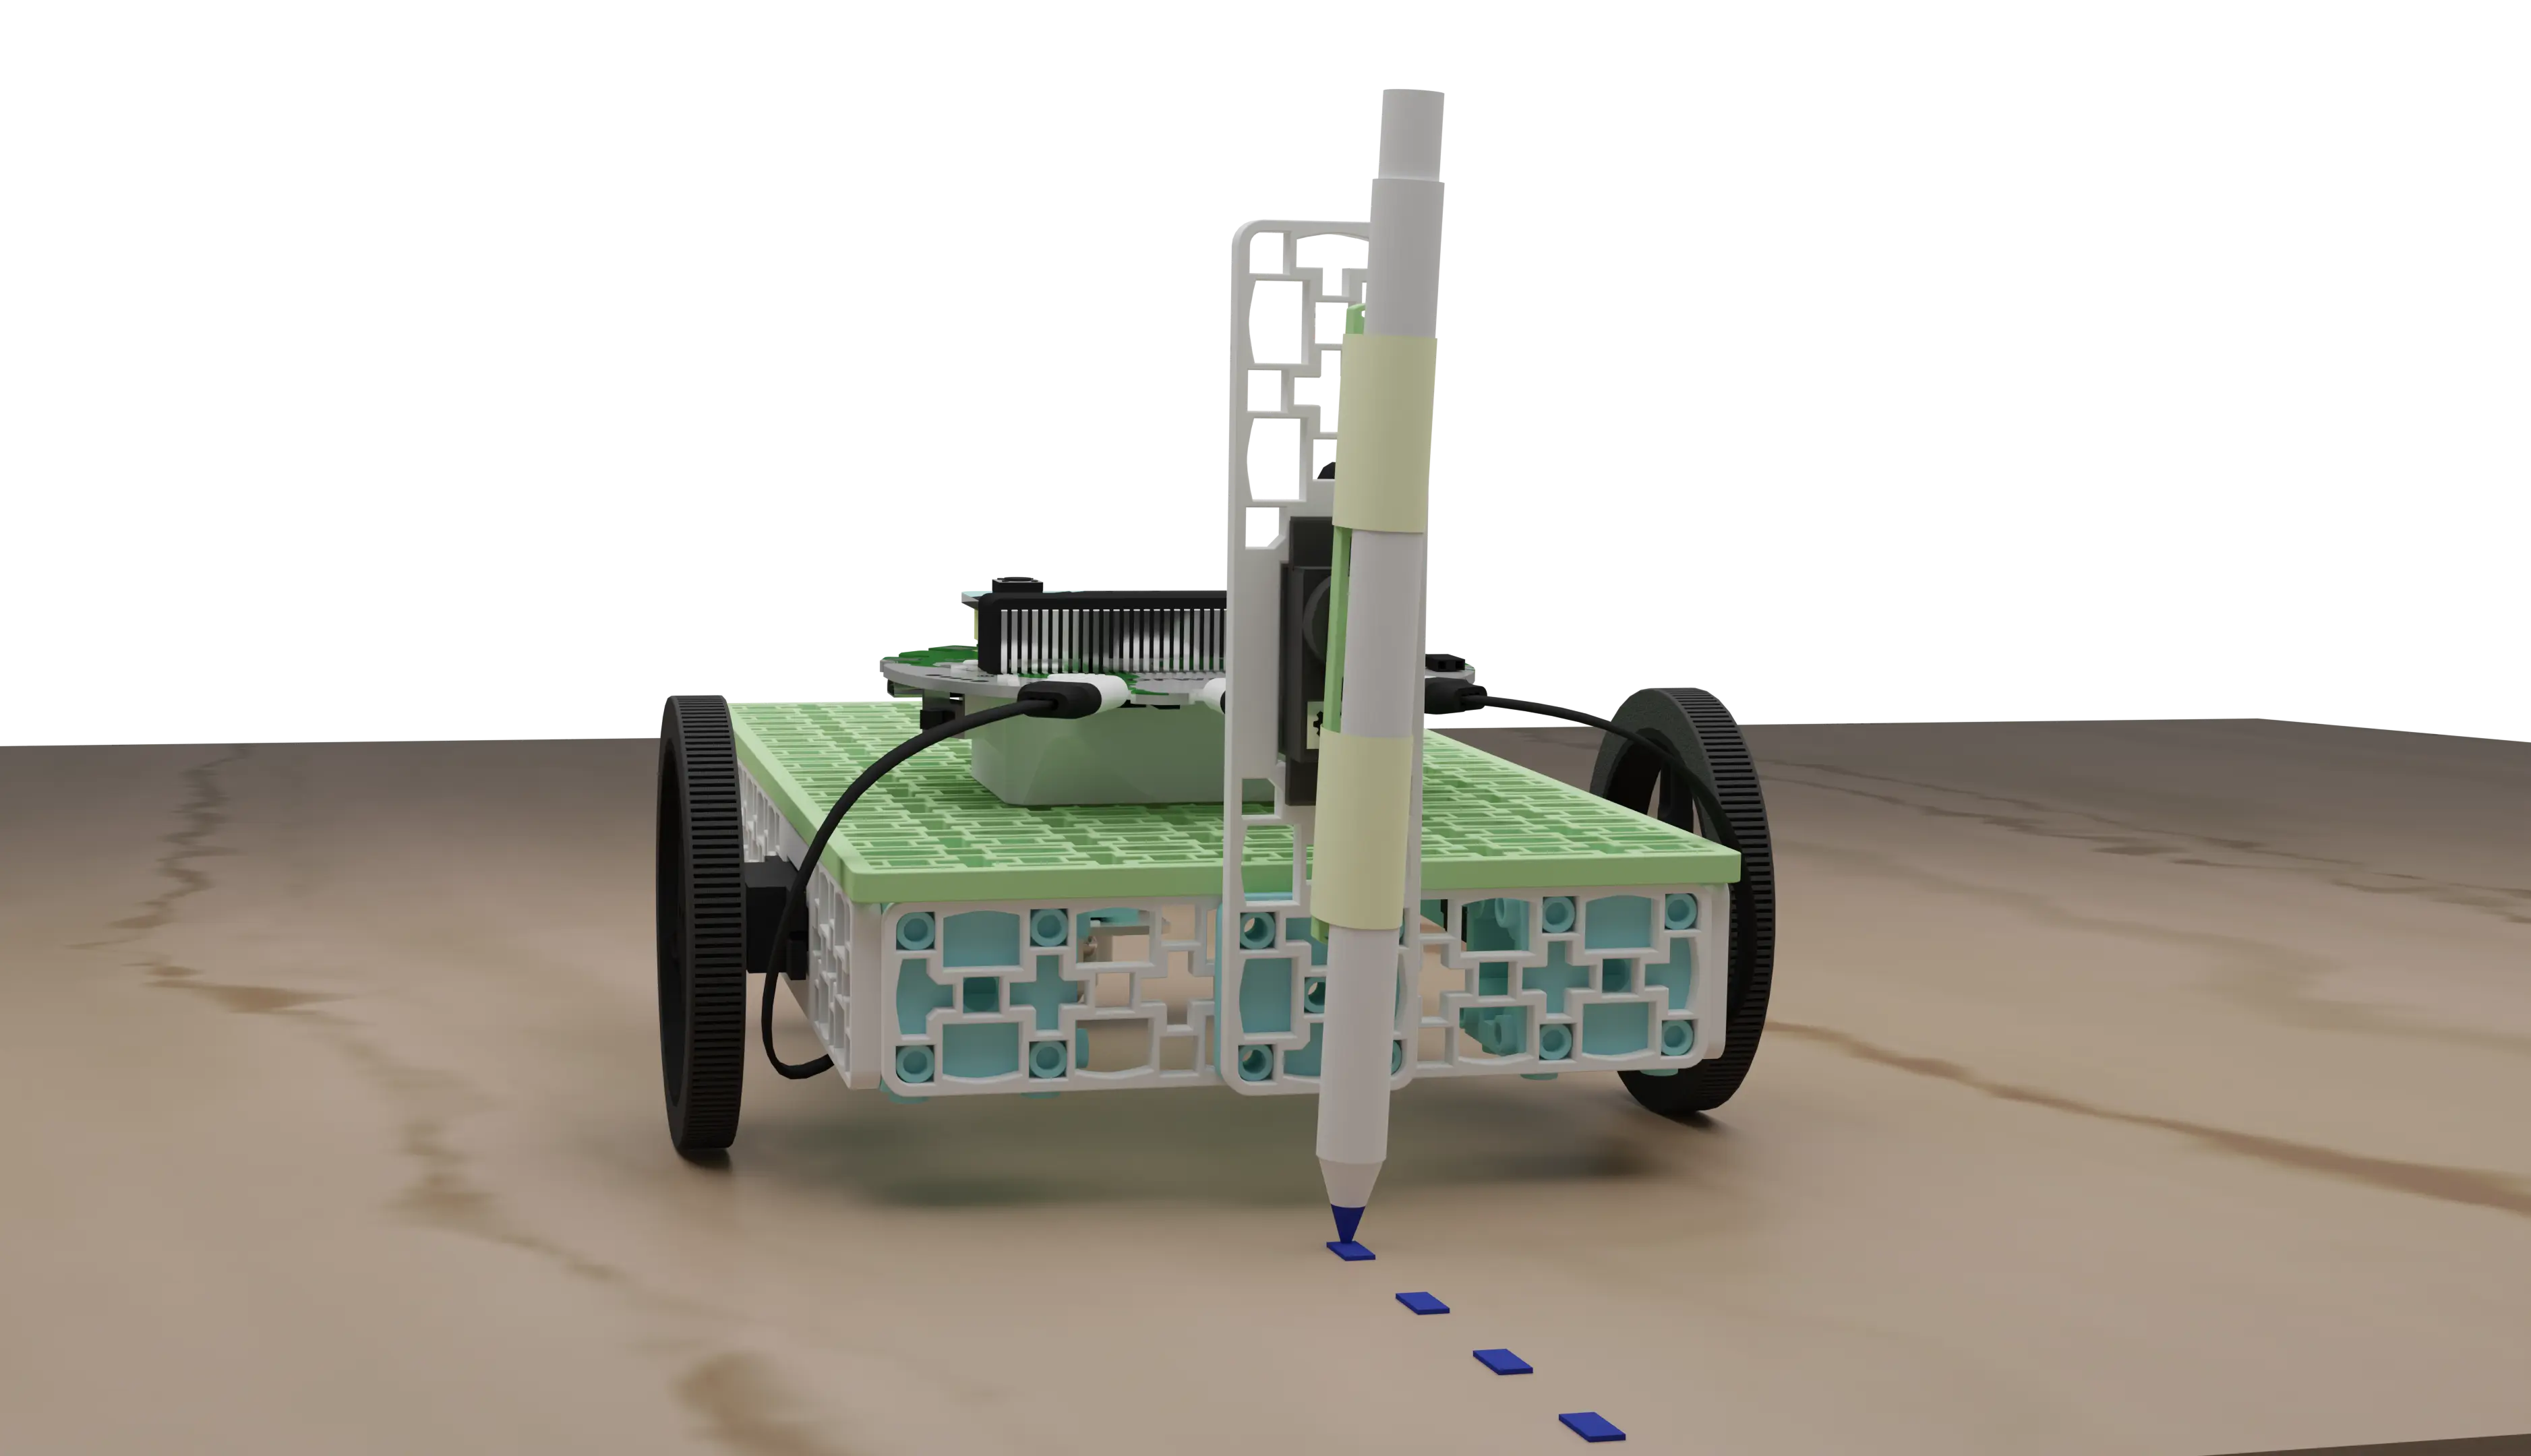
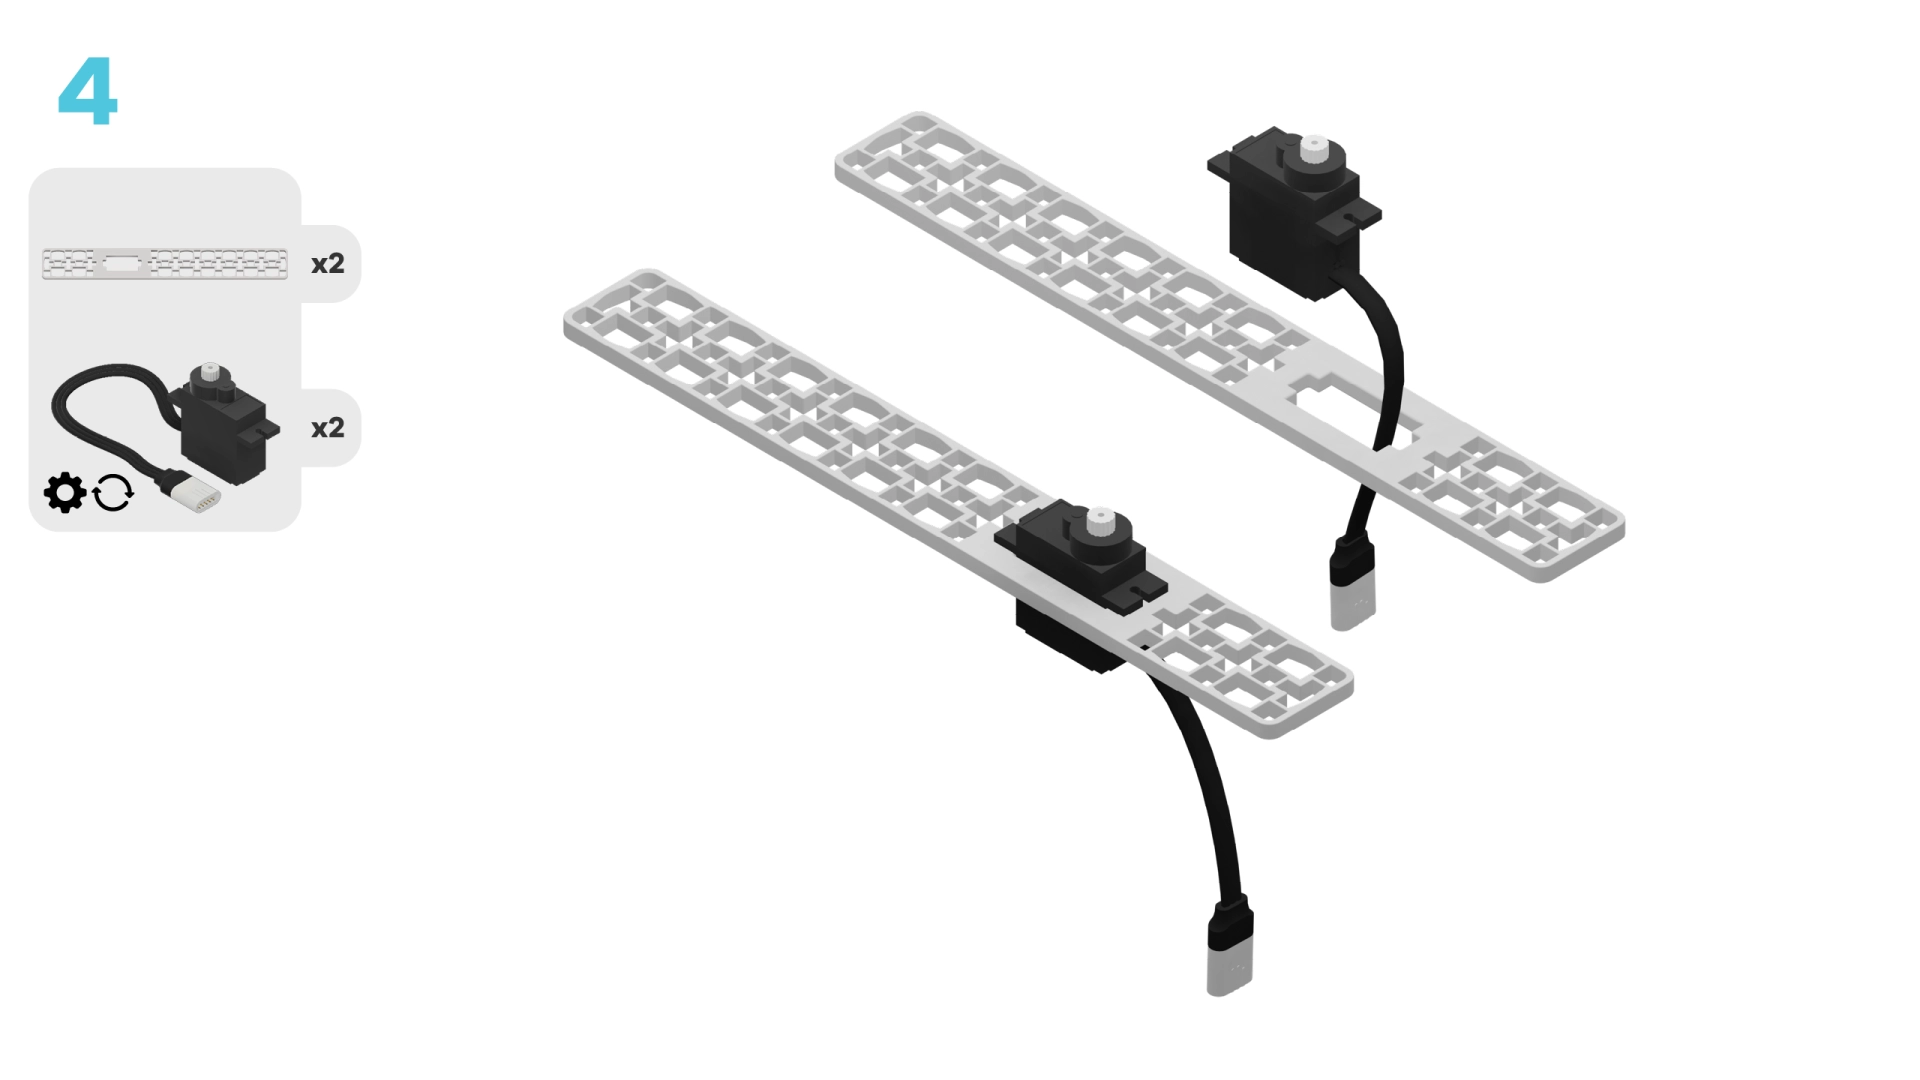
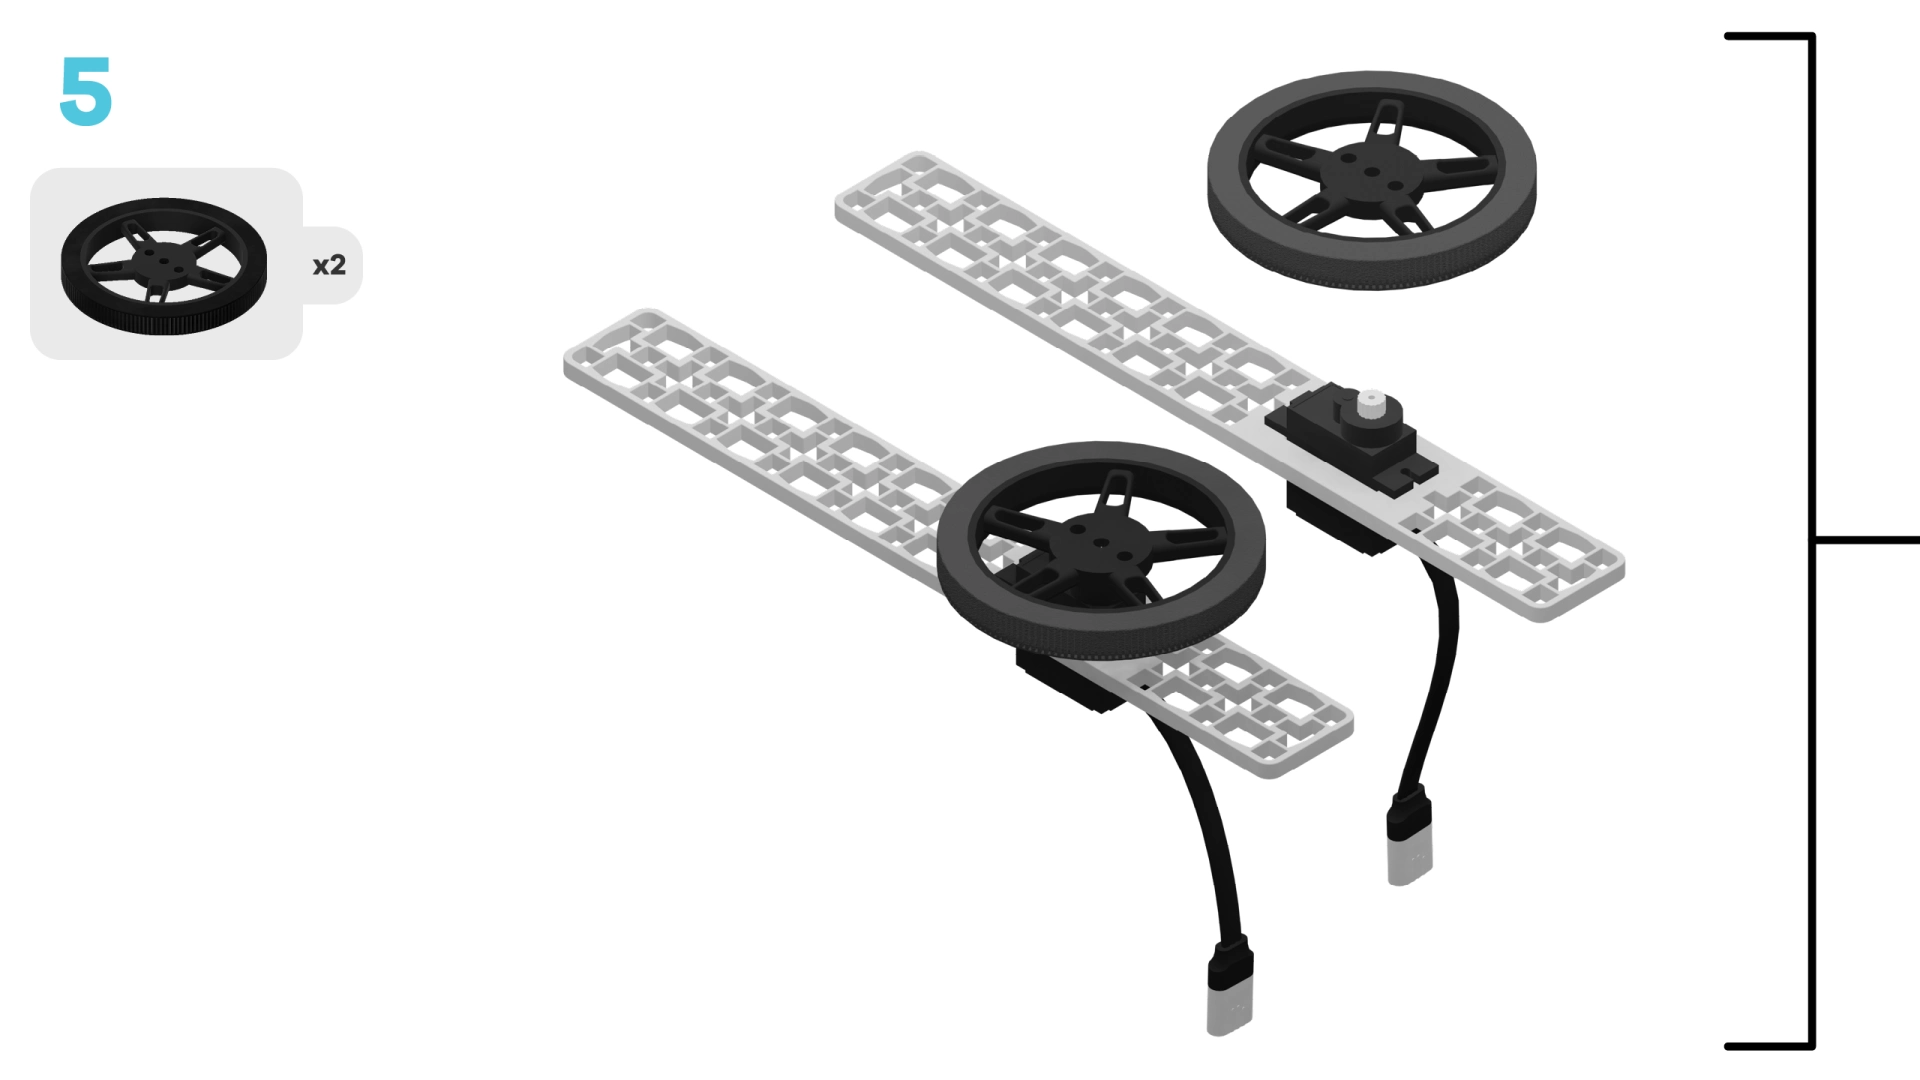
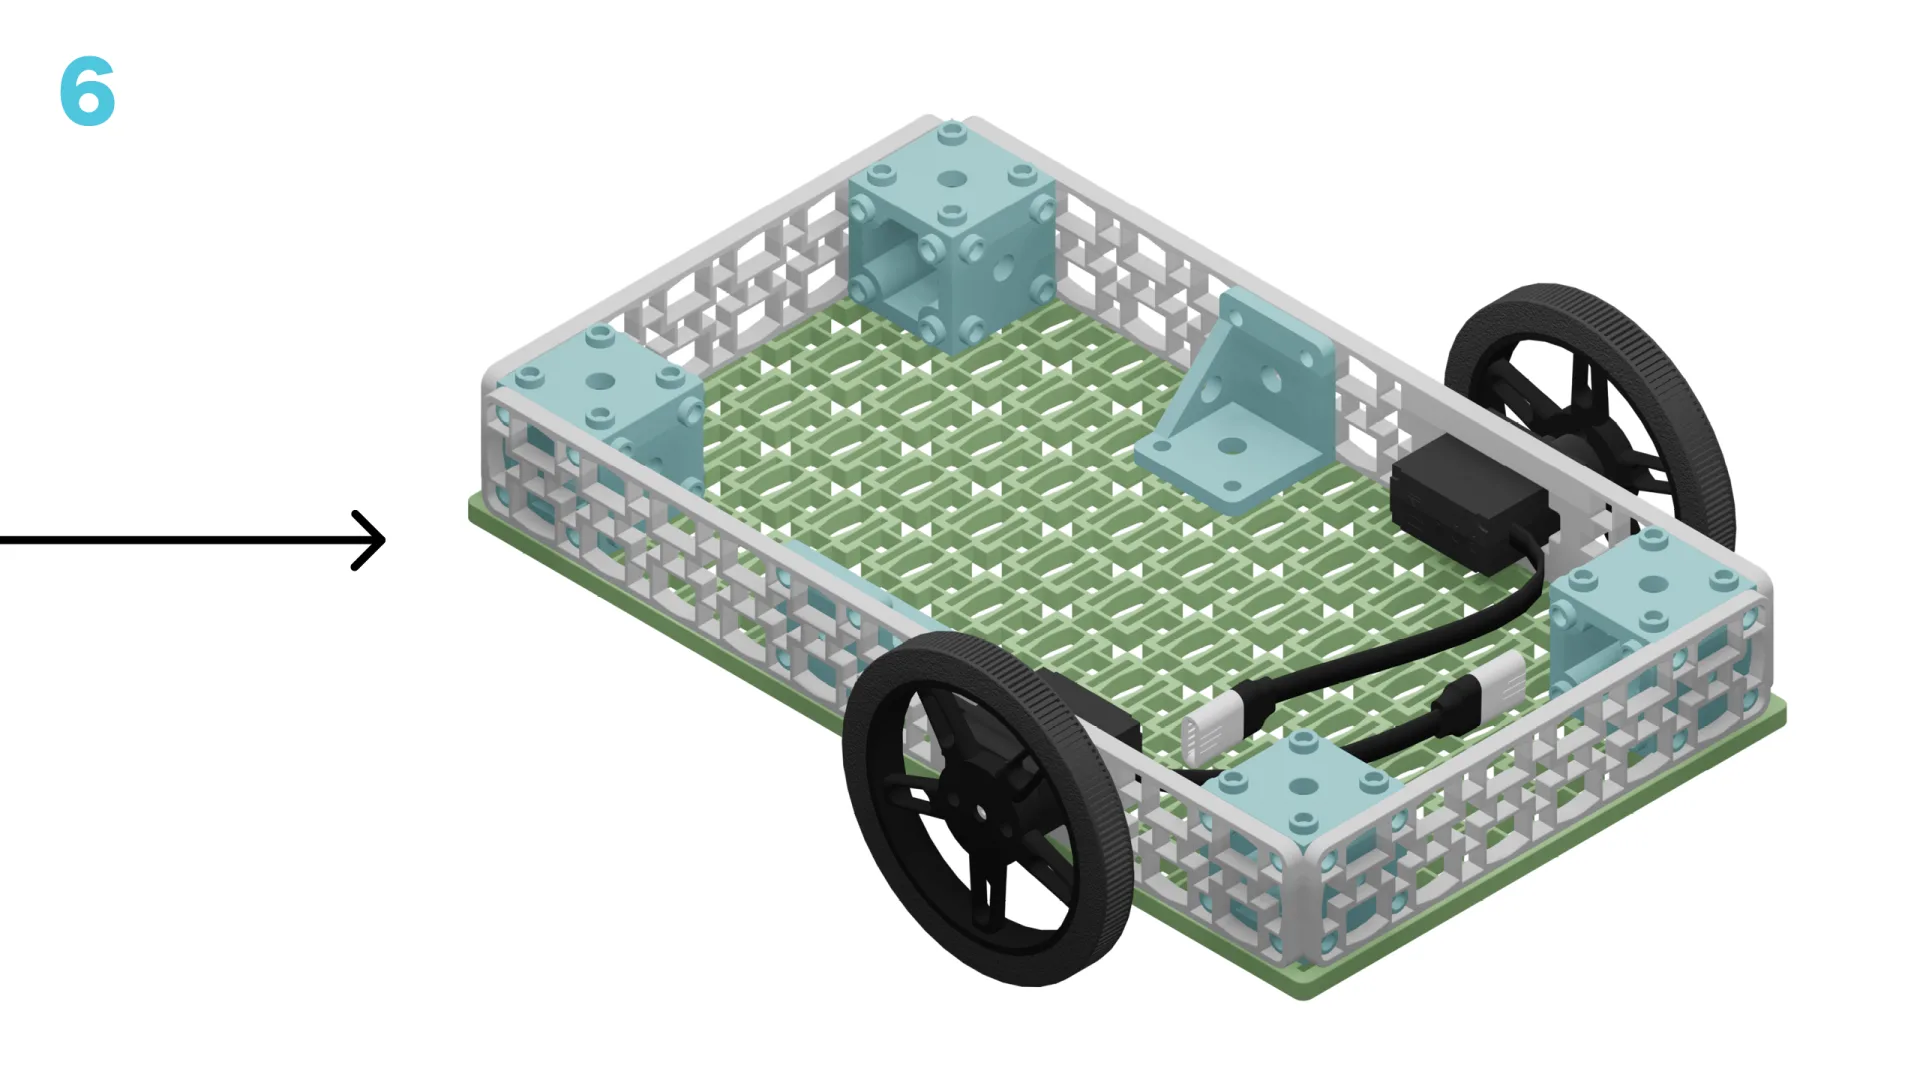
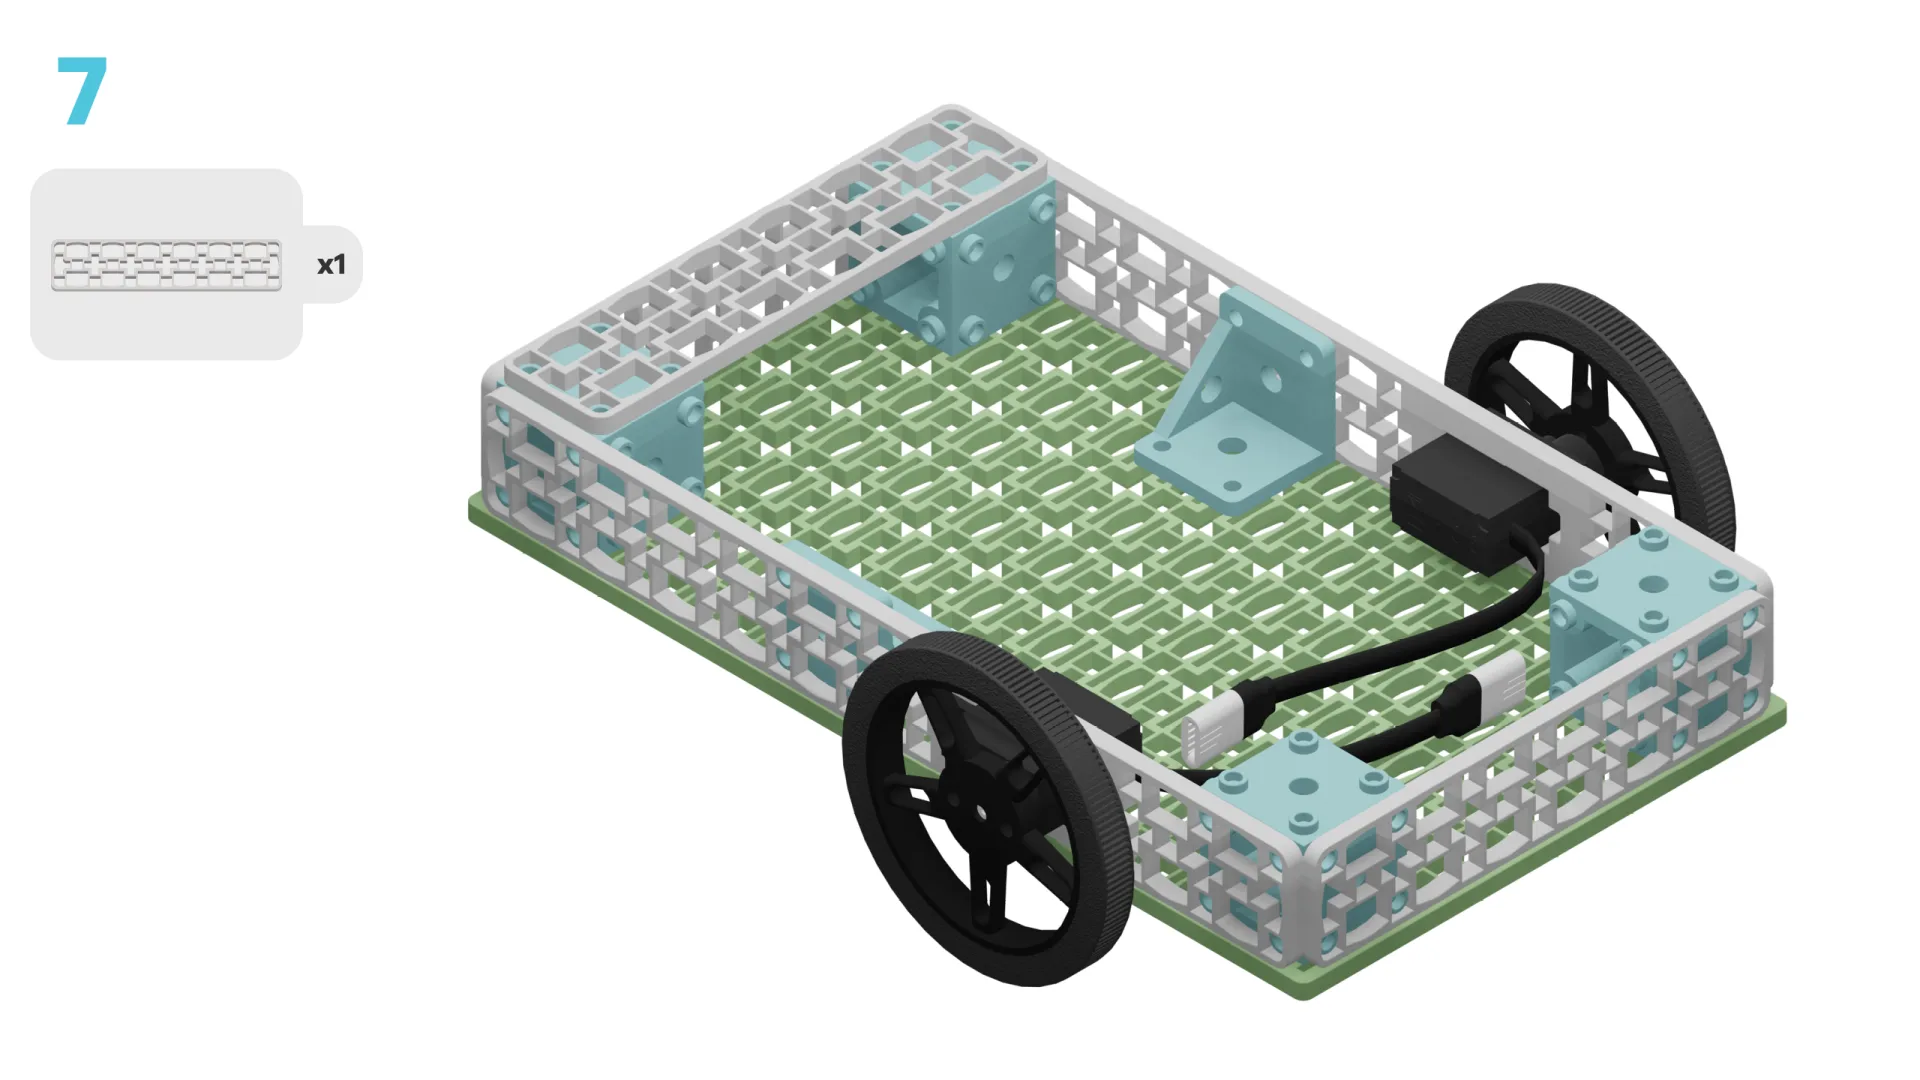
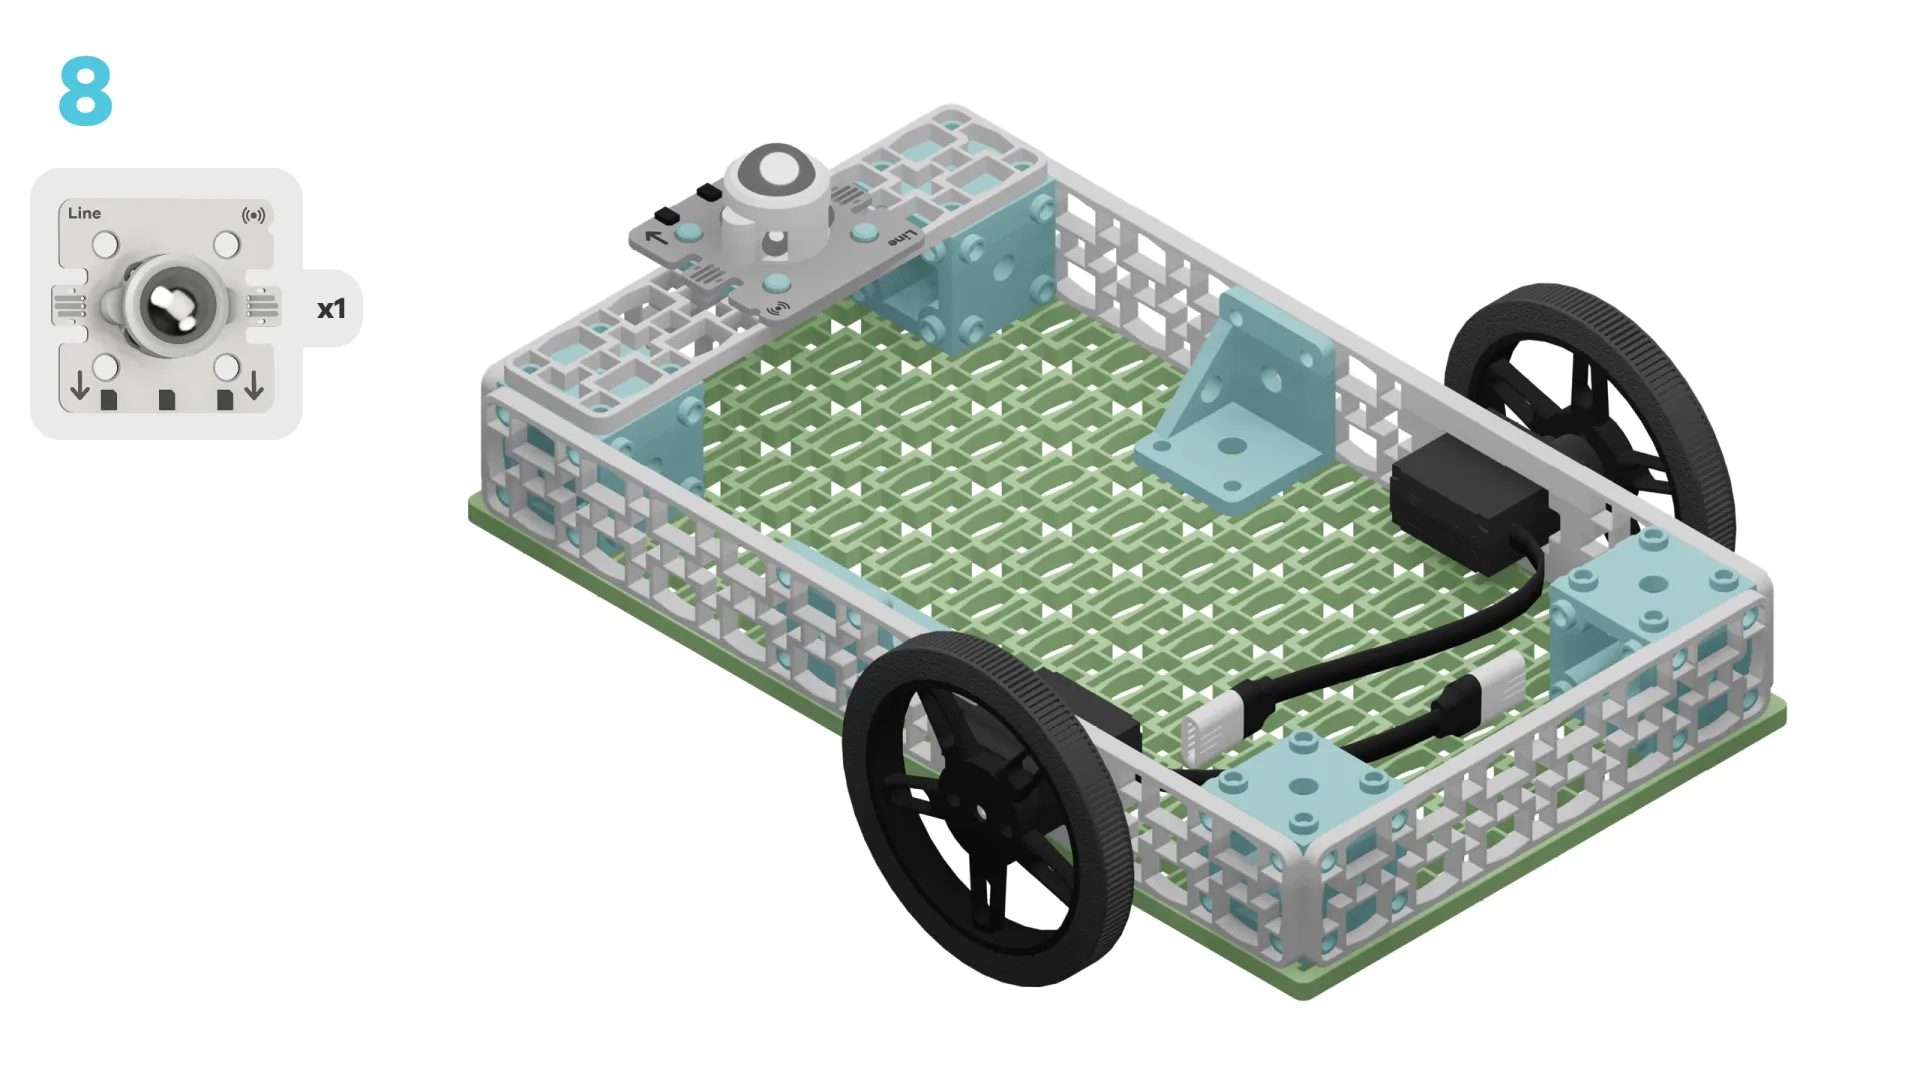
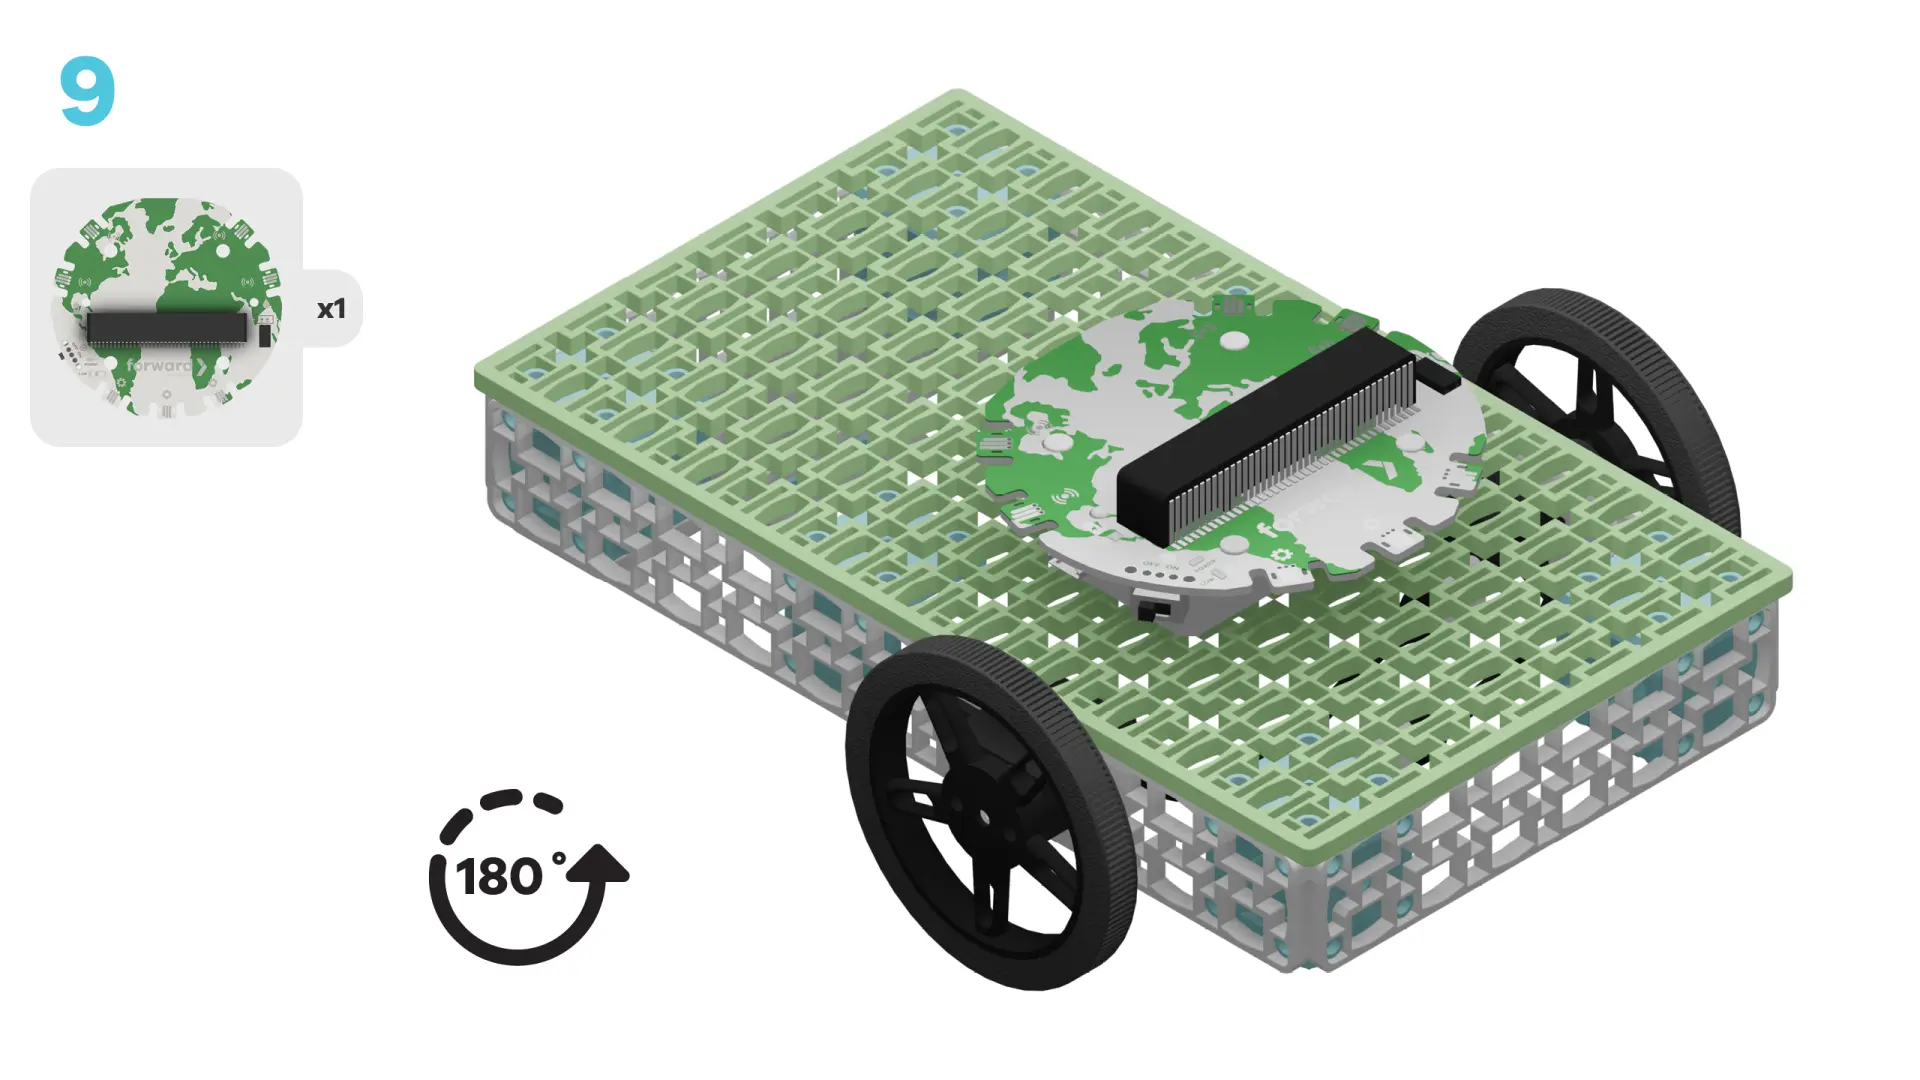
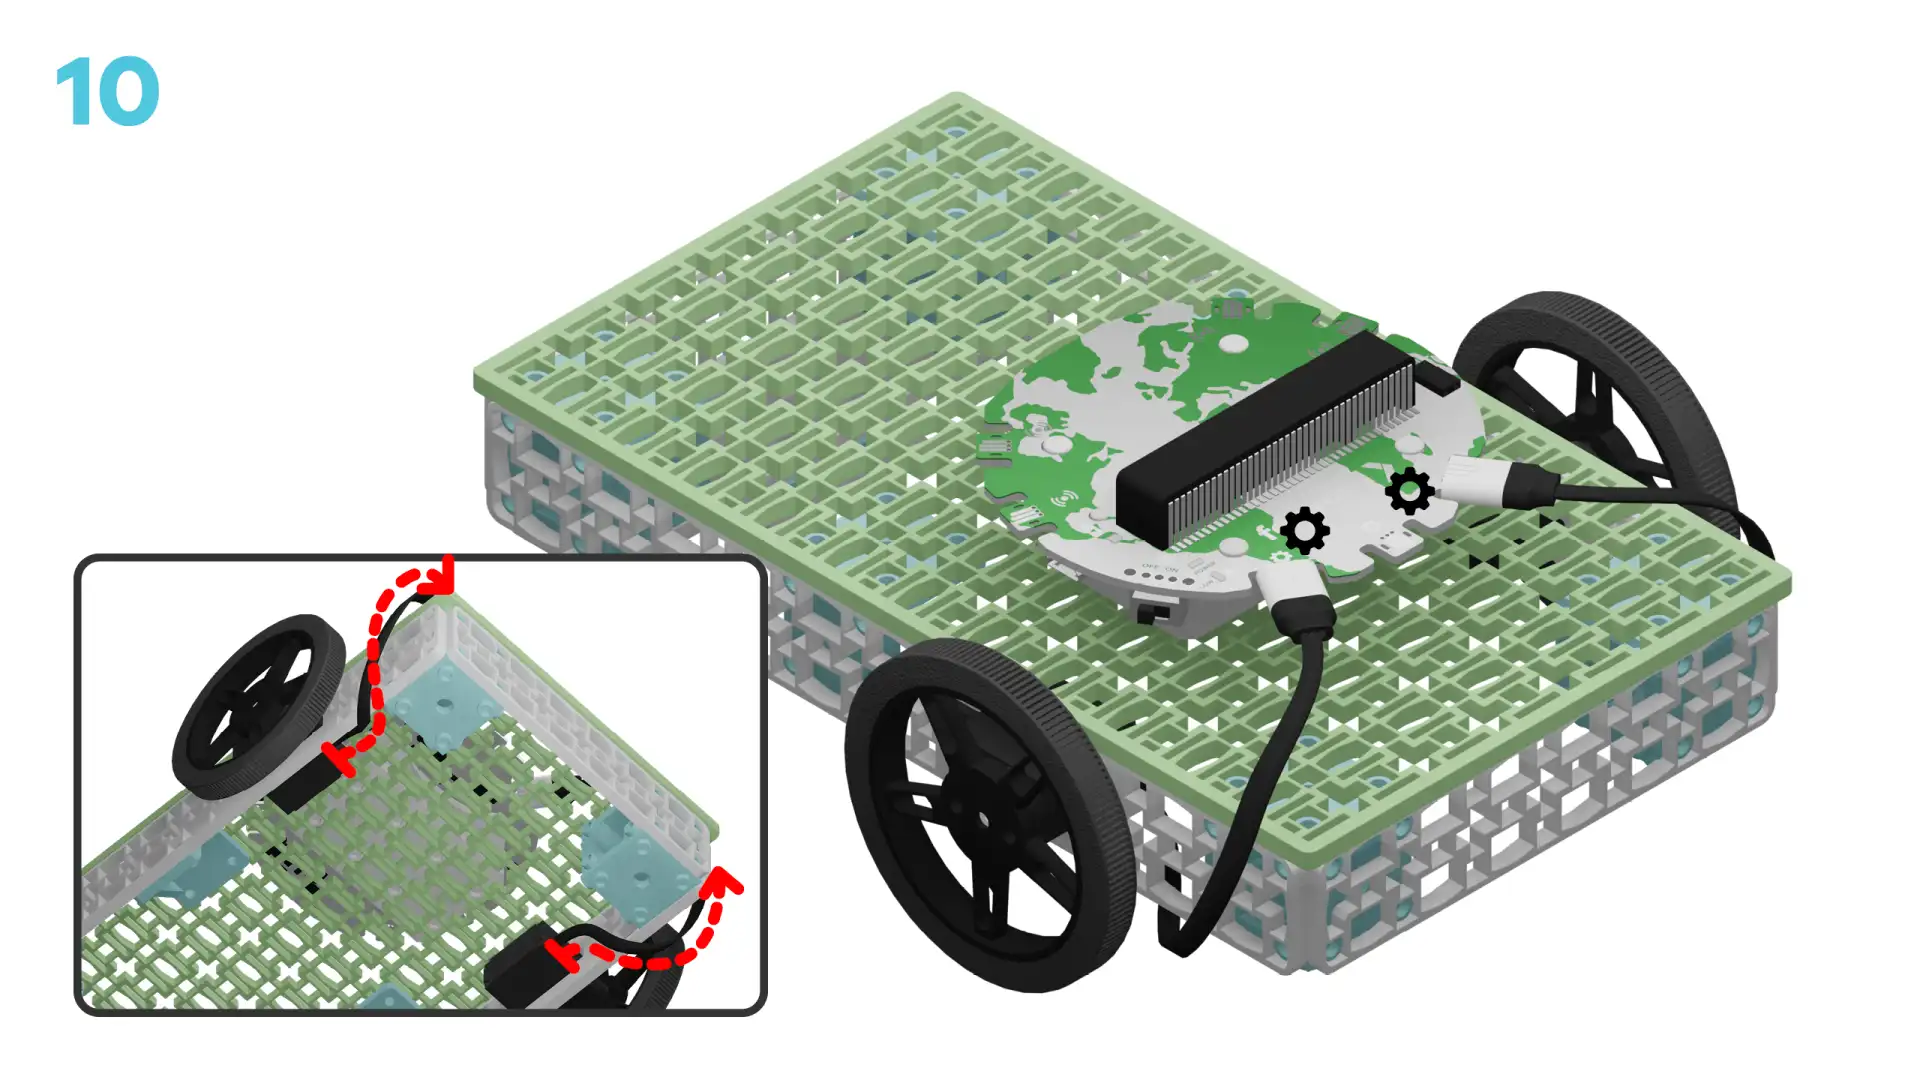
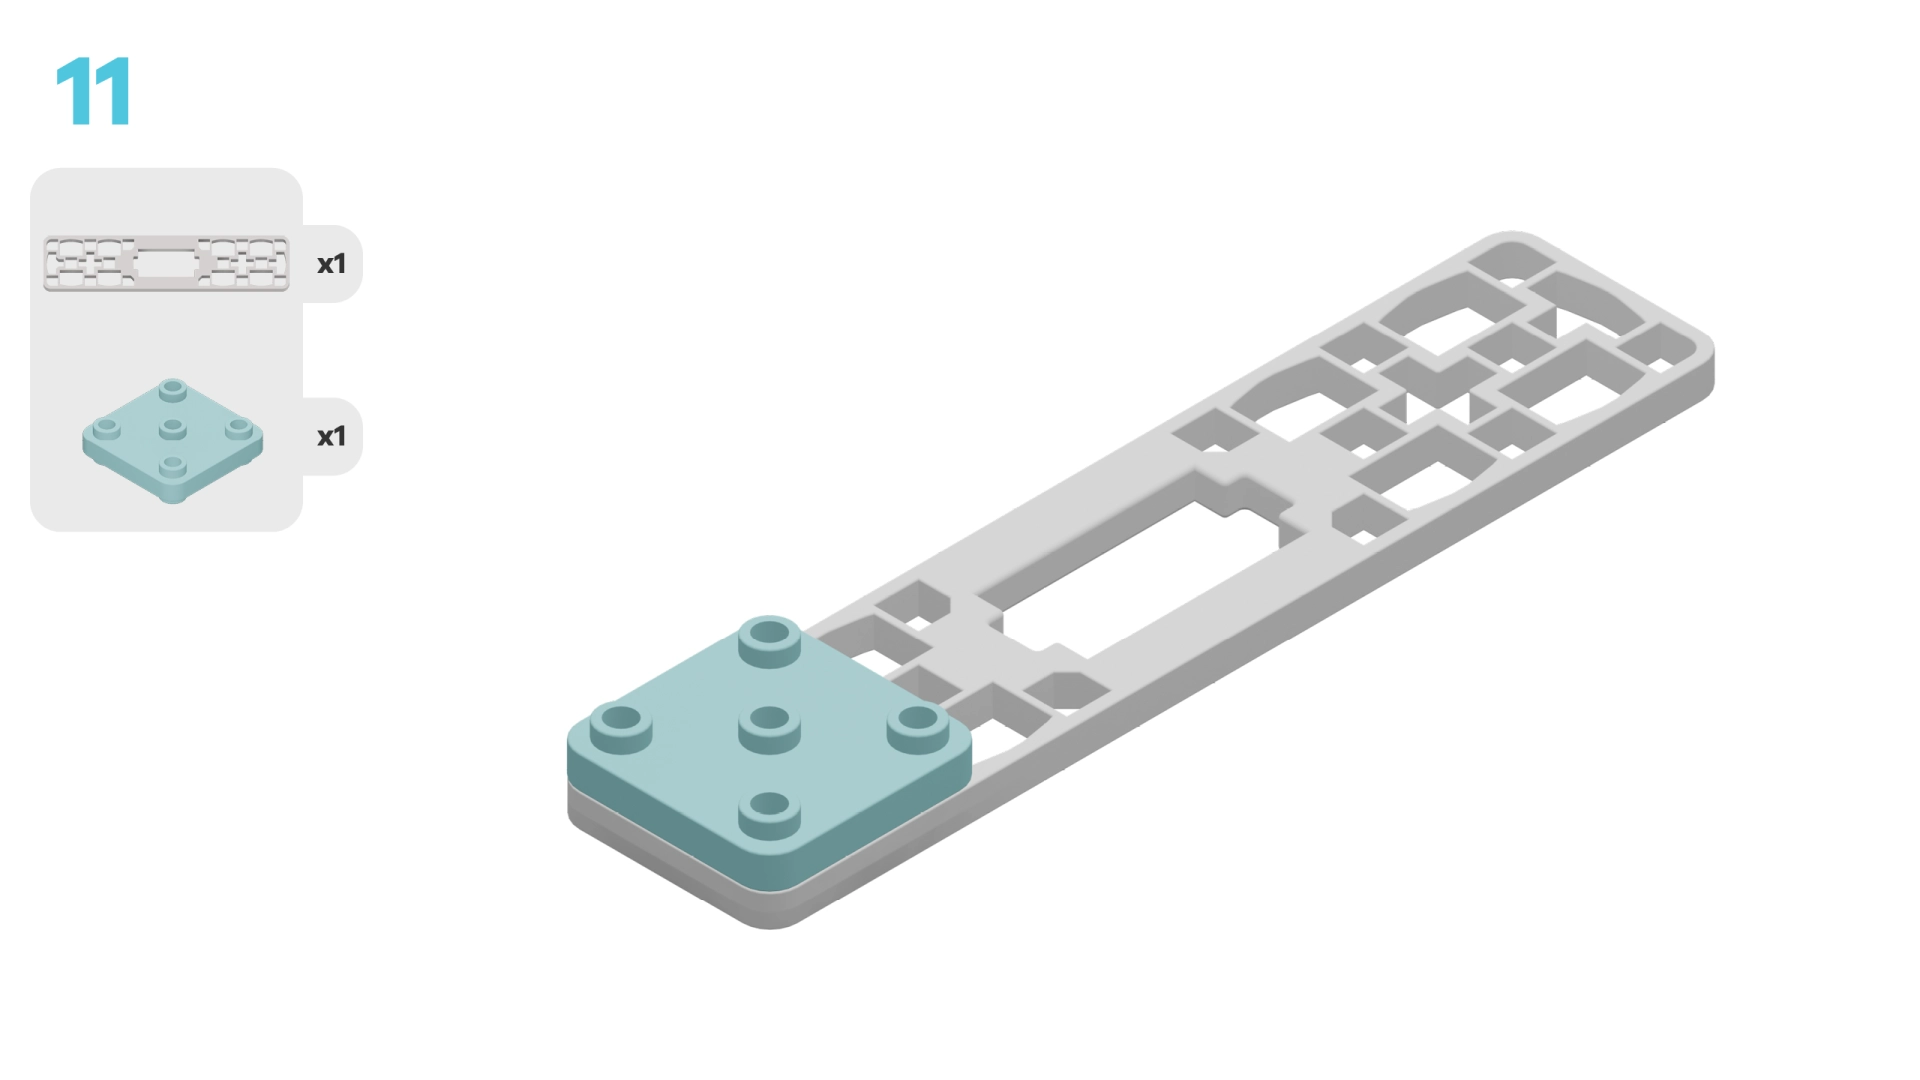
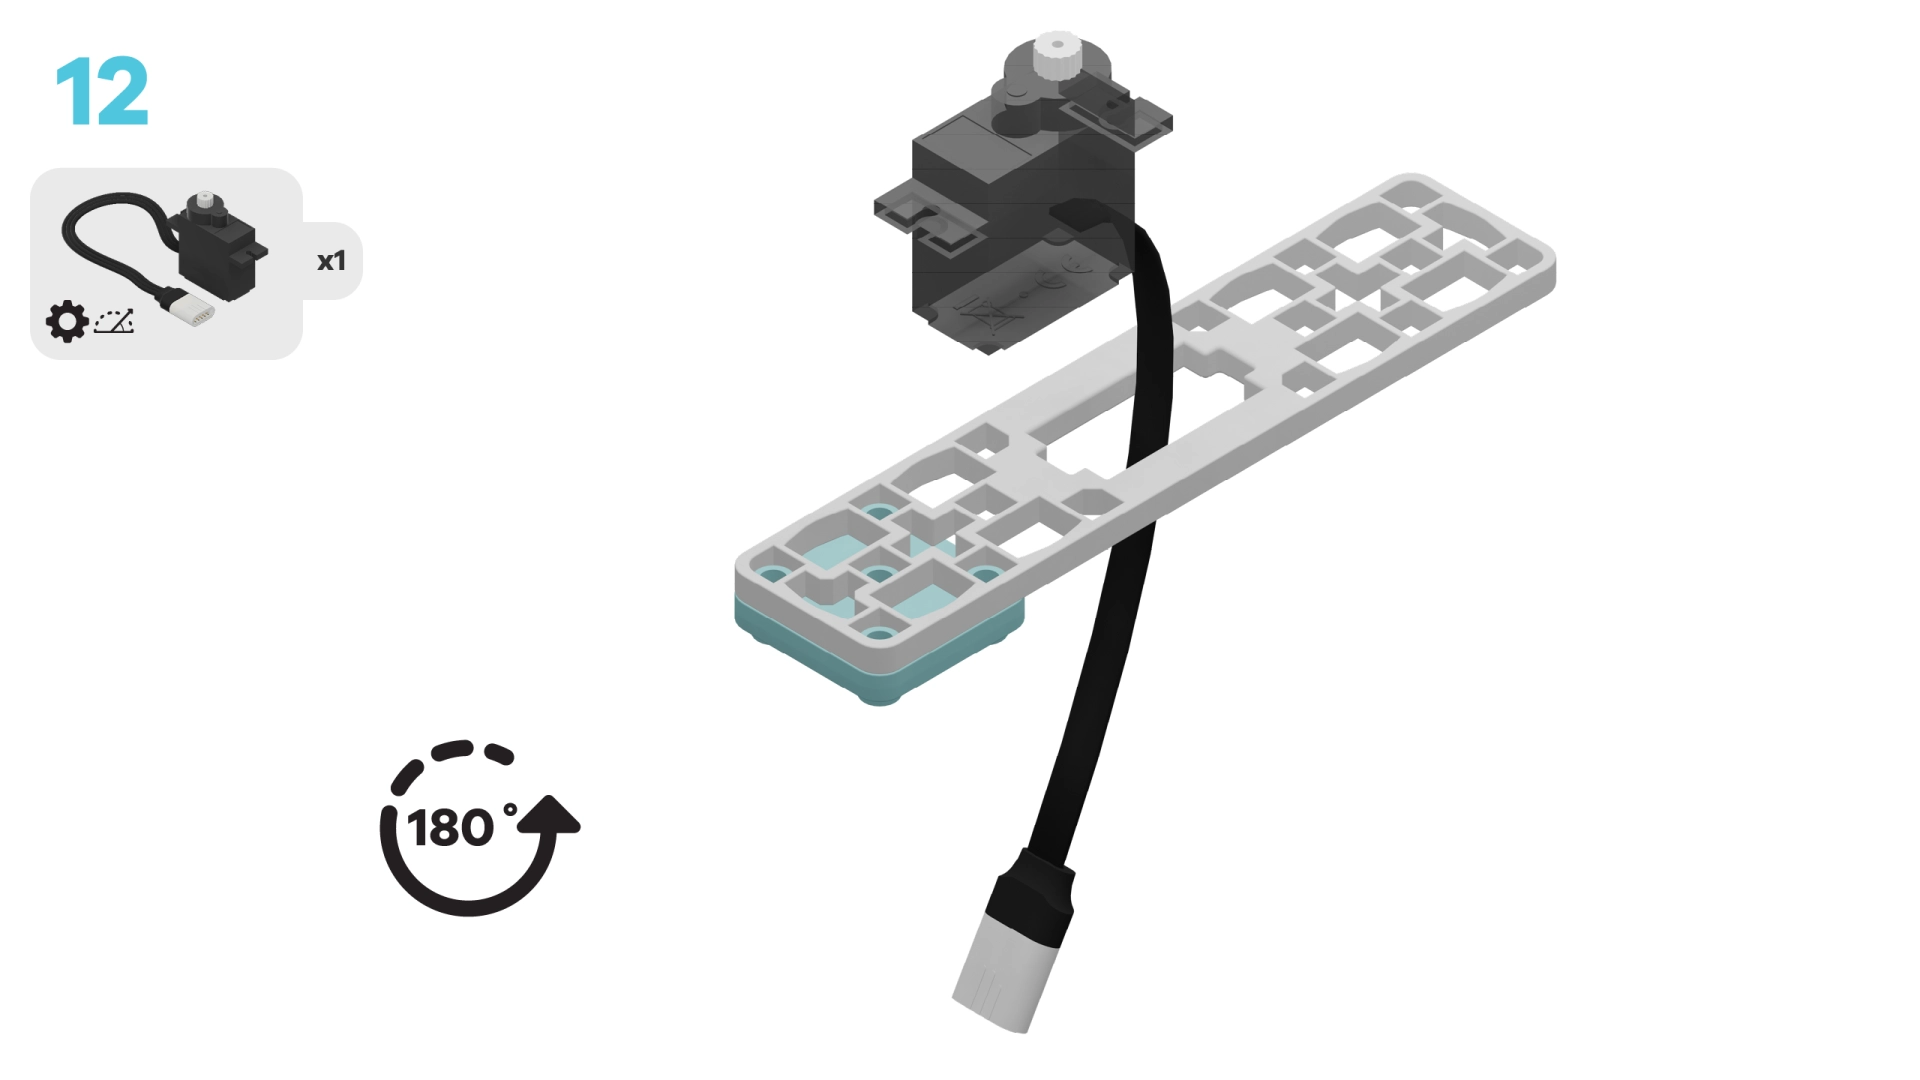
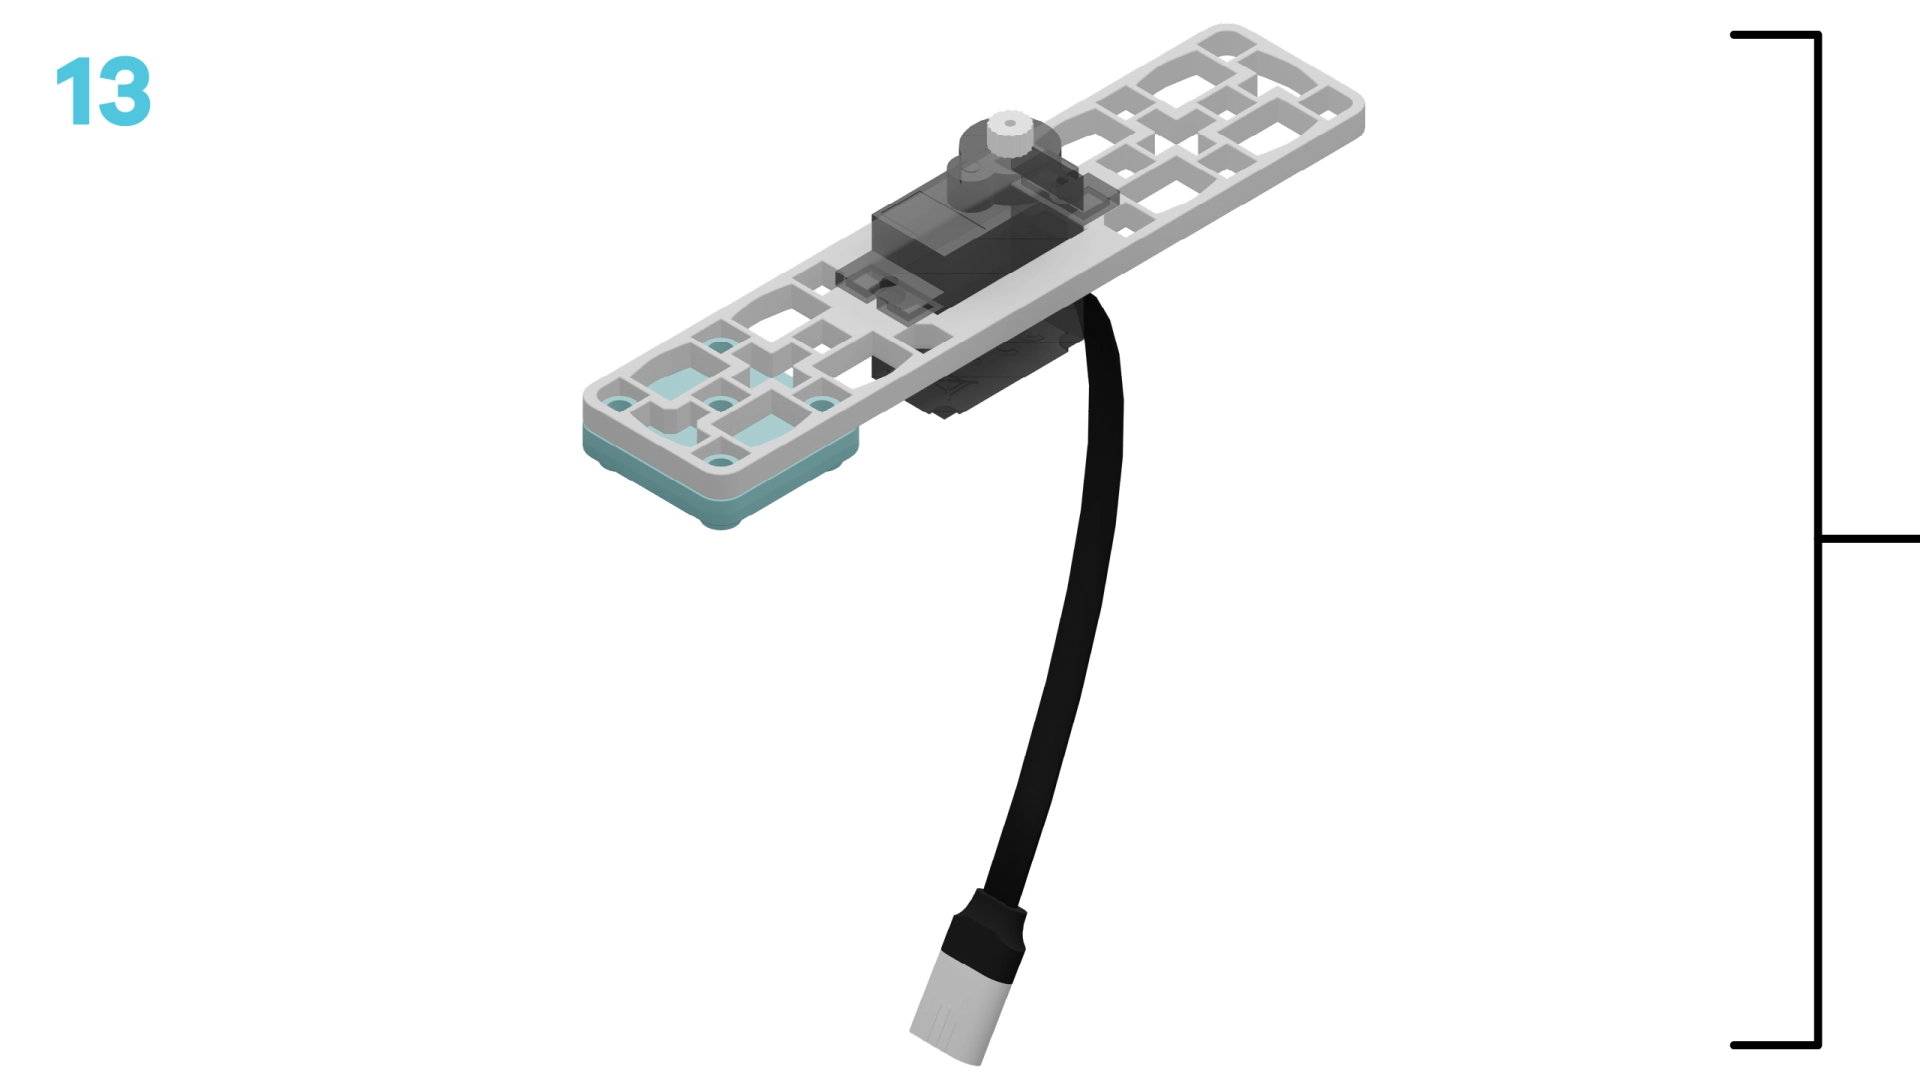
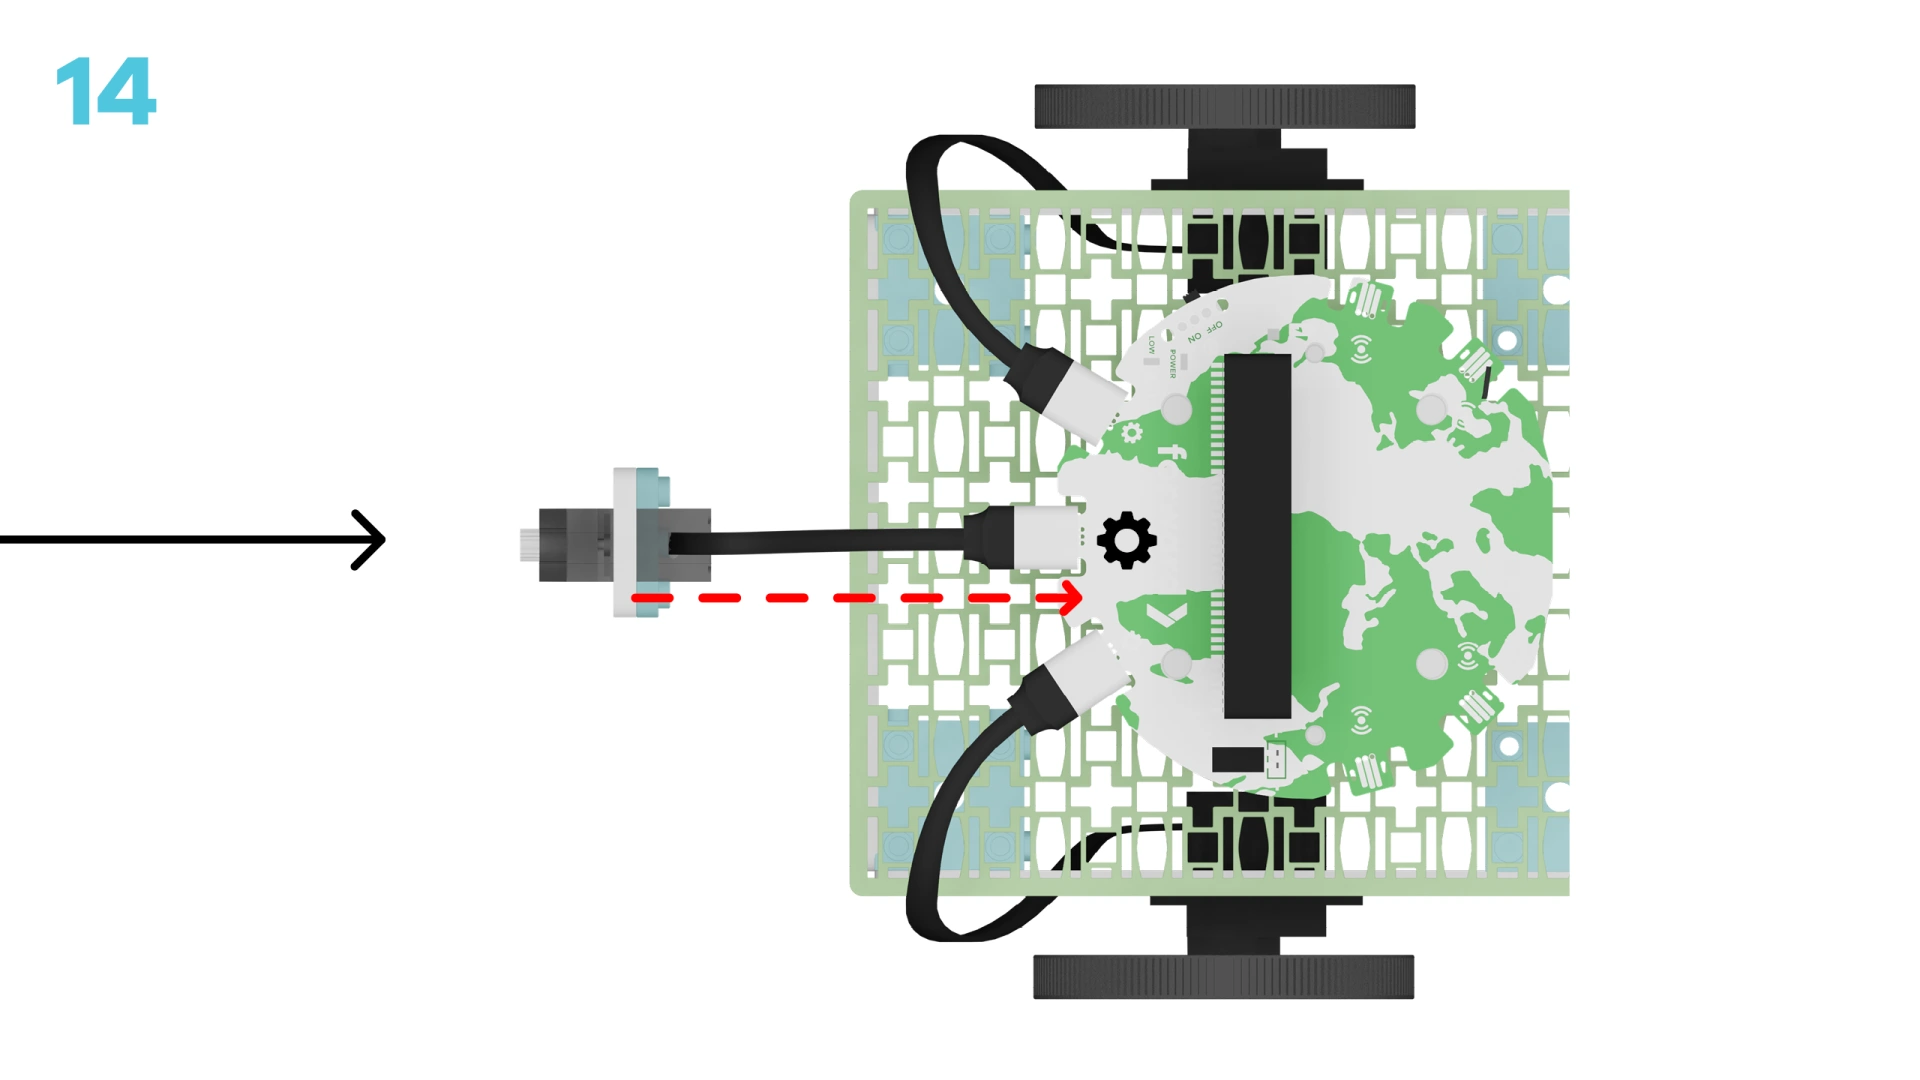
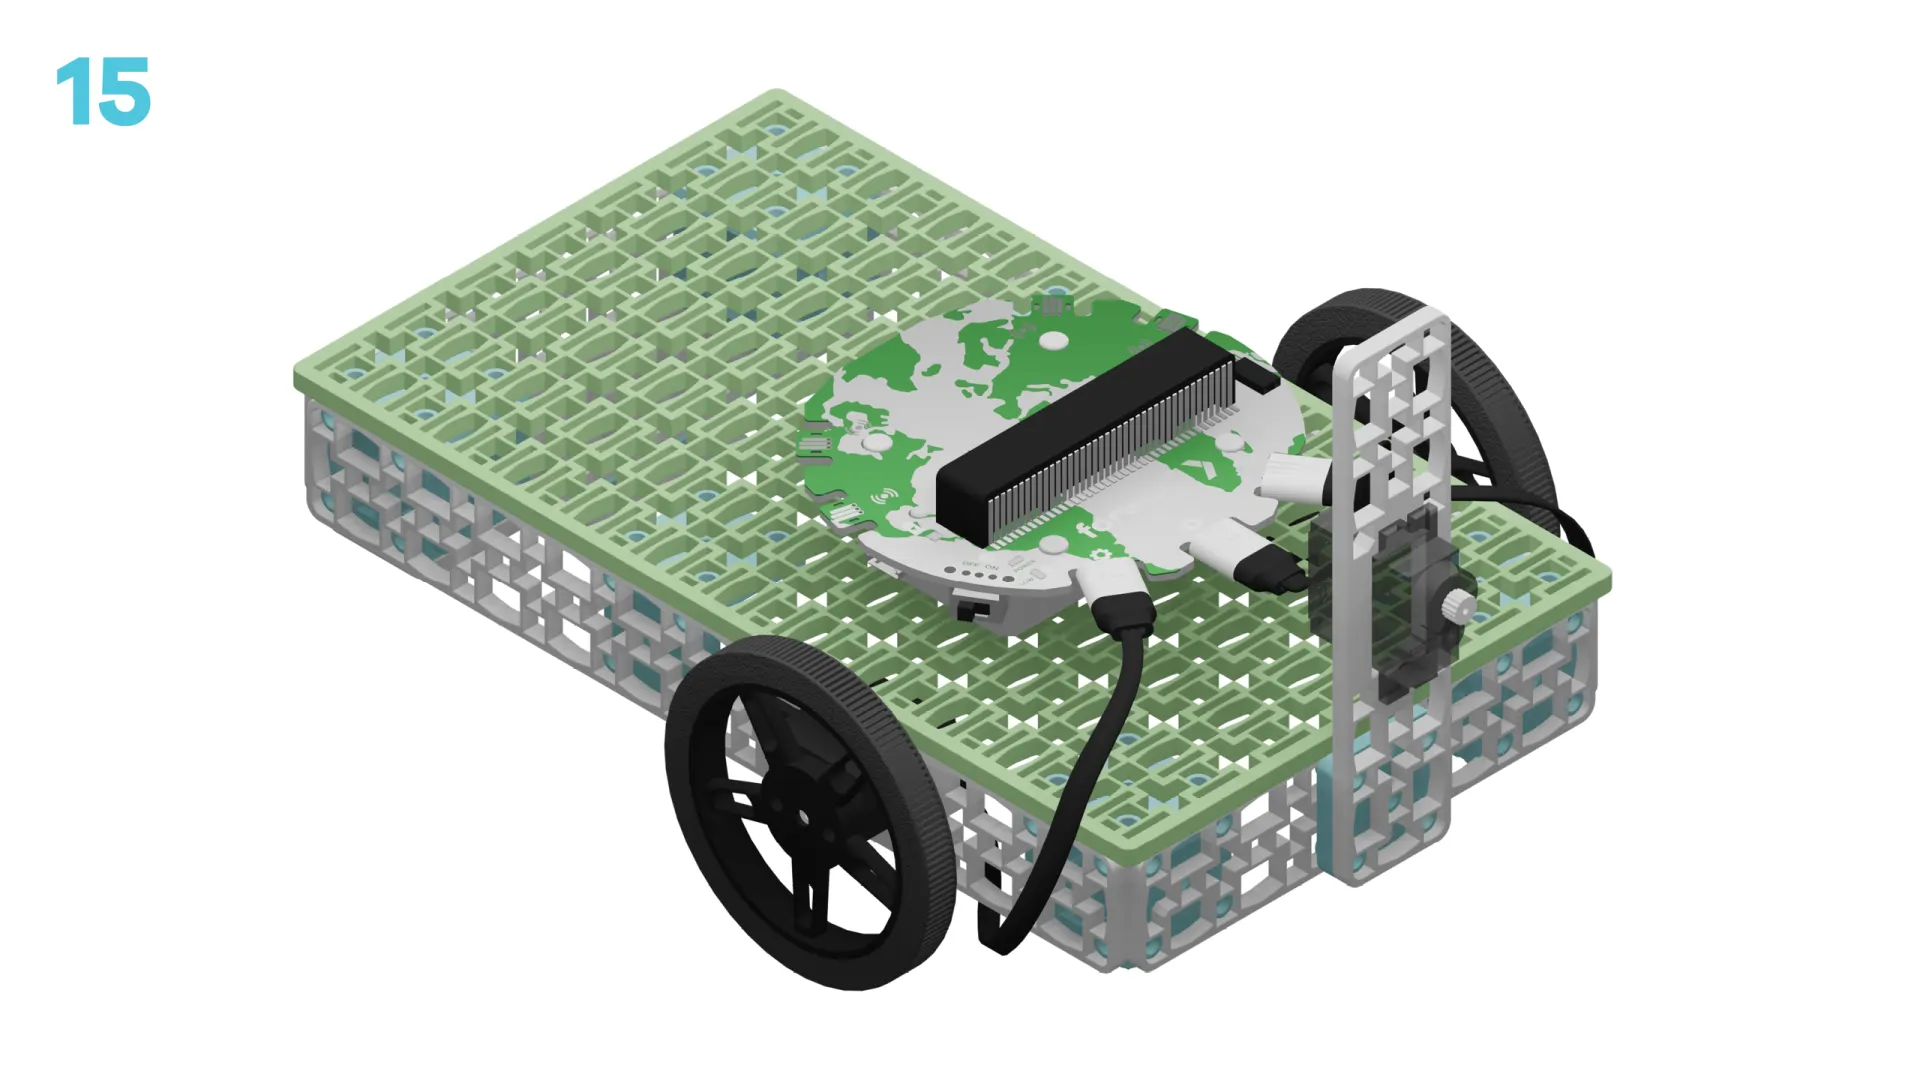
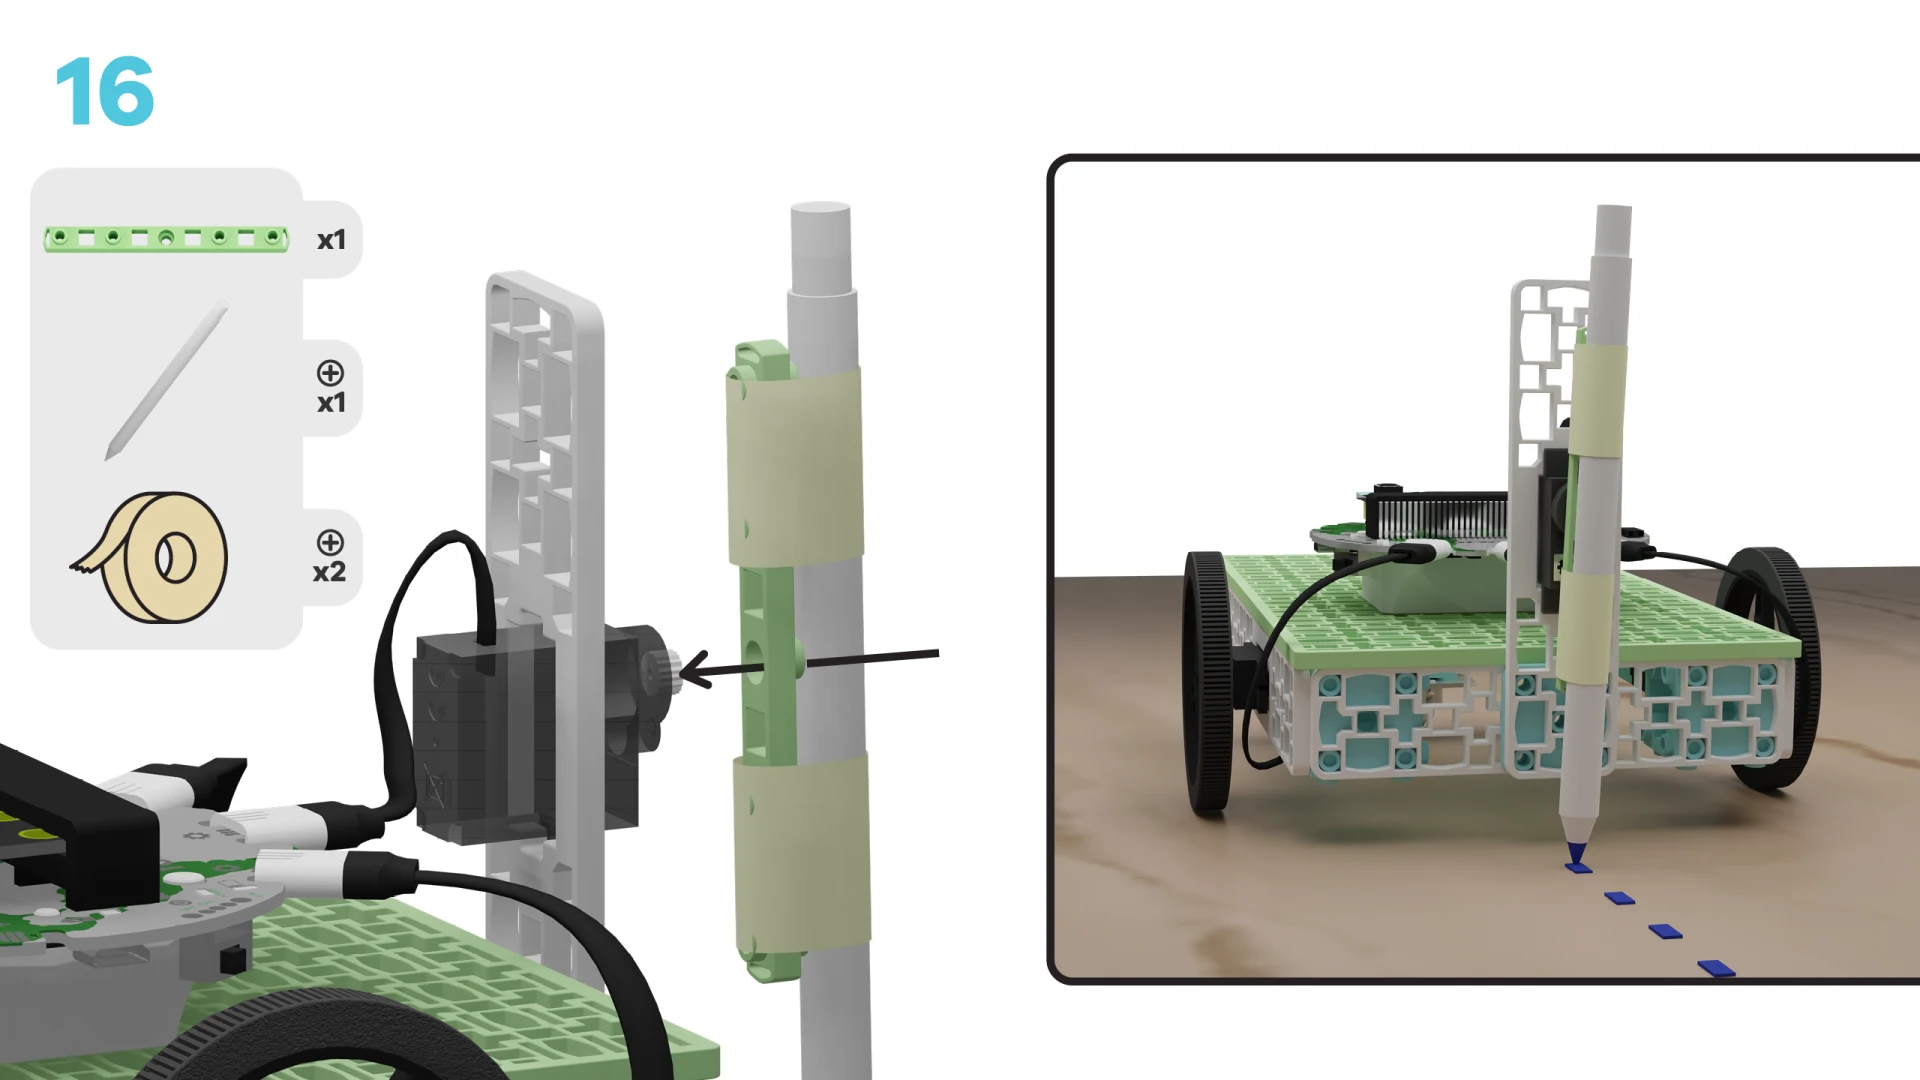
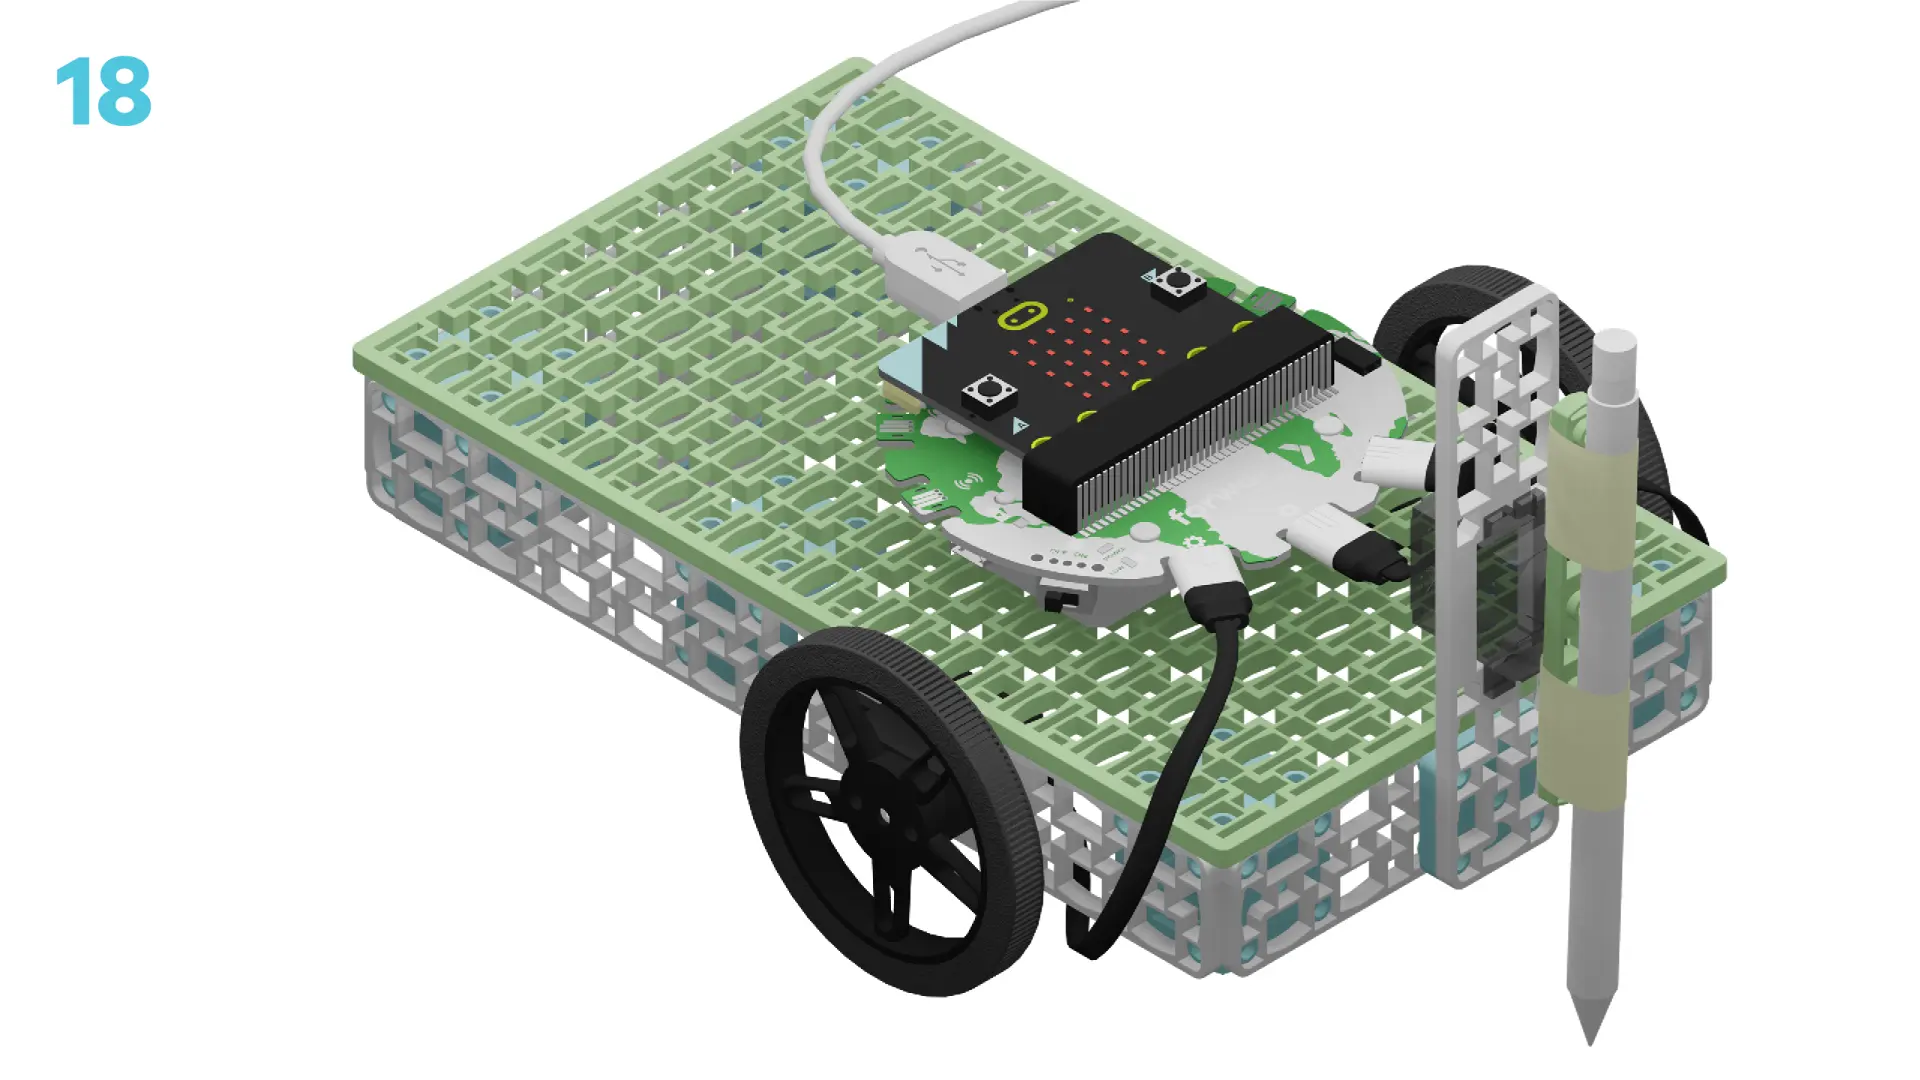
Let's build an automated tree seeder. We are going to do this in four parts:
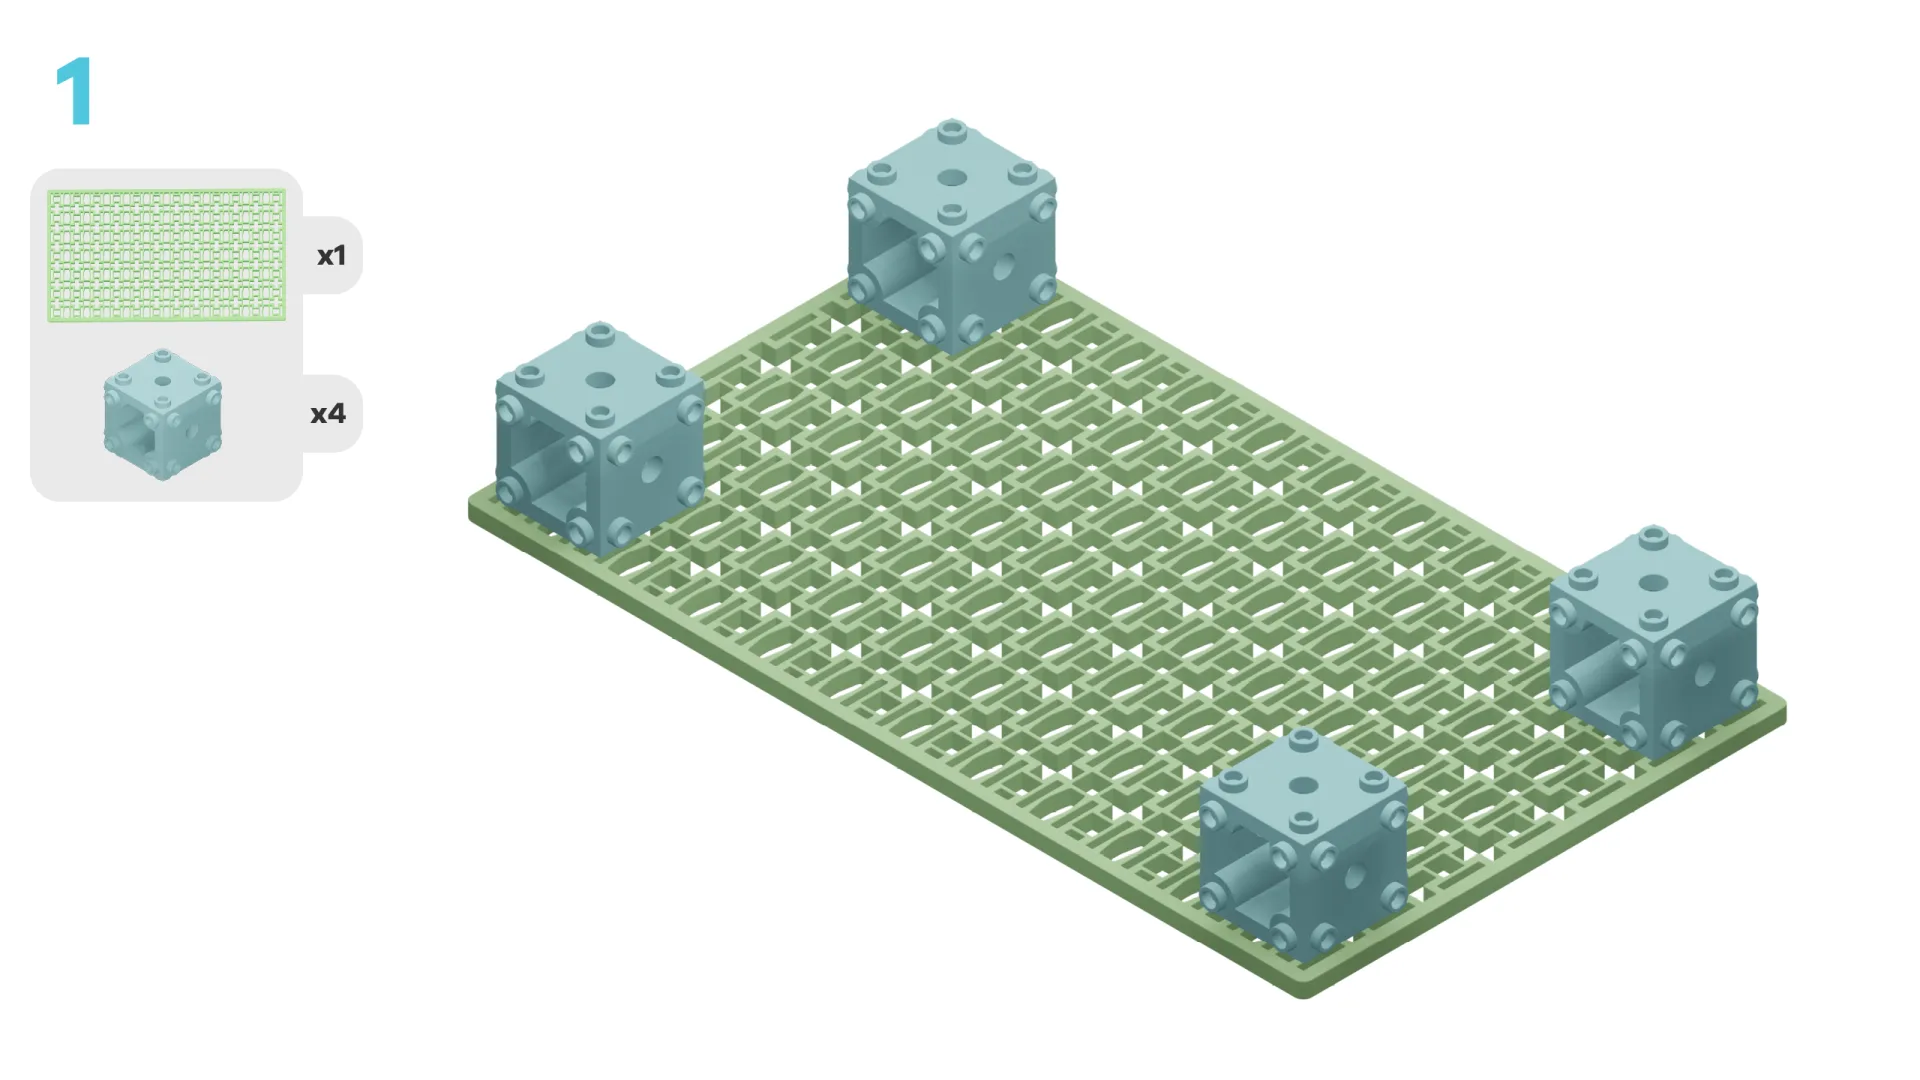
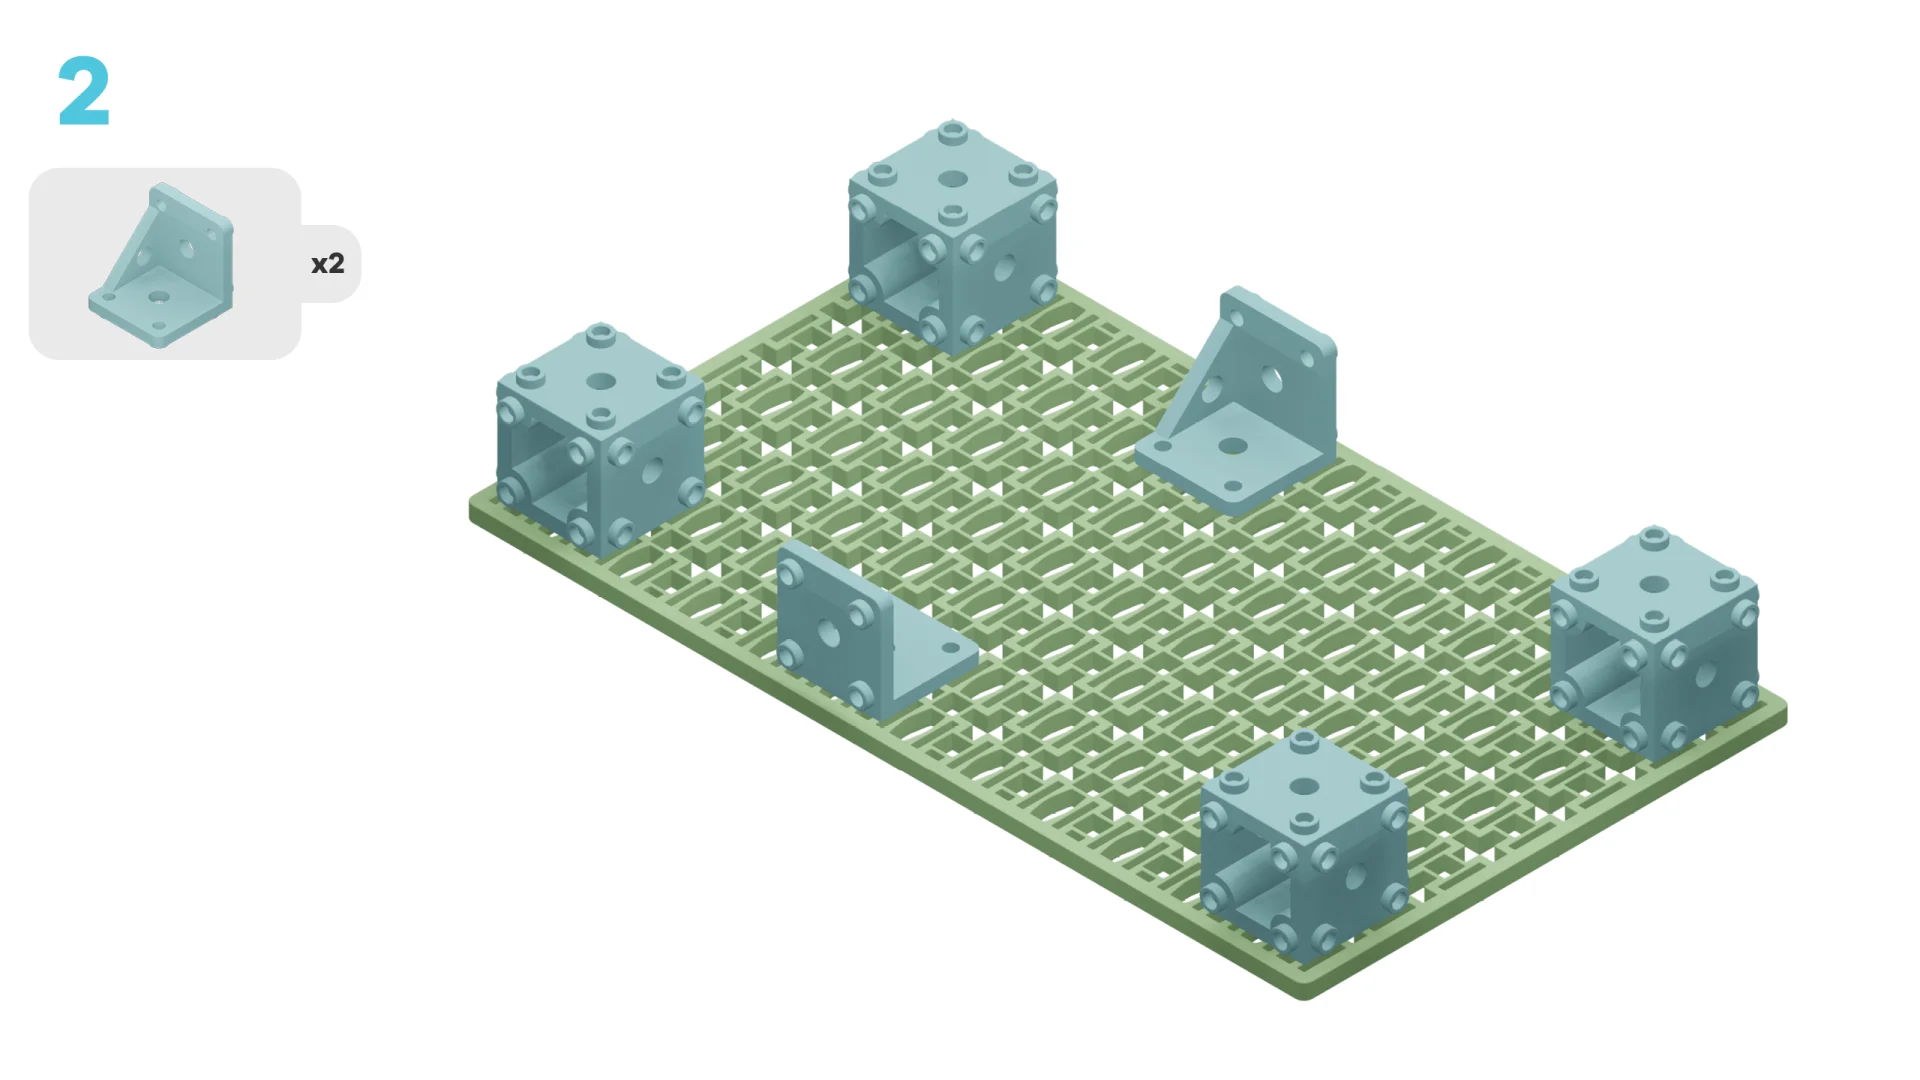
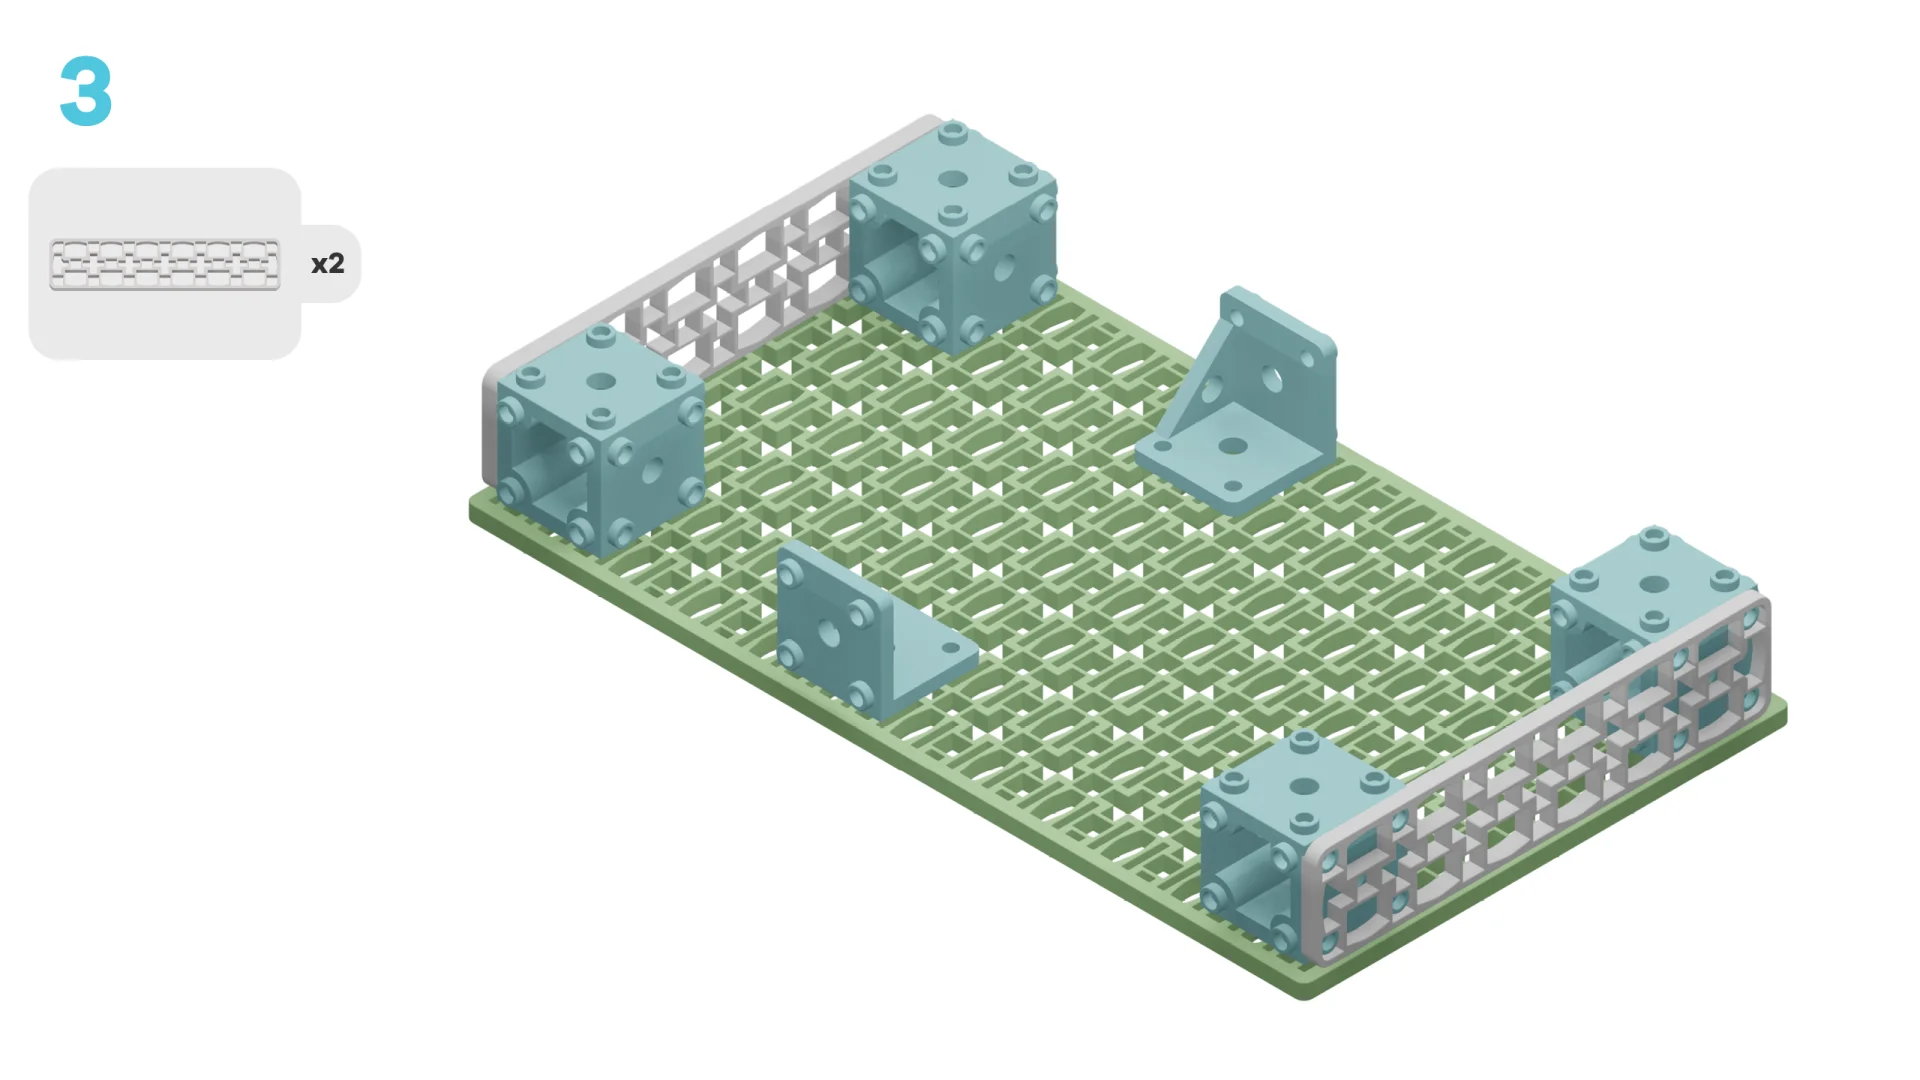
- Build the automated tree seeder
- Add code to make it move
- Modify the tree seeder's code to learn how it works
- Complete a challenge to improve its function
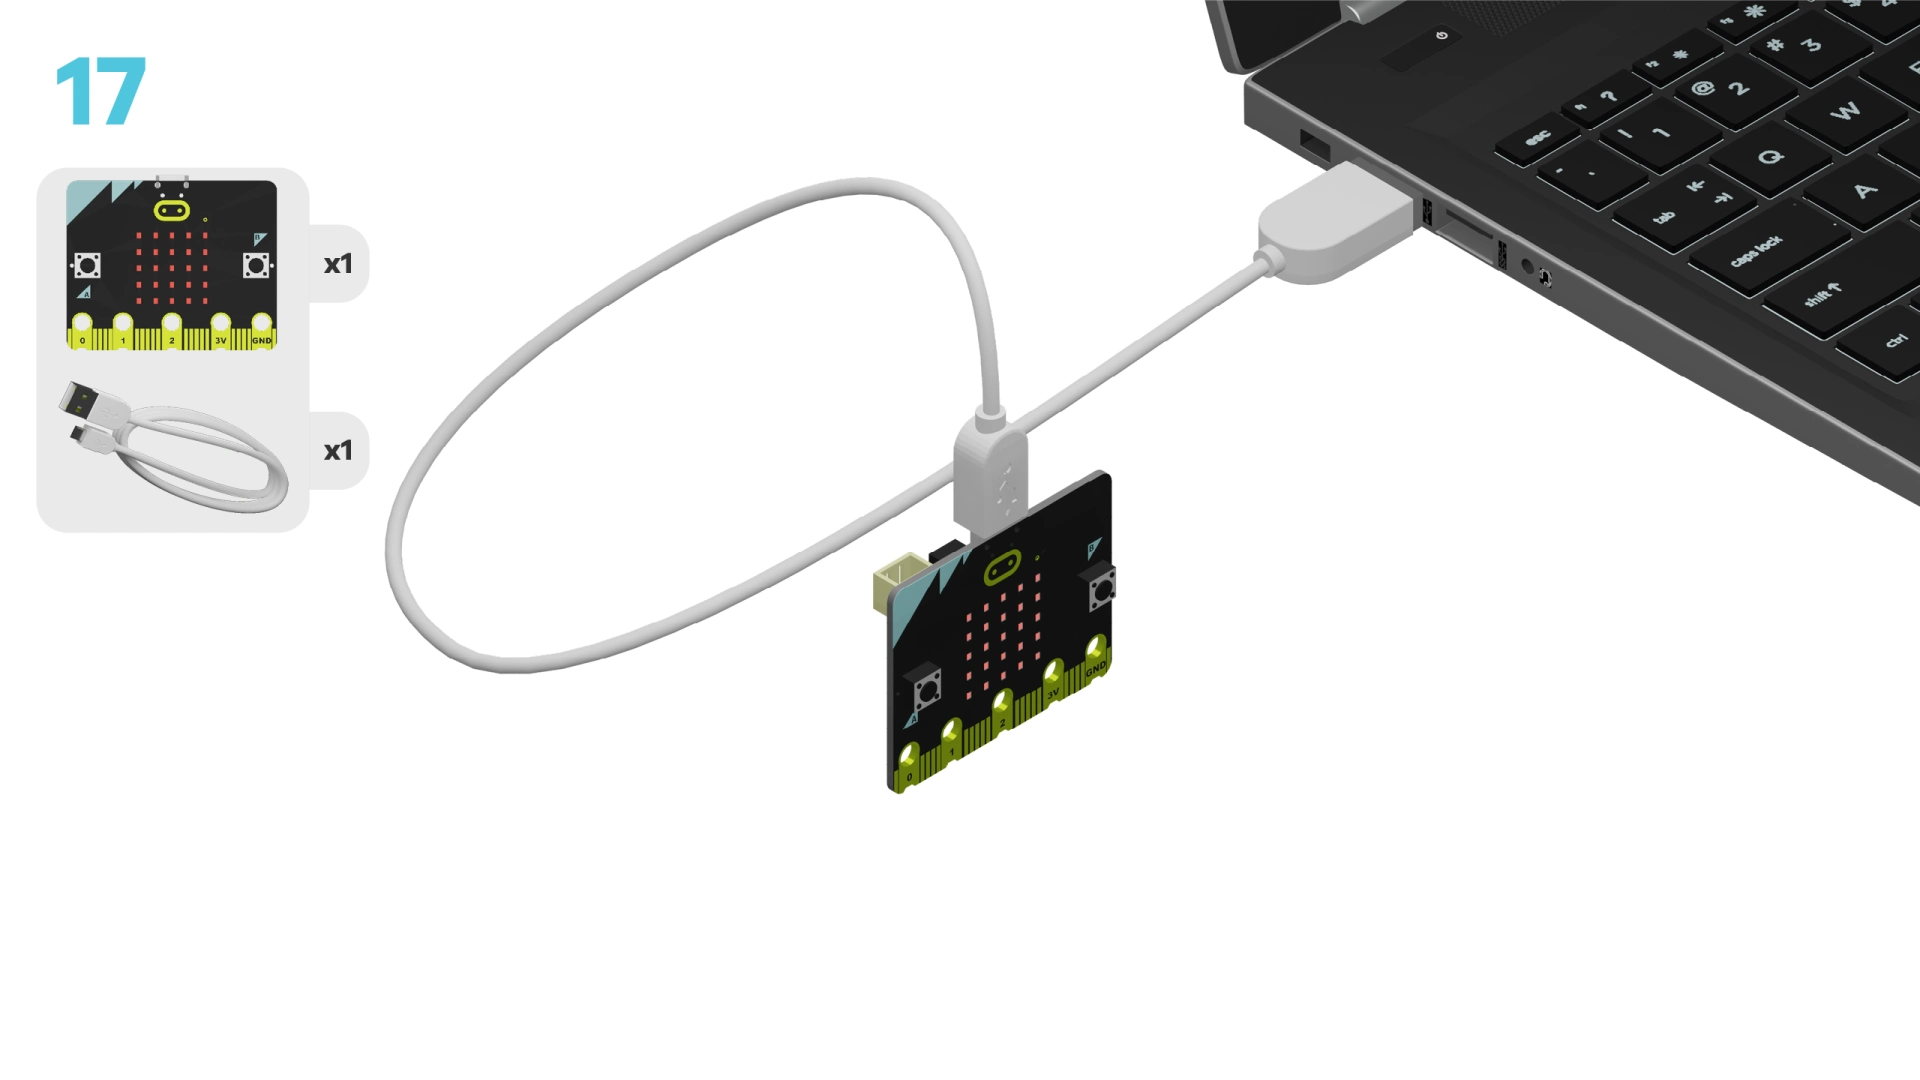
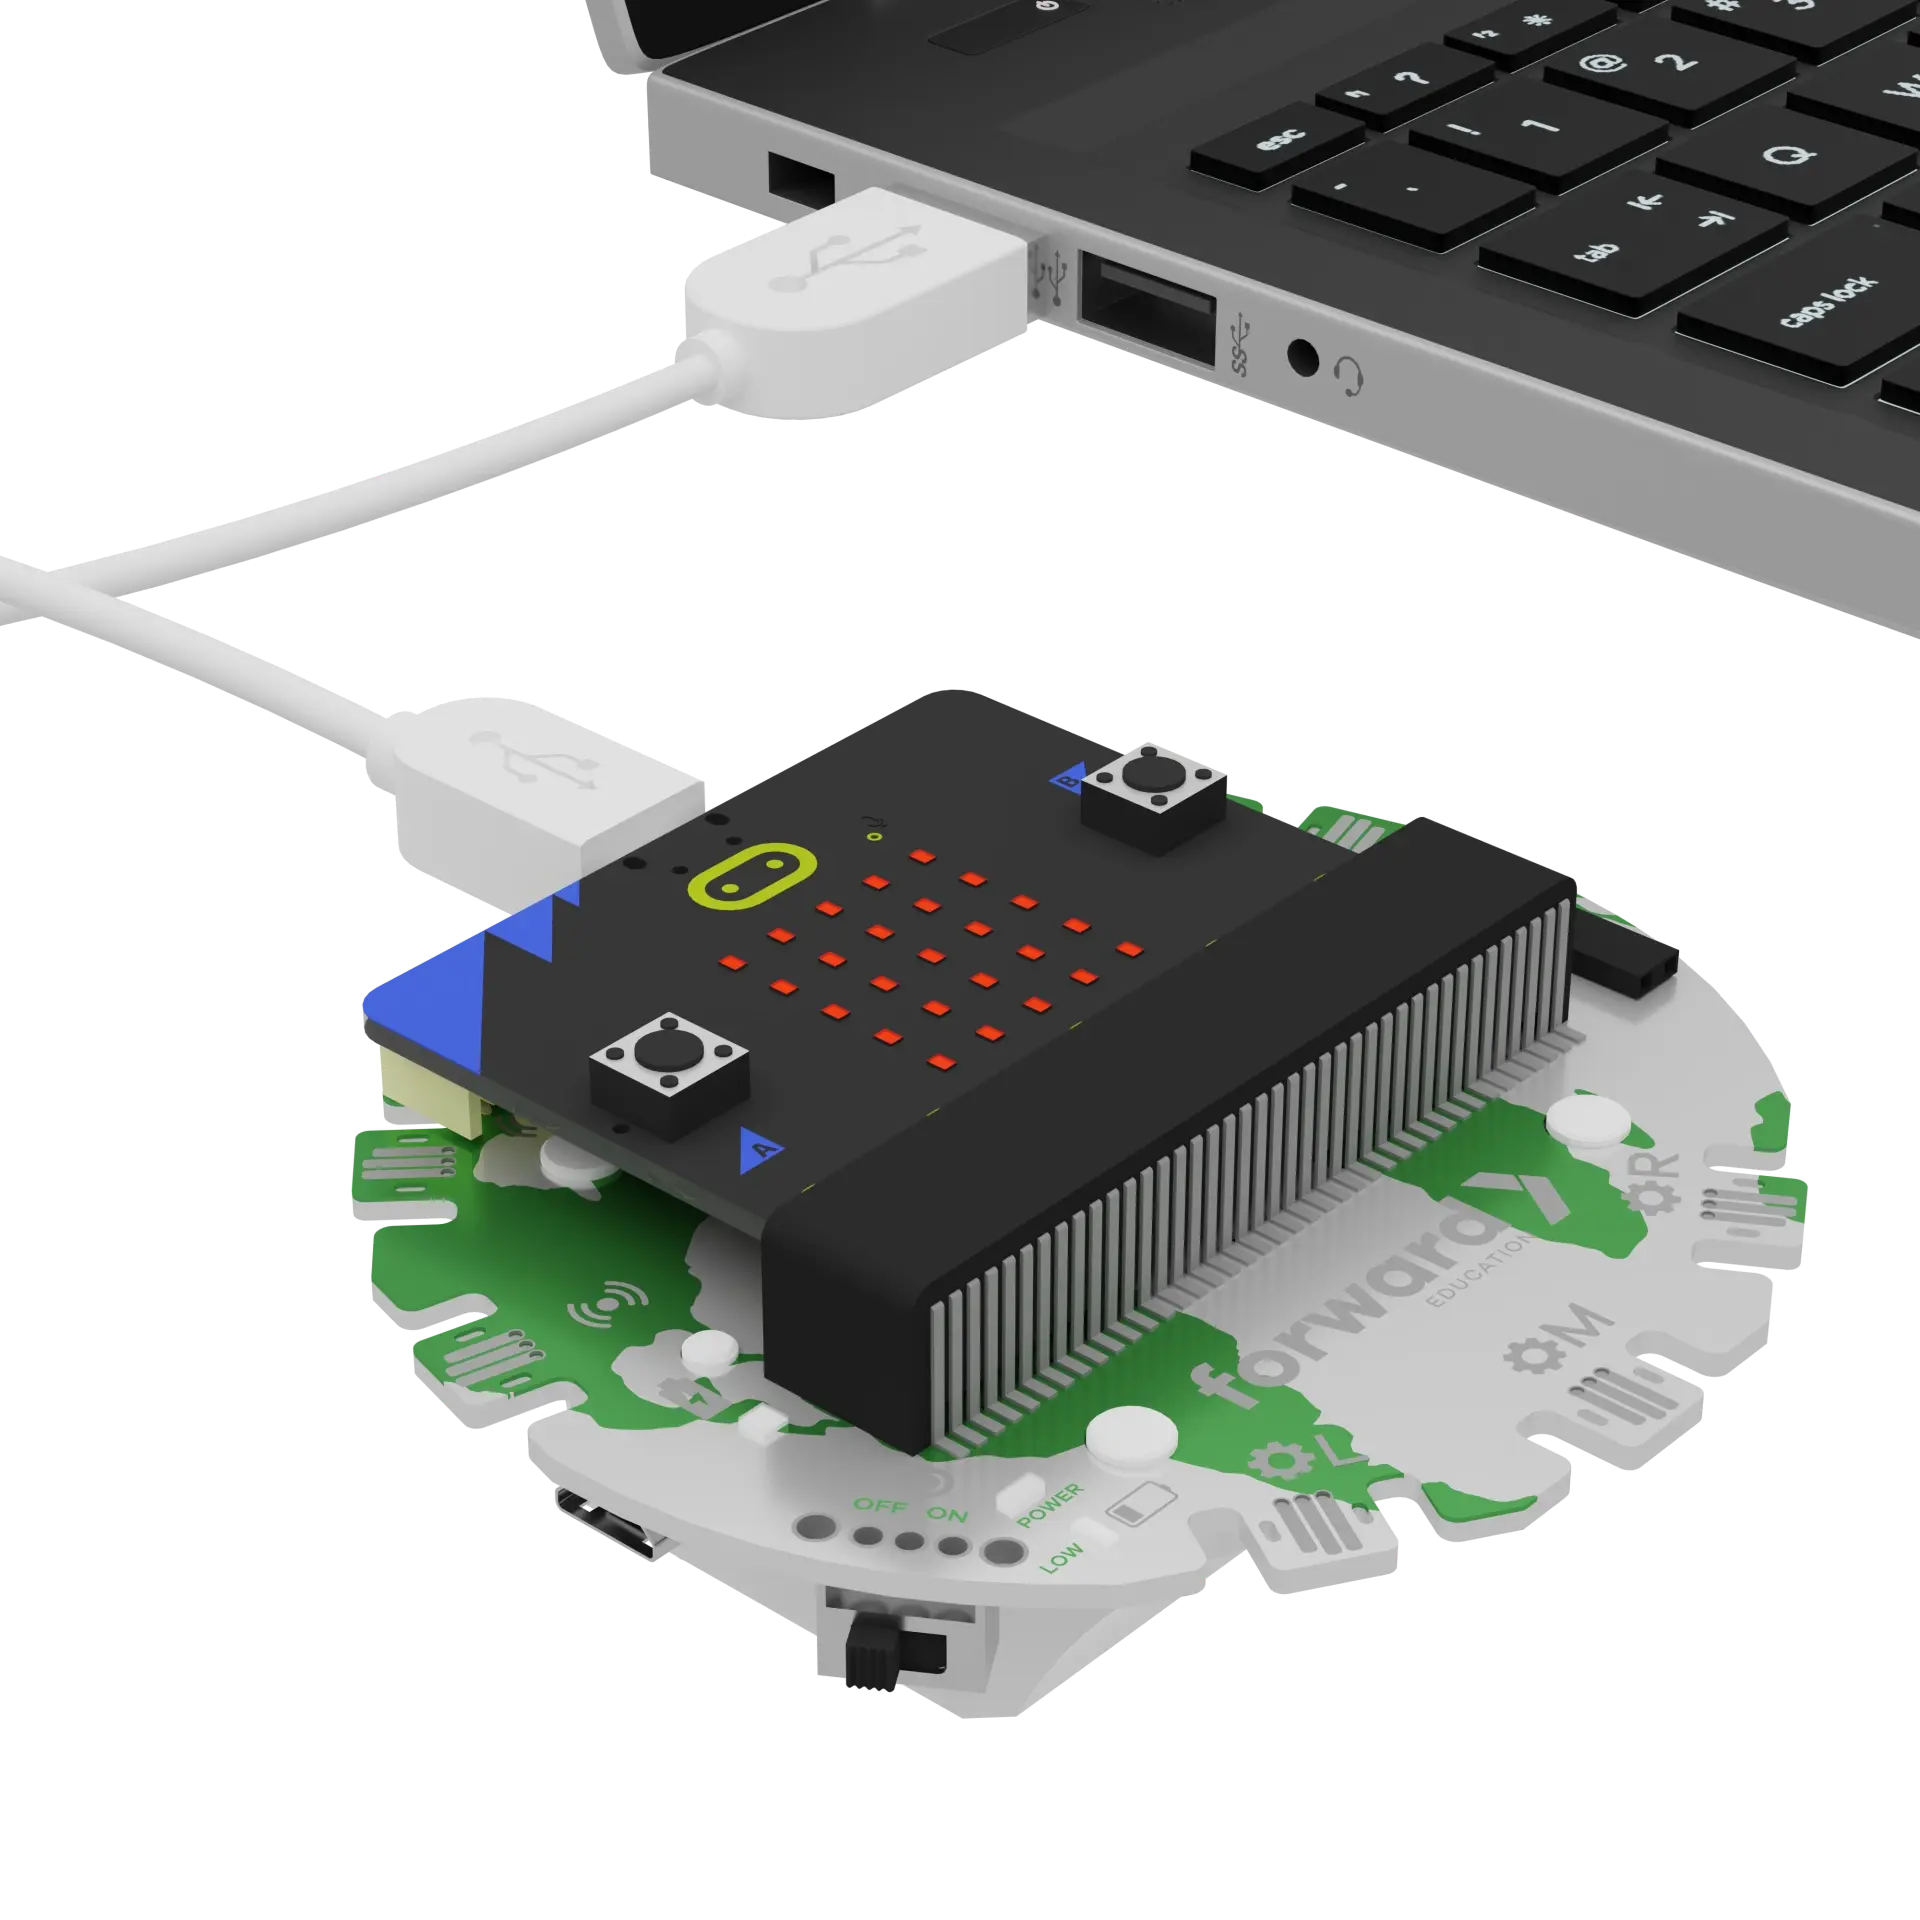
We need to connect our project to the computer to make it come to life with code!
The code will be the instructions that tell our micro:bit what to do.
IMPORTANT! Make sure your Climate Action Kit Breakout Board is turned on and your micro:bit is plugged into your computer.
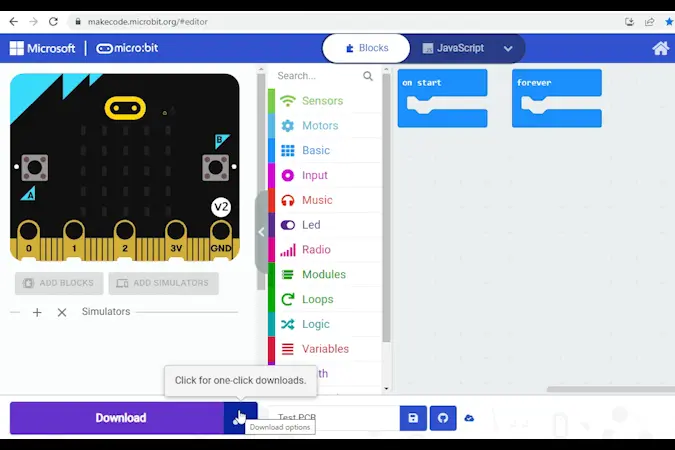
Click the three dots beside the |Download| button, then click on Connect Device.
Next, follow the steps to pair your micro:bit.
Next, click the |Download| button to download the code to your project.
We are now ready to modify our tree seeder!
Tips
- Follow the instructions at the top of the screen.
- When you are ready for more information, click 'Tell me more!'
- If you need help with the code, click the lightbulb!
- After each change, you will need to
|Download|the updated code to your micro:bit.
Think back to the lesson or watch this video.
What should an automated tree seeder be able to do?
~hint Tell me more! The automated tree seeder should be able to:
- Continuously move
- Plant seeds evenly across a field
Different products may have more features, but these two are the minimum requirement. hint~
Let’s test out the tree seeder. Unplug it from the computer. Then, place it on the ground in an open area.
Press 'A'. What do you notice? Do this a few times, if necessary, then document your findings.
~hint Tell me more! Hopefully you noticed that there was indeed a pattern. The tree seeder completed the following steps 4 times in a row:
- Drive forward
- Stop
- Move pencil/arm towards ground
- Stop
- Move pencil/arm away from ground
- Stop hint~
The positional servo motor controls the pencil/arm of our project. Each time it swings back and forth simulates a seed being planted.
Can you identify the blocks of code below that are responsible for this swinging motion?
~hint Tell me more!
- The
||fwdMotors:set middleServo to||blocks control the position of the arm. hint~
input.onButtonPressed(Button.A, function () {
    for (let index2 = 0; index2 < 4; index2++) {
        fwdMotors.drive(fwdMotors.DrivingDirection.Forward, 50)
        basic.pause(1000)
        fwdMotors.stop()
        // @highlight
        fwdMotors.middleServo.fwdSetAngle(0)
        basic.pause(250)
        // @highlight
        fwdMotors.middleServo.fwdSetAngle(45)
        basic.pause(250)
    }
    fwdMotors.stop()
})
let index = 0
index = 0
// @highlight
fwdMotors.middleServo.fwdSetAngle(45)
fwdMotors.setupDriving(
fwdMotors.leftServo,
fwdMotors.rightServo,
10
)
Try changing the value in the first ||fwdMotors:set middleServo to|| block from ‘0 degrees’ to a number between '60 degrees' and '180 degrees'. What do you think will change?
Download your code and test it out. What happened?
~hint Tell me more!
- When the positional servo motor is at '0 degrees', the pencil or pen points downward. When the number is greater than '45 degrees', the pencil moves upwards, away from the ground.
- In this case, no trees were planted. We need the arm to touch the ground to simulate planting a tree! hint~
    for (let index2 = 0; index2 < 4; index2++) {
        fwdMotors.drive(fwdMotors.DrivingDirection.Forward, 50)
        basic.pause(1000)
        fwdMotors.stop()
        // @highlight
        fwdMotors.middleServo.fwdSetAngle(100)
        basic.pause(250)
        fwdMotors.middleServo.fwdSetAngle(45)
        basic.pause(250)
    }
Reset your value to ‘0 degrees’.
    for (let index2 = 0; index2 < 4; index2++) {
        fwdMotors.drive(fwdMotors.DrivingDirection.Forward, 50)
        basic.pause(1000)
        fwdMotors.stop()
        // @highlight
        fwdMotors.middleServo.fwdSetAngle(0)
        basic.pause(250)
        fwdMotors.middleServo.fwdSetAngle(45)
        basic.pause(250)
    }
What do you think will happen if you modify the number in the ||loops:repeat 4 times|| loop? Try it now!
~hint Tell me more!
- The automated tree seeder will now plant a different number of seeds.
- For example: If you change the number to '5', the seeder will plant 5 trees! hint~
input.onButtonPressed(Button.A, function () {
    // @highlight
    for (let index2 = 0; index2 < 5; index2++) {
        fwdMotors.drive(fwdMotors.DrivingDirection.Forward, 50)
        basic.pause(1000)
        fwdMotors.stop()
        fwdMotors.middleServo.fwdSetAngle(0)
        basic.pause(250)
        fwdMotors.middleServo.fwdSetAngle(45)
        basic.pause(250)
    }
    fwdMotors.stop()
})
What do you think will happen if you modify the number in the first ||basic:pause|| block? Try a few different numbers between '200 ms' and '3000 ms'.
What did you observe?
~hint Tell me more!
- The smaller the number is, the closer together the trees will be planted. The larger the number is, the farther trees are planted from one another.
- Change the number back to '1000 ms' once you've completed your tests.
- Don’t notice a change? Don’t forget to re-download the code each time! hint~
    for (let index2 = 0; index2 < 5; index2++) {
        fwdMotors.drive(fwdMotors.DrivingDirection.Forward, 50)
        // @highlight
        basic.pause(200)
        fwdMotors.stop()
        fwdMotors.middleServo.fwdSetAngle(0)
        basic.pause(250)
        fwdMotors.middleServo.fwdSetAngle(45)
        basic.pause(250)
    }
Imagine you own the company that builds these automated tree seeders.
You have a customer that has a few different fields they want to fill with trees. They’d like the trees on Field A to be packed densely together; however, they require a lot of space between the trees grown on Field B.
It would be a lot of work to modify the code for each customer or field. How might we write the code initially so that it is adaptable to these types of requests?
We saw that changing the value in the first ||basic:pause|| block meant we could plant seeds closer together or farther apart.
What if instead of manually changing the code, we included several pre-programmed levels that the user could choose between based on their needs?
Let's assume these levels are: 'Extremely High Density', 'High Density', 'Medium Density', and 'Low Density' seed planting.
We are going to store the values for each level in something known as an array. An array is a list of items. In this case, we are going to create a list of numbers called ‘seedDensity’.
Open the ||array:Array|| category. Create a new array by dragging a ||variables:set list to|| ||array:array of|| block into the ||basic:on start|| block.
Click the down arrow next to ||variables:list||. Select 'Rename variable...' and type 'seedDensity'.
let index = 0
index = 0
let seedDensity = [
0,
1
]
fwdMotors.middleServo.fwdSetAngle(45)
fwdMotors.setupDriving(
fwdMotors.leftServo,
fwdMotors.rightServo,
10
)
What 4 numbers should we add to this array? Assume the first number will represent the 'Low Density' level and the last number will be the 'Extremely High Density' level.
~hint Tell me more! Remember:
- To plant trees far apart (low density), we need the number in the
||basic:pause||block to be large. - To plant trees close together (high density), the number should be small.
- Try something like ‘2000’, ‘1000’, ‘500’, ‘200’. You can press the + button on the block to open up more spaces. hint~
let index = 0
index = 0
let seedDensity = [
2000,
1000,
500,
200
]
fwdMotors.middleServo.fwdSetAngle(45)
fwdMotors.setupDriving(
fwdMotors.leftServo,
fwdMotors.rightServo,
10
)
You can identify a specific item in an array by referring to its index.
The first number in an array has an index of '0', the second number an index of '1', and so on.
~hint Tell me more!
The following is true for the ||variables:seedDensity|| list:
- Index 0 = 2000 = Low Density
- Index 1 = 1000 = Medium Density
- Index 2 = 500 = High Density
- Index 3 = 200 = Extremely High Density hint~
Now we need to allow the user to toggle between these options. We’ve begun this process for you.
Open the ||input:on button B pressed|| event and ||basic:forever|| loop now by clicking on the down arrow next to each. Read this new code. What do you predict it will do?
Test it out by pressing 'B' a few times. Was your prediction correct?
~hint Tell me more!
- There is an variable called
||variables:index||that is set to ‘0’ at the start of the program. - Each time you press ‘B’, the number inside that variable increases by ‘1’ until it reaches ‘3’. At this point, the variable will reset to ‘0’ the next time 'B' is pressed.
- The current value in the
||variables:index||variable is displayed on the micro:bit’s LEDs so the user knows what level they are on. hint~
let index = 0
index = 0

input.onButtonPressed(Button.B, function () {
    if (index < 3) {
        index += 1
    } else {
        index = 0
    }
})

basic.forever(function () {
    basic.showNumber(index)
})
Download your new code.
Press 'B' a few times to set the tree seeder to level 3, then rerun your tree seeding program by pressing 'A'.
Press 'B' to set the level to 1. Rerun your seeding program by pressing 'A'.
What happened? Was this what you expected?
~hint Tell me more!
- You might have expected that changing the level would impact how often we planted seeds. In reality, nothing has changed... yet!
- This is because we need to incorporate the
||variables:index||variable into our tree seeding program. hint~
Drag a ||variables:list|| ||array:get value at|| block from the ||array:Array|| category into the first ||basic:pause|| block.
Be sure to change ||variables:list|| to ||variables:seedDensity||.
    for (let index2 = 0; index2 < 4; index2++) {
        let seedDensity: number[] = []
        fwdMotors.drive(fwdMotors.DrivingDirection.Forward, 50)
        // @highlight
        basic.pause(seedDensity[0])
        fwdMotors.stop()
        fwdMotors.middleServo.fwdSetAngle(0)
        basic.pause(250)
        fwdMotors.middleServo.fwdSetAngle(45)
        basic.pause(250)
    }
At this point, we are constantly pulling the first value in the array because the index is set to ‘0’ in the new ||variables:seedDensity|| ||array:get value at|| block.
Go to the ||variables:Variables|| category and replace the ‘0’ value with ||variables:index||.
~hint Tell me more!
- Now, the micro:bit will pull a different value from the list based on the
||variables:index||or level the user has selected. hint~
for (let index2 = 0; index2 < 4; index2++) {
        fwdMotors.drive(fwdMotors.DrivingDirection.Forward, 50)
        // @highlight
        basic.pause(seedDensity[index])
        fwdMotors.stop()
        fwdMotors.middleServo.fwdSetAngle(0)
        basic.pause(250)
        fwdMotors.middleServo.fwdSetAngle(45)
        basic.pause(250)
    }
Download your new code. Then, test out a few different density levels:
- Set your desired tree density level by pressing 'B'.
- Press 'A' to run the seeding program.
- Repeat with a different density level.
Is the program working as you expected?
Are there any parts of the code you still don't understand? This is your time to explore!
~hint Tell me more! Follow these steps:
- Find a part of the code you'd like to learn more about
- Make a single change to this block (or remove it entirely)
- Download the new code
- Test it out and observe what changed
- Repeat hint~
You've completed the activity!
Think about something in this project that challenged you.
How did you overcome this challenge? How did that make you feel?
In the next step, you can click the |Done| button to finish the tutorial.
