![]()
Desktop platforms, with OpenGL Rendering
![]()
![]()
Mobile and web
![]()
![]()
![]()
Other rendering backends
![]()
![]()
![]()
Other
![]()
![]()
![]()
Hello ImGui is a library that enables quickly write multiplatform apps with the simplicity of a "Hello World" app. It is based on Dear ImGui.
 |
| 10' demo video showcasing multi-platform support and rapid development with Hello ImGui |
- Set up a project in 5 minutes
- Advanced layout handling: handle multiple layouts (each of which will remember the user modifications and the list of opened windows). See demo video
- Embed assets on all platforms
- Power Save mode: reduce FPS when application is idle
- Theme tweaking
- Window geometry utilities (autosize, restore window position)
- Truly multiplatform (Linux, Windows, MacOS, iOS, Android, emscripten)
- Available windowing backends: SDL2, Glfw3
- Available graphics backends: OpenGL3, Metal
The starter template will get you started in 5 minutes, and shows how to embed assets, customize the app icon (etc.), on all platforms.
Save this as hello_world.main.cpp
#include "hello_imgui/hello_imgui.h"
int main(int , char *[])
{
    HelloImGui::Run(
        []{ ImGui::Text("Hello, world!"); }, // Gui code
        "Hello!",                            // Window title
        true                                 // Window size auto
    );
    return 0;
}
Save this as CMakeLists.txt
cmake_minimum_required(VERSION 3.12)
project(helloworld_with_helloimgui)
set(CMAKE_CXX_STANDARD 17)

# Build hello_imgui
# 1/  Option 1: simply fetch hello_imgui during the build
include(FetchContent)
FetchContent_Declare(hello_imgui GIT_REPOSITORY https://github.com/pthom/hello_imgui.git GIT_TAG master)
FetchContent_MakeAvailable(hello_imgui)
# 2/  Option 2: if hello_imgui is available as a submodule for example
# add_subdirectory(path/to/hello_imgui)

# Build your app
hello_imgui_add_app(hello_world hello_world.main.cpp)
Now, build with:
# Build
mkdir build && cd build && cmake .. && cmake --build . -j 4
# Run the build hello_world app
./hello_world
Optionally, copy some assets beside your app's CMakeLists.txt, and they will be embedded in the app. See Embed assets for more info.
That's it!
Note about hello_imgui_add_app
hello_imgui_add_app is a helper function, similar to cmake's "add_executable" which will:
- automaticaly link the target to the required libraries (hello_imgui, OpenGl, glad, etc)
- embed the assets
- perform additional customization (app icon and name on mobile platforms, etc)
Usage:
hello_imgui_add_app(app_name file1.cpp file2.cpp ...)![]() ImGuiBundle is based on HelloImGui and provides lots of additional widgets (imgui, implot, imgui-node-editor, ImFileDialog, ImGuiColorTextEdit, imgui_md), as well as complete python bindings.
ImGuiBundle is based on HelloImGui and provides lots of additional widgets (imgui, implot, imgui-node-editor, ImFileDialog, ImGuiColorTextEdit, imgui_md), as well as complete python bindings.
See ImGuiBundle's C++ demos and Python demos.
HelloImGui is extremely easy to use: there is one main function in the API, with three overloads.
HelloImGui::Run() will run an application with a single call.
Three signatures are provided:
-
HelloImGui::Run(RunnerParams &): full signature, the most customizable version. Runs an application whose params and Gui are provided by runnerParams. -
HelloImGui::Run(const SimpleRunnerParams&): Runs an application, using simpler params. -
HelloImGui::Run(guiFunction, windowTitle, windowSize, windowSizeAuto=false, restoreLastWindowGeometry=false, fpsIdle=10)
Other utilities:
-
HelloImGui::GetRunnerParams(): a convenience function that will return the runnerParams of the current application -
FrameRate(durationForMean = 0.5): Returns the current FrameRate. May differ from ImGui::GetIO().FrameRate, since one can choose the duration for the calculation of the mean value of the fps -
ImGuiTestEngine* GetImGuiTestEngine(): returns a pointer to the global instance of ImGuiTestEngine that was initialized by HelloImGui (iif ImGui Test Engine is active).
Although the API is extremely simple, it is highly customizable, and you can set many options by filling the elements in the RunnerParams struct, or in the simpler SimpleRunnerParams, or even by giving a subset of params to HelloImGui::Run.
Click on the image below to access the full API doc

More info about the how to handle complex layouts in the docking API.
Click on the images below to run the demonstration applications.
| Hello, World | Advanced Docking | ImGui Manual |
|---|---|---|
 |
 |
 |
| Code | Code | ImGui Manual is a fully interactive manual for ImGui. Code |

Anything in the assets/ folder located beside the app's CMakeLists will be embedded in the app:
└── hello_globe.main.cpp
├── CMakeLists.txt
├── assets/
│    └── world.jpg
(even on iOS and emscripten).
Dear ImGui uses the Immediate Gui paradigm: each button, each widget returns true if the user interacted with it.
hello_globe.main.cpp
#include "hello_imgui/hello_imgui.h"
int main(int , char *[])
{
    auto guiFunction = []() {
        ImGui::Text("Hello, ");                    // Display a simple label
        HelloImGui::ImageFromAsset("world.jpg");   // Display a static image
        if (ImGui::Button("Bye!"))                 // Display a button
            // and immediately handle its action if it is clicked!
            HelloImGui::GetRunnerParams()->appShallExit = true;
     };
    HelloImGui::Run(guiFunction, "Hello, globe", true);
    return 0;
}The C++ demo file hello_imgui_demodocking.main.cpp demonstrates:
- How to handle complex layouts: you can define several layouts and switch between them: each layout which will remember the user modifications and the list of opened windows
- How to use theming
- How to store you own user settings in the app ini file
- How to add a status bar and a log window
- How to set an adaptative FPS for your application (to reduce CPU usage)
You can try this demo online via an emscripten web demo. It is also available in python, inside Dear ImGui Bundle
Also, see this video that give more explanations on how to handle multiple complex layouts

The C++ demo file hello_custom_background.main.cpp demonstrates how to use a custom 3D background.
Anything in the assets/ folder located beside the app's CMakeLists will be embedded
on mobile devices and emscripten, i.e. they will be bundled together with the app;
and you can access them via assetFileFullPath(const std::string& assetRelativeFilename).
Typical content of the assets/ folder:
assets/
├── fonts/
├── DroidSans.ttf                 # default fonts
│    └── fontawesome-webfont.ttf  # used by HelloImGui
├── images/
│    ├── whatever.jpg             # add any file you like in whatever folder you like
├── app_settings/
│    ├── ...                      # see App customization
The default fonts are available inside hello_imgui_assets.
The subfolder assets/app_settings located beside your app's CMakeLists can store some settings: app icon, app name, etc.
Example:
assets/
├── app_settings/
│    ├── icon.png          # If present, this will be used as the app icon.
│    │                     # Tt should be a square image, of large size, at least 256x256.
│    │                     # This works on macOS, iOS, windows, linux, and emscripten
│    │                     # and it will automatically
│    │                     # be converted to the correct format.
│    │
│    ├── apple/
│    │    ├── Info.plist    # Will be used as the app Info.plist for iOS and macOS
│    │    │                      # (if absent, HelloImGui will provide a default one)
│    │    │
│    │    ├── Info.ios.plist     # (optional, used on iOS if present)
│    │    ├── Info.macos.plist   # (optional, used on macOS if present)
│    │
│    └── emscripten/
│        ├── shell.emscripten.html # Emscripten shell file
│        │                         #   (this file will be cmake "configured"
│        │                         #    to add the name and favicon)
│        └── custom.js             # Any custom file here will be deployed
│                                  #   in the emscripten build folder
Table of contents
- Hello ImGui
- Full usage instructions and API
- Embed assets
- App customization
- Build instructions
- Supported platforms and backends
- Clone the repository
- Easy build on desktop platforms using Glfw
- Custom build: select your preferred backend
- Build for Windows: use
int main(int, char**) - Build instructions for iOS
- Build instructions for emscripten
- How to build terminal executables under macOS
- Build and deploy instructions for Android
- Real world examples
- Online interactive development platform
Platforms: Windows, Linux, OSX, iOS, Emscripten, Android (poorly supported)
Backends:: SDL2 + OpenGL 3 or OpenGLES3 for mobile devices, Glfw3 + OpenGL 3
git clone https://github.com/pthom/hello_imgui.git
cd hello_imgui
git submodule update --initOn Desktop platforms (Linux, MacOS, Windows), if you do not specify any backend option, HelloImGui will automatically download Glfw and link with it.
mkdir build
cd build
cmake ..
make -jIn order to select your own backend, use one of the cmake options below:
cmake .. -DHELLOIMGUI_USE_GLFW_OPENGL3=ON
cmake .. -DHELLOIMGUI_USE_SDL_OPENGL3=ONUnder windows, Hello ImGui will automatically provide a WinMain() function that will call main, and expects its signature to be int main(int, char**). You may get a linker error if your main function signature is for example int main().
You can disable this via cmake by passing -DHELLOIMGUI_WIN32_AUTO_WINMAIN=OFF as a command line cmake option. In this case, write your own WinMain under windows.
Warning: if using SDL, you will need to #define SDL_MAIN_HANDLED before any inclusion of SDL.h (to refrain SDL from #defining #define main SDL_main)
"SDL + OpenGL ES3" is currently the preferred backend for iOS.
This project uses the ios-cmake toolchain which is a submodule in the folder hello_imgui_cmake/ios-cmake.
- First, you need to download SDL : launch tools/sdl_download.sh, which will download SDL into a symlink inside "external/SDL"
.tools/sdl_download.shAlternatively, download SDL2-2.28.5.tar.gz and extract it into external/SDL.
- Launch cmake with correct team and bundle url parts:
Adapt the command below, by:
- adding your own development team Id after
-DCMAKE_XCODE_ATTRIBUTE_DEVELOPMENT_TEAM=, - setting HELLO_IMGUI_BUNDLE_IDENTIFIER_URL_PART (for example
-DHELLO_IMGUI_BUNDLE_IDENTIFIER_URL_PART=com.org_name_or_email) - setting the correct platform (-DPLATFORM): see https://github.com/leetal/ios-cmake (-DPLATFORM=OS64COMBINED will build for iOS and its simulator).
mkdir build_ios_sdl
cd build_ios_sdl
cmake .. \
  -GXcode \
  -DCMAKE_TOOLCHAIN_FILE=../hello_imgui_cmake/ios-cmake/ios.toolchain.cmake \
  -DHELLOIMGUI_USE_SDL_OPENGL3=ON \
  -DPLATFORM=OS64COMBINED \
  -DCMAKE_XCODE_ATTRIBUTE_DEVELOPMENT_TEAM=... \
  -DHELLO_IMGUI_BUNDLE_IDENTIFIER_URL_PART=... \
..emscripten is a toolchain for compiling to asm.js and WebAssembly, built using LLVM, that lets you run C and C++ on the web at near-native speed without plugins.
You can either install emsdk following the instruction on the emscripten website or you can use the script tools/emscripten/install_emscripten.sh.
../tools/emscripten/install_emscripten.shThis script will download and install emscripten into ~/emsdk
- Add emsdk to your shell path;
You need to source the script ~/emsdk/emsdk_env.sh
source ~/emsdk/emsdk_env.sh- Run cmake, using "emcmake":
mkdir build_emscripten
cd build_emscripten
emcmake cmake ..- Build
make -j 4- Test your emscripten application
You will need a web server. Python provides a basic web server that is easy to usen which you can launch like this:
cd build_emscripten
python3 -m http.server
Open a browser, and navigate to http://localhost:8000.
For example, the docking demo will be available at http://localhost:8000/src/hello_imgui_demos/hello_imgui_demodocking/hello_imgui_demodocking.html
Refer to the emscripten docs
By default, the application will be presented inside an empty html page. You can adapt this page by modyfing the "shell": copy the file hello_imgui_cmake/emscripten/shell.emscripten.html into your app source dir, and adapt it to your needs.
If you prefer to build regular terminal executables (not app bundles), use the cmake option -DHELLOIMGUI_MACOS_NO_BUNDLE=ON.
The Android version uses SDL + OpenGLES3.
Note: The Android version is currently not actively maintained.
export ANDROID_HOME=/path/to/AndroidSdk
export ANDROID_NDK_HOME=/path/to/AndroidNdk
For example (MacOS):
export ANDROID_HOME=/Users/Me/Library/Android/sdk
export ANDROID_NDK_HOME=/Users/Me//Library/Android/sdk/ndk/21.3.6528147
If ANDROID_NDK_HOME is unset, by default, the scripts will look for Android-ndk inside $ANDROID_HOME/ndk-bundle.
The script tools/android/cmake_arm-android.sh will invoke cmake with the android toolchain, and also create an Android Studio project which
is multiarch (arm64-v8a, armeabi-v7a, etc), via the option -DHELLOIMGUI_CREATE_ANDROID_STUDIO_PROJECT=ON (see tools/android/_impl_cmake_android.sh)
Run the following commands:
mkdir build_android
cd build_android
../tools/android/cmake_arm-android.sh ..
Your build directory will now look like this:
build_android/
├── CMakeCache.txt
├── ...
├── hello-imgui-demo-classic_AndroidStudio/
├── hello_imgui_demo_minimal_AndroidStudio/
├── hello_imgui_demodocking_AndroidStudio/
├── hello_world_AndroidStudio/
├── ...
The folders "xxxx_AndroidStudio" contain Android Studio projects, which you can use to build and debug your app.
You can now open (for example) the project hello_imgui_demodocking_AndroidStudio with Android Studio and run it / debug it.
You can also build the project manually via gradlew like this:
export JAVA_HOME=/Library/Java/JavaVirtualMachines/adoptopenjdk-8.jdk/Contents/Home
cd hello_imgui_demodocking_AndroidStudio
./gradlew build
Note: (you need to first set JAVA_HOME to the correct java version (Android requires exactly jdk8), the path given here is for MacOS users, where adoptopenjdk provides the correct version)
You can also install the app via command line, like this:
./gradlew installDebugSee intructions in Hello ImGui Template.
See Gallery
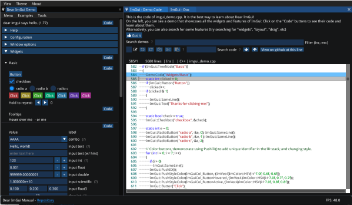
ImGui Manual is an interactive manual for Dear ImGui, which uses Hello ImGui.
Just click on the image below to open it:
Dear ImGui Bundle is a bundle for Dear ImGui, including various powerful libraries from its ecosystem. It is based on HelloImGui.
You can test developping with Hello ImGui in 1 minute, without even installing anything, thanks to Gitpod.io's online development platform: Open Hello ImGui inside Gitpod (58 seconds demo video on youtube)