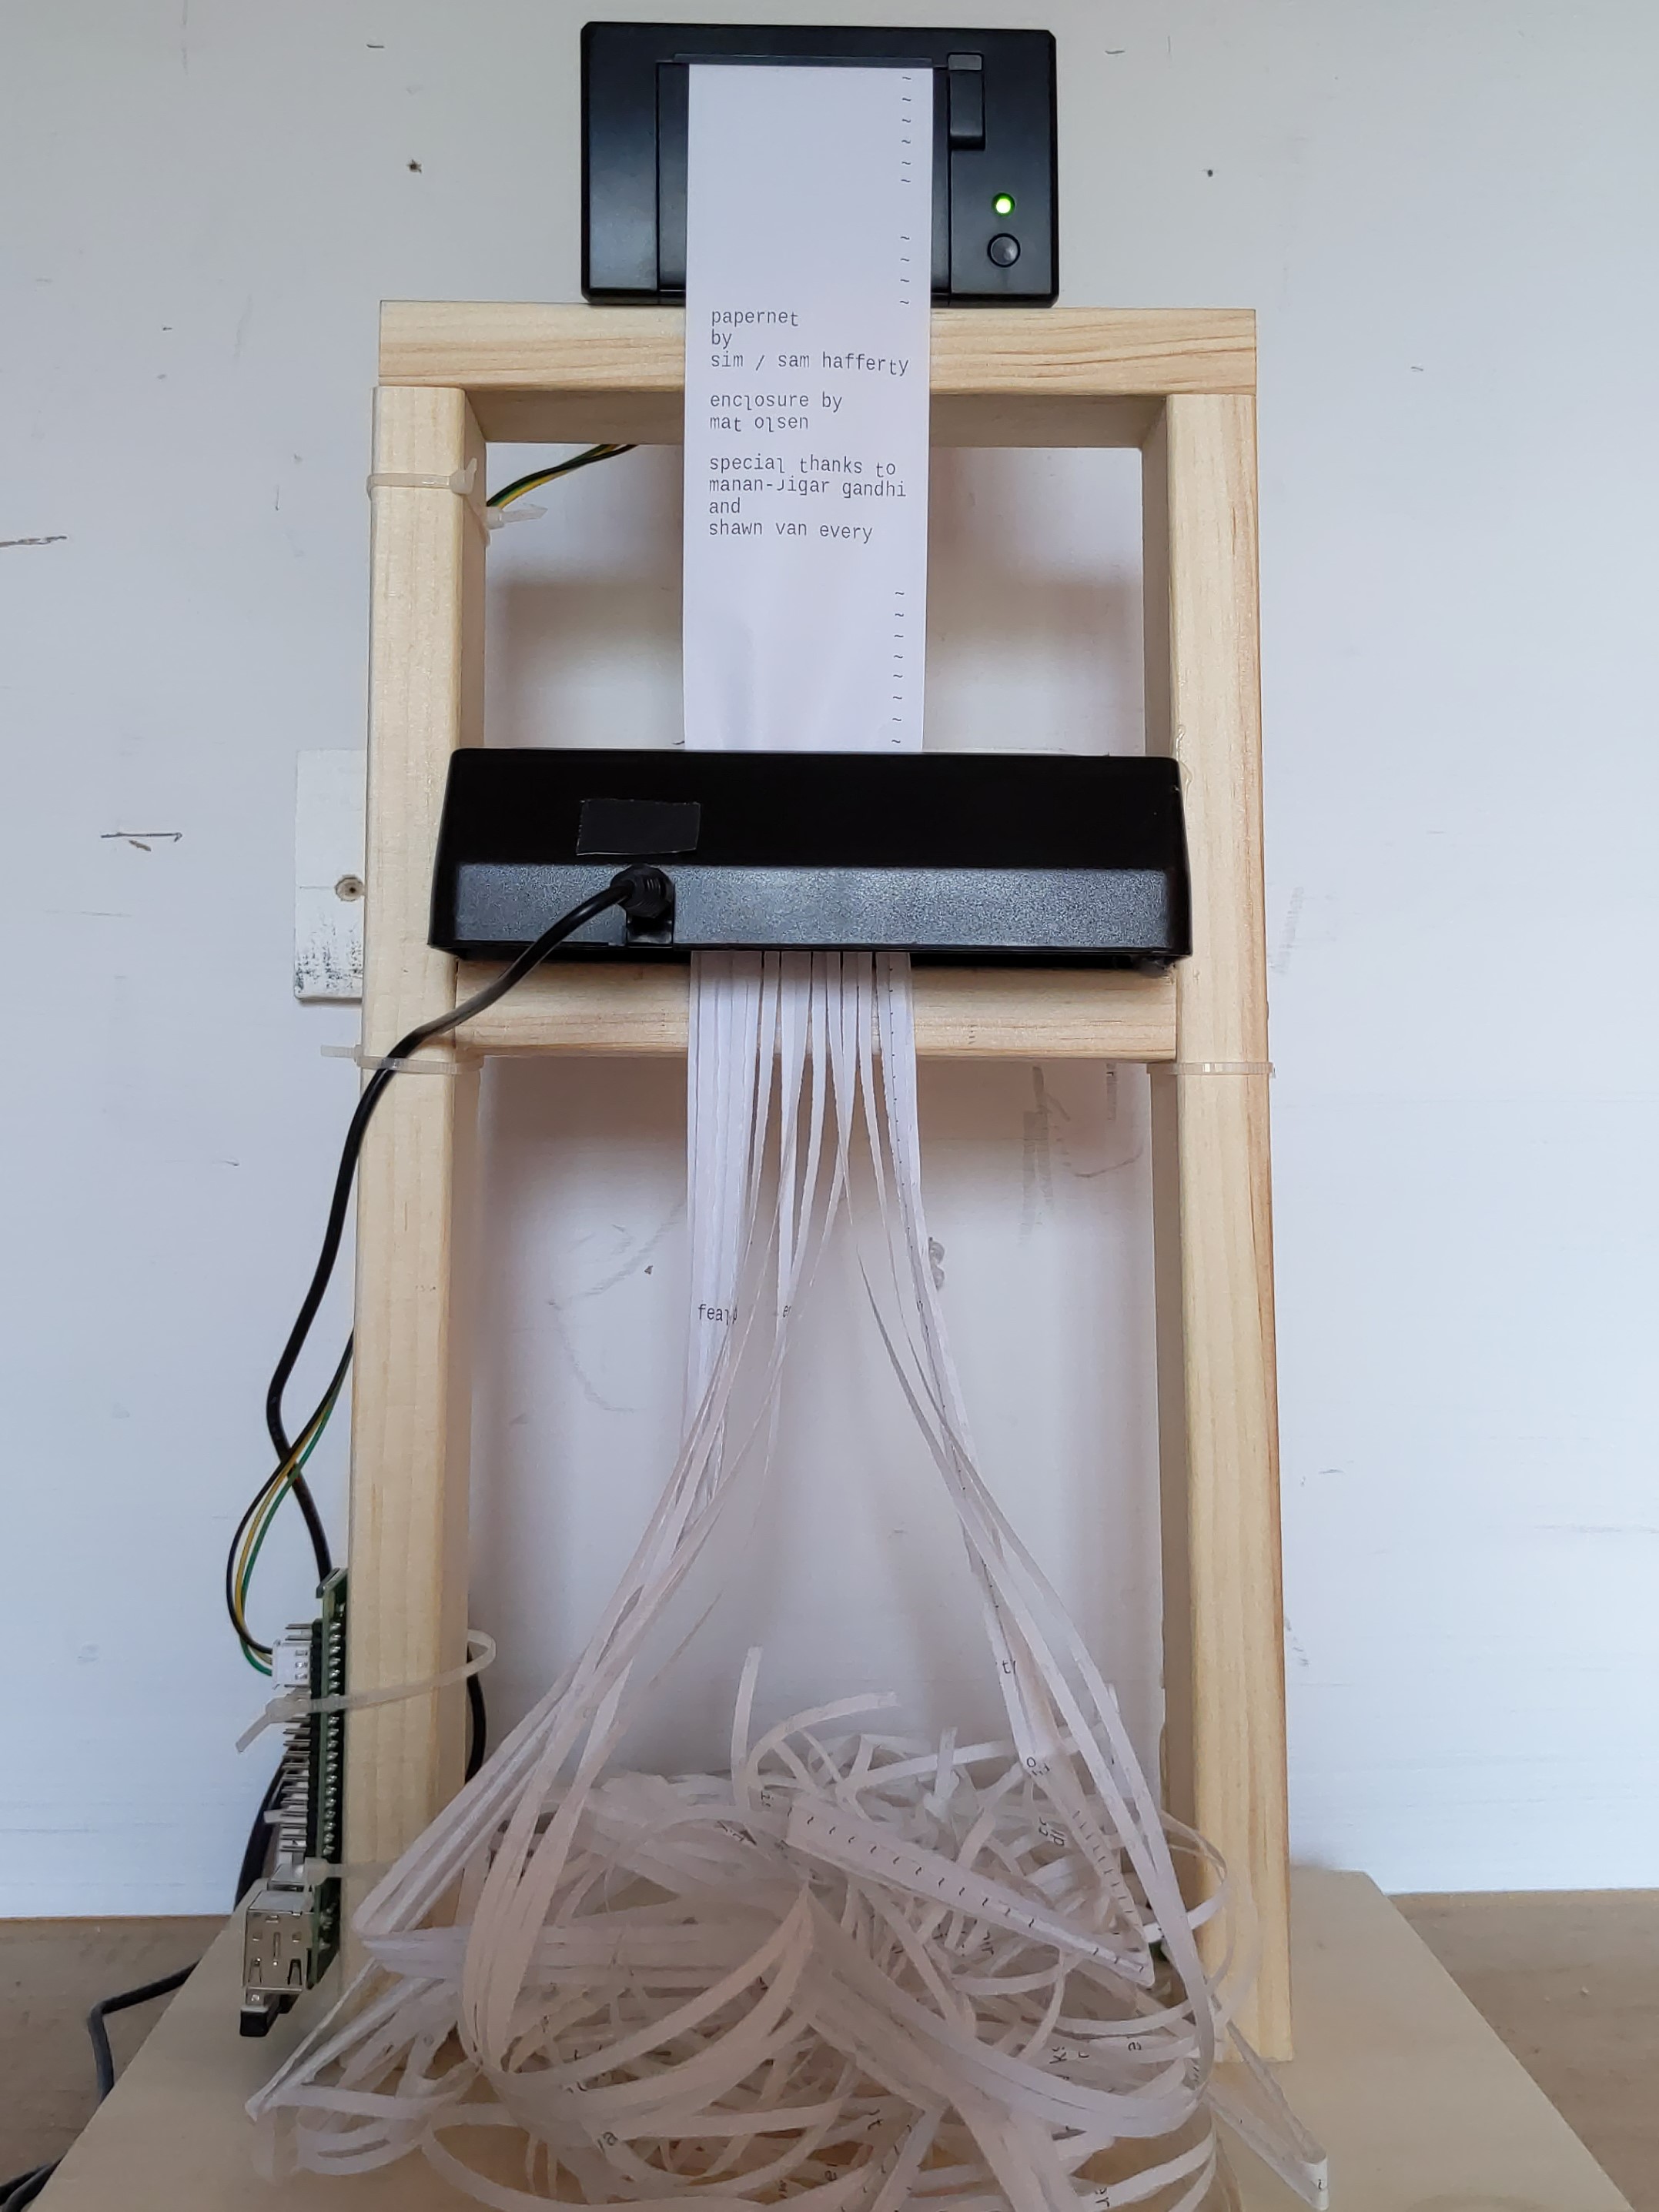
- Raspberry Pi [RPI] w/ Raspberry Pi OS (full-version)
- TTL Thermal Printer (adafruit mini thermal printer recommended) w/ paper refill rolls
- paper shredder (any shredder will do - you can find mini electric and mechinical ones online for less than $20)
- Secure a domain name (ex: website.com, internet.net, etc.) or sub-domain & certificate to enable HTTPS security for your server.
- Students can recieve 1-year of a free domain name (& certificate as well) via the GitHub Student Developer Pack offers.
- Anyone can recieve a free certificate for their domain using Certbot by the Electronic Frontier Foundation.
- Once you have a domain, find the IP address of your RPI & attach your domain to it using your domain provider's admin panel.
- NOTE: If you want your papernet to be able to recieve messages from outside of your home network you may need to look into port-forwarding or tunneling. Do your research and note security risks of exposing your home network to the public internet.
- Once that is all settled, retrieve your certificate & generated key and place it in a non-public (very important) directory on your RPI.
- Git pull this repo & enter the paths to your printer, certificate & key where noted.
- If this is your first time working with a RPI, see the linked guide to set up your Pi with Raspberry Pi OS.
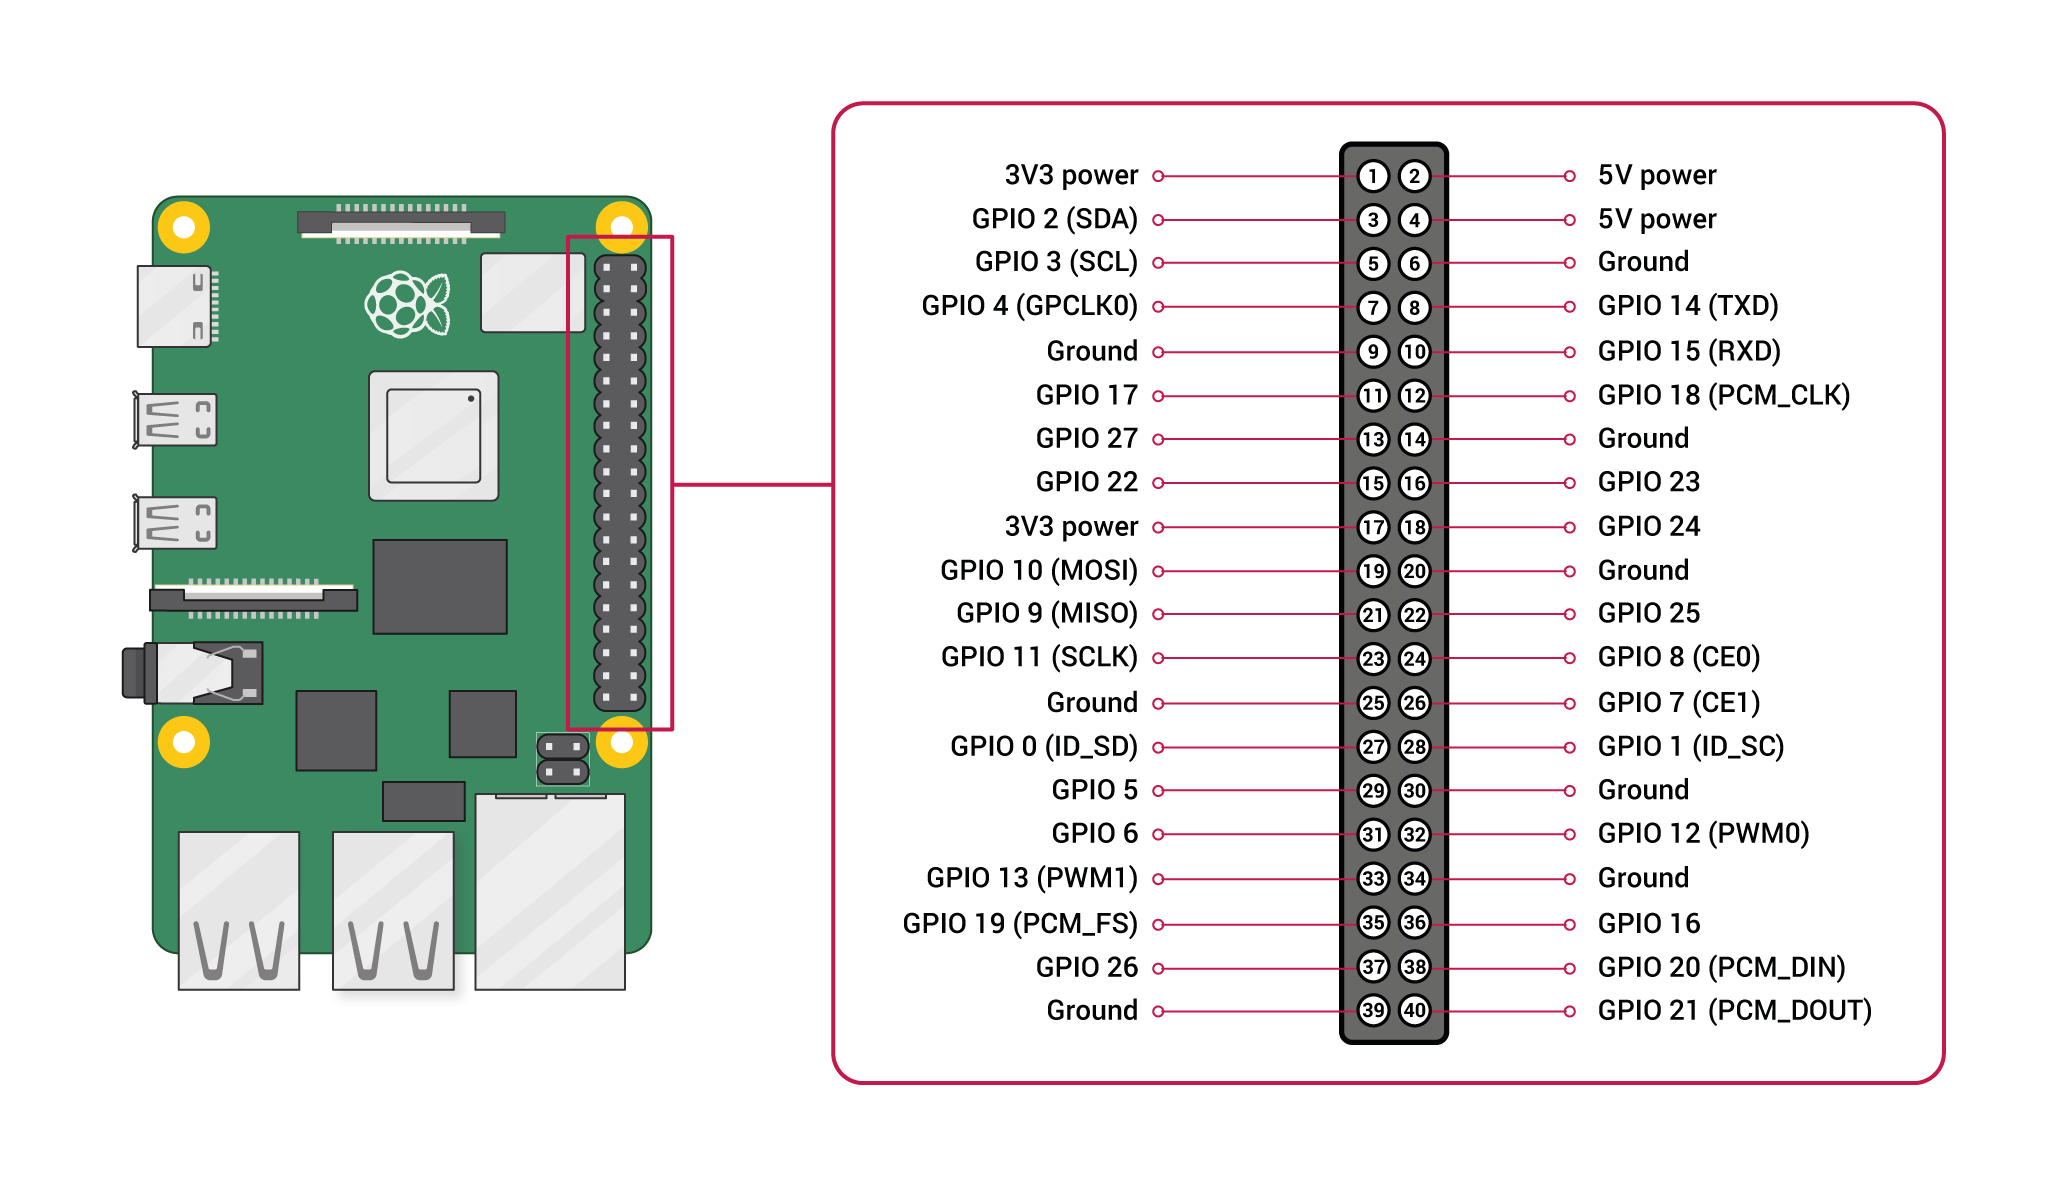
- with both the RPI and printer unpowered - attach the thermal printer. The ground, RX & TX pins pictured below are where you want to connect the two. Black to ground, Yellow to TX, Green to RX.
- Time to power it all on so you can configure & test your printer! If your printer came with a test printout in the box, look at it closely for voltage and baud rate. Either way follow steps in the Adafruit tutorial linked here to enable printing via lp & over the network on your printer. Be sure to only follow steps relevant for TTL printers - USB steps do not apply.
- Note: if your printer is still printing gibberish try making sure the voltage is correct & rebooting.
- Now that your thermal printer is all set up, time to run the server & give it a try! With the thermal printer & shredder powered on, run the node server from your RPI.
- Lastly, navigate to your domain or sub-domain on any computer or smartphone on your network to send a message & watch it shred ~
That's the gist! Feel welcome to reach out with any Qs.

