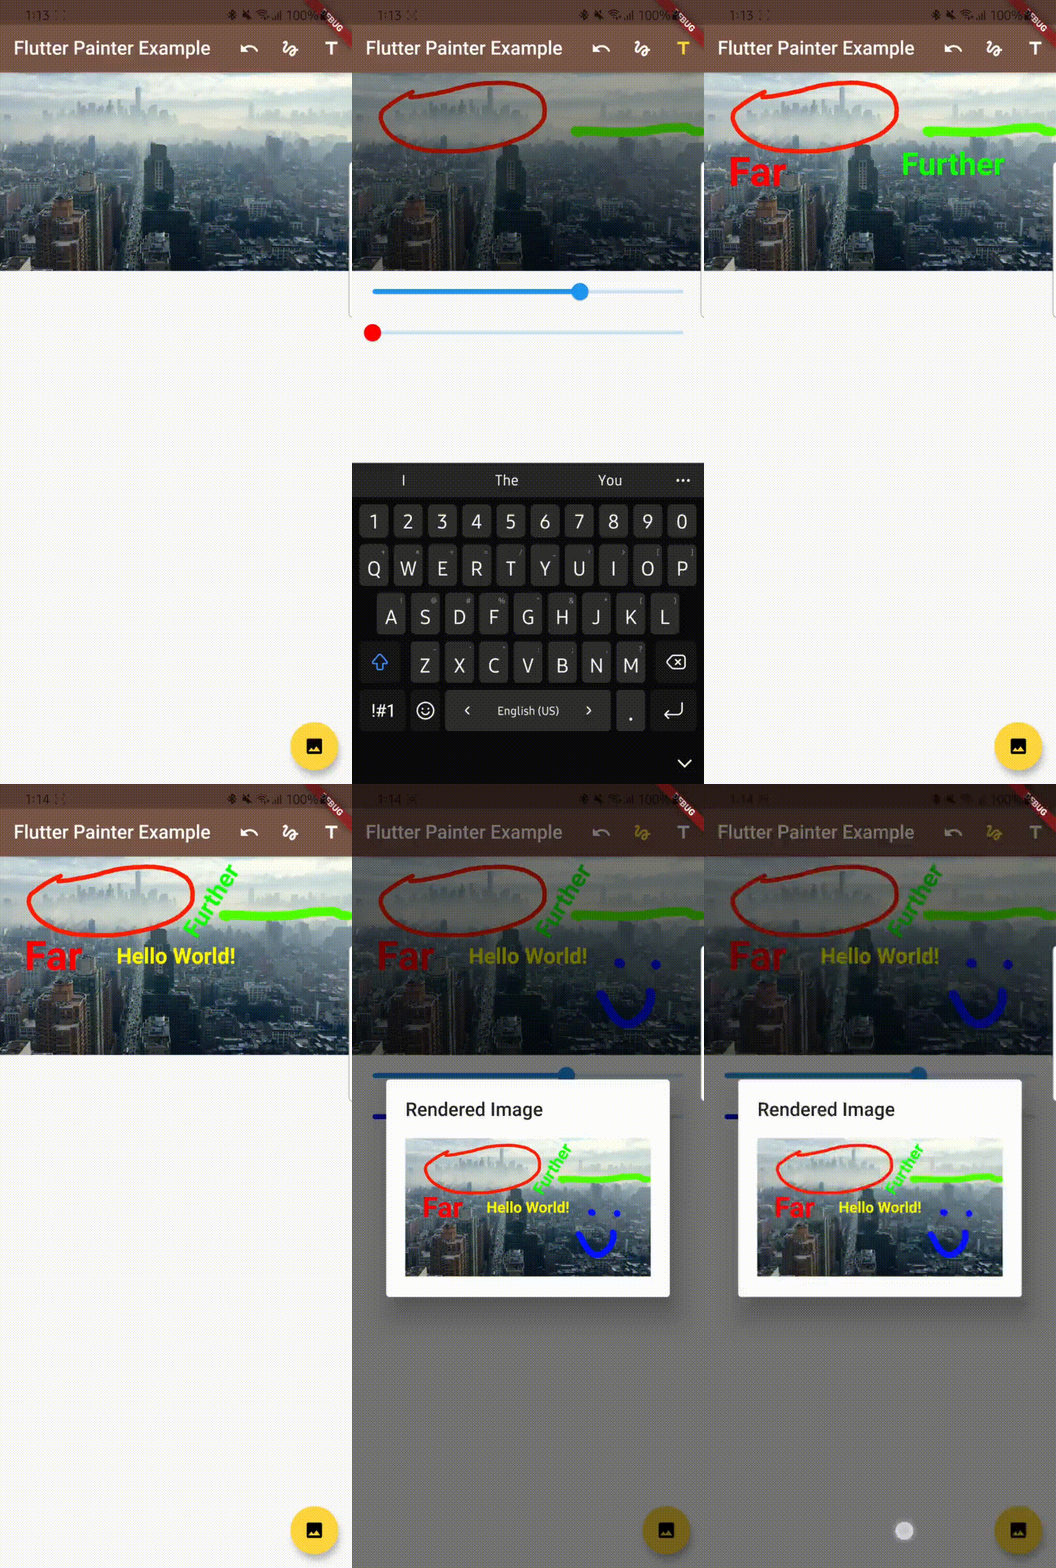
A pure-Flutter package for painting.
flutter_painter provides you with a widget that can be used to draw on it. Right now, it supports:
- Free-style drawing: Scribble anything you want with any width and color.
- Text: Add text of any
TextStyleonto the drawing and control its position, size and rotation in a way you're familiar with with other applications.
In flutter_painter, these are called drawables.
flutter_painter also allows you to choose a color or an image for the background of your drawing. You can export your painting as an image.
First, you'll need a PainterController object. The PainterController controls the different drawables, the background you're drawing on and provides the FlutterPainter widget with the settings it needs. Then, in your UI, use the FlutterPainter widget with the controller assigned to it.
class ExampleWidget extends StatefulWidget {
  const ExampleWidget({Key? key}) : super(key: key);

  @override
  _ExampleWidgetState createState() => _ExampleWidgetState();
}

class _ExampleWidgetState extends State<ExampleWidget> {
  PainterController controller = PainterController();

  @override
  Widget build(BuildContext context) {
    return SizedBox(
      width: 300,
      height: 300,
      child: FlutterPainter(controller: controller,),
    );
  }
}
Note that FlutterWidget does not define its own constraints on its size, so it is advised to use a widget that can provide its child with size constraints, such as SizedBox or AspectRatio (more on constraints here).
The PainterController is the heart of the operation of flutter_painter. It controls the settings for FlutterPainter, its background, and all of its drawables.
All setters on PainterController directly notify your FlutterPainter to respond and repaint. However, note that if you also respond to changes in the different fields of the controller, you'll need to use setState to re-build your widget.
NOTE: If you are using multiple painters, make sure that each
FlutterPainterwidget has its ownPainterController, do not use the same controller for multiple painters.
There are currently three types of settings:
freeStyleSettings: They control the parameters used in drawing scribbles, such as the width and color. It also has a field to enable/disable scribbles, to prevent the user from drawing on theFlutterPainter.textSettings: They mainly control theTextStyleof the text being drawn. It also has a focus node field (more on focus nodes here) to allow you to detect when the user starts and stops editing text.objectSettings: These settings control objects that can be moved, scaled and rotated. Texts are considered objects (they are currently the only ones, but there are plans to add more in the future, such as images). It mainly controls layout assist, which allows to center objects and rotate them at a right angle, as shown here:
You can provide initial settings for the things you want to draw through the settings parameter in the constructor of the PainterController.
All of the settings objects are immutable and cannot be modified, so in order to change some settings, you'll have to create a copy of your current settings and apply the changes you need (this is similar to how you would copy ThemeData). For example, this is how you would change the stroke width for your scribbles:
void setStrokeWidth(double value){
  controller.freeStyleSettings = controller.freeStyleSettings.copyWith(
    strokeWidth: value
  );
}You can also provide a background for the FlutterPainter widget from the controller. You can either use a color or an image as a background.
In order to use a color, you can simply call the backgroundDrawable getter on any color.
void setBackground(){
  // Sets the background to the color black
  controller.background = Colors.black.backgroundDrawable;
}
In order to use an image, you will need an Image object from the dart library dart:ui. Since Flutter has an Image type from the Material package, we'll refer to the image type we need as ui.Image.
import 'dart:ui' as ui;
ui.Image? myImage;
In order to get the ui.Image object from usual image sources (file, asset, network), you can use an ImageProvider with the image getter (Examples of ImageProvider: FileImage, MemoryImage, NetworkImage). This getter returns a future.
Then, you can use the backgroundDrawable getter on the ui.Image.
void setBackground() async {
  // Obtains an image from network and creates a [ui.Image] object
  final ui.Image myImage = await NetworkImage('https://picsum.photos/960/720').image;
  // Sets the background to the image
  controller.background = myImage.backgroundDrawable;
}
The background can also be assigned from the constructor of PainterController directly.
All the drawables drawn on FlutterPainter are stored and controller by the PainterController. On most use cases, you won't need to interact with the drawables directly. However, you may add your own drawables however you wish (without the user actually drawing them).
You can assign an initial list of drawables from the PainterController constructor to initialize the controller with them. You can also modify them from the controller, but be careful, use the methods from the PainterController itself and don't modify the drawables list directly.
DO:
void addMyDrawables(List<Drawable> drawables){
  controller.addDrawables(drawables);
}
DON'T:
void addMyDrawables(List<Drawable> drawables){
  controller.drawables.addAll(drawables);
}From the PainterController, you can render the contents of FlutterPainter as a PNG-encoded ui.Image object. In order to do that, you need to provide the size of the output image. All the drawings will be scaled according to that size.
From the ui.Image object, you can convert it into a raw bytes list (Uint8List) in order to display it with Image.memory or save it as a file.
Uint8List? renderImage(Size size) async {
  final ui.Image renderedImage = await controller.renderImage(size);
  final Uint8List? byteData = await renderedImage.pngBytes;
  return byteData;
}-
Scaling and rotating objects (such as Text) is not currently possible using a mouse pointer. You can still programmatically set your own scaling and rotation. A suitable implementation for this is planned in the future.
-
Testing is not available right now because I'm not familiar with it. If anybody is willing to help out with it, it would be highly appreciated (contact me through my GitHub).
You can check out the example tab for an example on how to use the package.
A video recording showing the example running:


