-
Notifications
You must be signed in to change notification settings - Fork 1
AWS Instances info
- First we need to create an EC2 instance:.
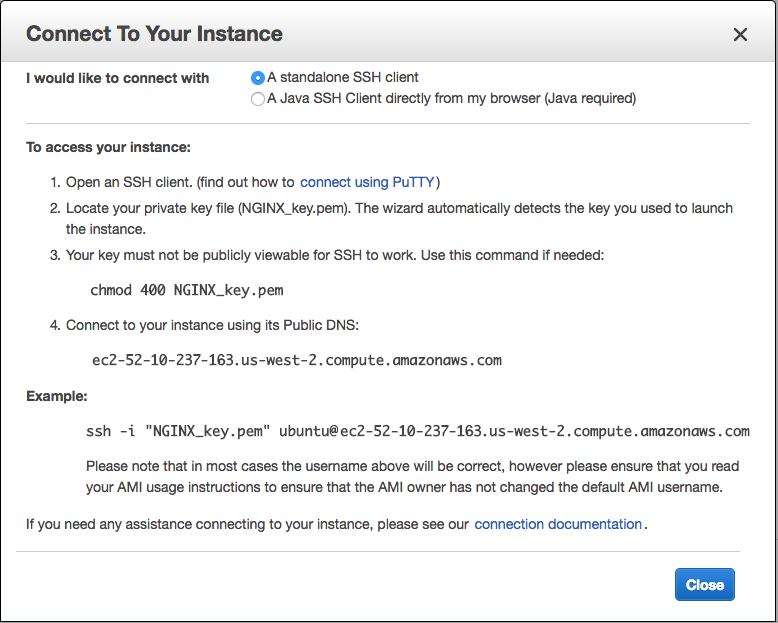
- Then we connect to it. We will need the key.pem (the instance admin. should provide it for you). Once we activate the instance and connect to it, Amazon AWS will provide for a code like this: ec2-xx-xxx-xxx-xxx.us-east-2.compute.amazonaws.com. The connecting process is:
AWS provides the info we have to introduce in our terminal:
Using the Amazon temporary codes:
On your ubuntu terminal:
-
First transform the Public key to a private key. This can be done by typing: ubuntu@xxx ~$ chmod 400 /path/my-key-pair.pem
-
Then Connect doing: ubuntu@xxx ~$ -L 5902:localhost:5902 -i DetectronKey.pem [email protected]
You are in!!! Now you can navigate on the remote terminal, run scripts, open an interactive ipython, etc. Have a look to the [Deep Learning AMI](https://docs.aws.amazon.com/dlami/latest/devguide/dlami-dg.pdf)
Nevertheless, you may want something more intuitive than the terminal. Two are the main options we use at Clear Image AI so far:
1. Set up a GUI connecting to the server (a bit slower, but you will have access to pycharm, nautilus files view, mozzila explorer, etc.): check website1 & website2
- Download and install vncserver (or vncviewer)
- Open vncviewer in your terminal: user@xxx: ~$ vncviewer
- Connect to the remote server (seen before) and activate vncserver in the remote terminal:
ubuntuEC2@xxx: ~$ vncserver

ec2-xx-xxx-xxx-xxx.us-east-2.compute.amazonaws.com:5901
(Note that we need to add the port in which we wnt it to be oppened). It will ask for a password (ask for it to te CTO or EC2 Admin). If everything is alright vncviewer will transform itself in a GUI window desktop of the remote computer EC2 :)
2. Set up a Jupyter notebook that connects to the remote server (as fast as the terminal, but not exactly a GUI)
2.1. check if you have anaconda, if not install it and activate it properly:
2.2. Configure the Jupyter server and its config.py file: see webpage1 & webpage2
2.3. Run JUPYTER:
This is a Two steps process: Instead of just "logging in" in the remote machine with ports 5902:localhost:5902, we will do:
a) Run the notebook in your terminal: user@xxx ~$ jupyter notebook --no-browser –port=8888
b) Log in the remote server with the next ports configuration: ubuntuEC2@xxx: ~$ ssh -i DetectronKey.pem -L 8000:localhost:8888 ubuntu@ec2–34–227–222–100.compute-1.amazonaws.com
Then we'll do:
- ubuntuEC2@xxx: jupyter-notebook
or - ubuntuEC2@xxx: jupyter-lab
It will show the token on the remote terminal, in case Jupyter asks for it later.
Finally Open your browser, type localhost:8000 and use the token if requested
You should be viewing the server machine EC2 in your Jupyter notebook :)
AND REMEMBER TO STOP THE INSTANCE RUNNING WHEN YOU FINISH!
