-
-
Notifications
You must be signed in to change notification settings - Fork 219
Debug your plugins during development
To make debugging from Visual Studio possible, a few things must be configured correctly.
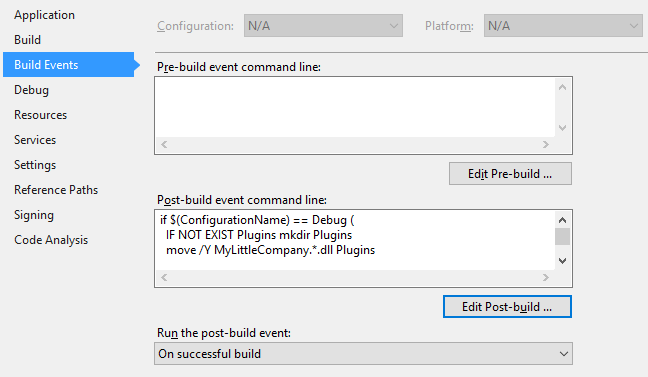
Add a Post-build event to create a Plugins sub-folder where XrmToolBox looks for plugin assemblies.

Sample post-build event:
if $(ConfigurationName) == Debug (
  IF NOT EXIST Plugins mkdir Plugins
  move /Y MyLittleCompany.*.dll Plugins
  move /Y MyLittleCompany.*.pdb Plugins
)
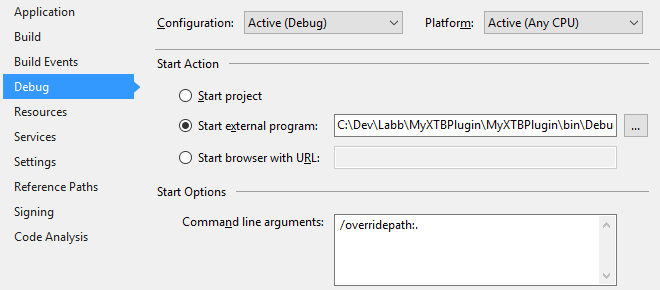
Define external program to start for debugging.

Sample path:
C:\Dev\Labb\MyXTBPlugin\MyXTBPlugin\bin\Debug\XrmToolBox.exe
Command line arguments used to specify the current working folder for XrmToolBox:
/overridepath:.
| Argument | Description |
|---|---|
| /overridepath:. | This specifies that you want to use the build folder as the root folder for XrmToolBox and not the user's AppData. |
| /connection:"[Connection Name]" | The organization that XrmToolBox should connect to when it starts. |
| /plugin:"[Plugin Name]" | The name of the plugin you are developing. This is the value in ExportMetaData attribute. |
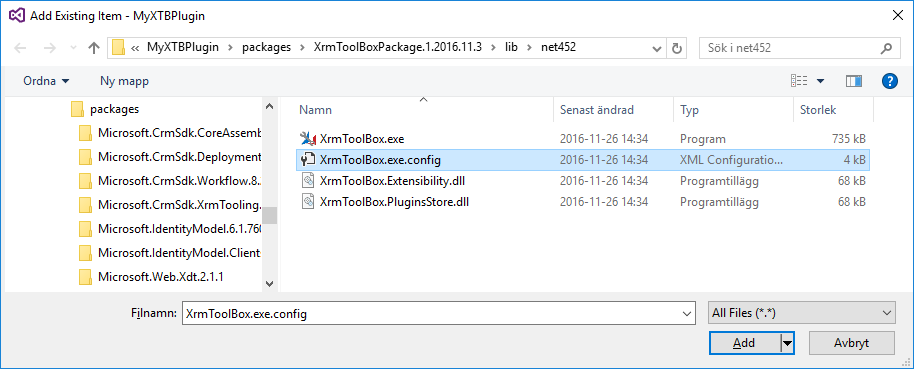
As expected versions of some dependencies might be different between your own plugin and XrmToolBox itself, and to automatically enable connection logging, the sample XrmToolBox.exe.config file from the XrmToolBox NuGet package should be added to the project.
Right-click the project, select Add - Existing item...

Browse to the packages folder under your solution, and latest version folder for the XrmToolBox package.
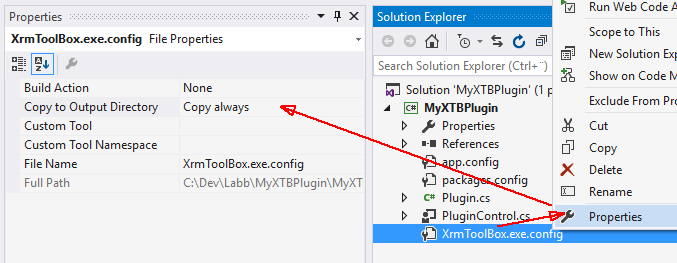
To make sure the configuration file is available run-time, go to properties for the file and set Copy to Output Directory = Copy always.

Some dependencies might not be specified in the sample configuration file.
Copy missing dependentAssembly blocks from the app.config file in the project and paste these blocks into the added configuration file.

In this case, Microsoft.Xrm.Tooling.Connector and NuGet.Core were needed.