Home
This repository contains different example projects using the MOSIM - Unity integration. All of the Unity Projects include the MOSIM framework via the MMIUnity-Core, MMIUnity-TargetEngine and MMU Generator packages.
The Retargeting Configurator is a Unity-based software tool with which users can configure human avatars to be used inside the MOSIM framework. During the process, a translation between the avatar's skeleton and the intermediate skeleton will be performed which can be verified by using a sample animation and saved to a .mos configuration file. Such a file is needed for MMI Avatars in both Unity and Unreal. In the following, we will discuss every step needed by the configurator.
In the current state, the configurator only accepts GLTF files to be imported. Usually, digital content, such as avatars, is available in fbx format. If an avatar is already being used in either Unreal or Unity, both platforms offer an fbx export function. When exporting please be mindful that the position and rotation of the avatar game object should be zeroed. The fbx file can then be converted into a gltf file using tools such as gltFast. The tool will create a folder containing a .gltf and buffer.bin file. It is important not to separate said files.
The gltf file format allows instantiating files at runtime in Unity. Inside the Configurator, you will be asked to import the file. Navigate to the folder containing both the .gltf and buffer.bin file of your avatar and select the gltf file.
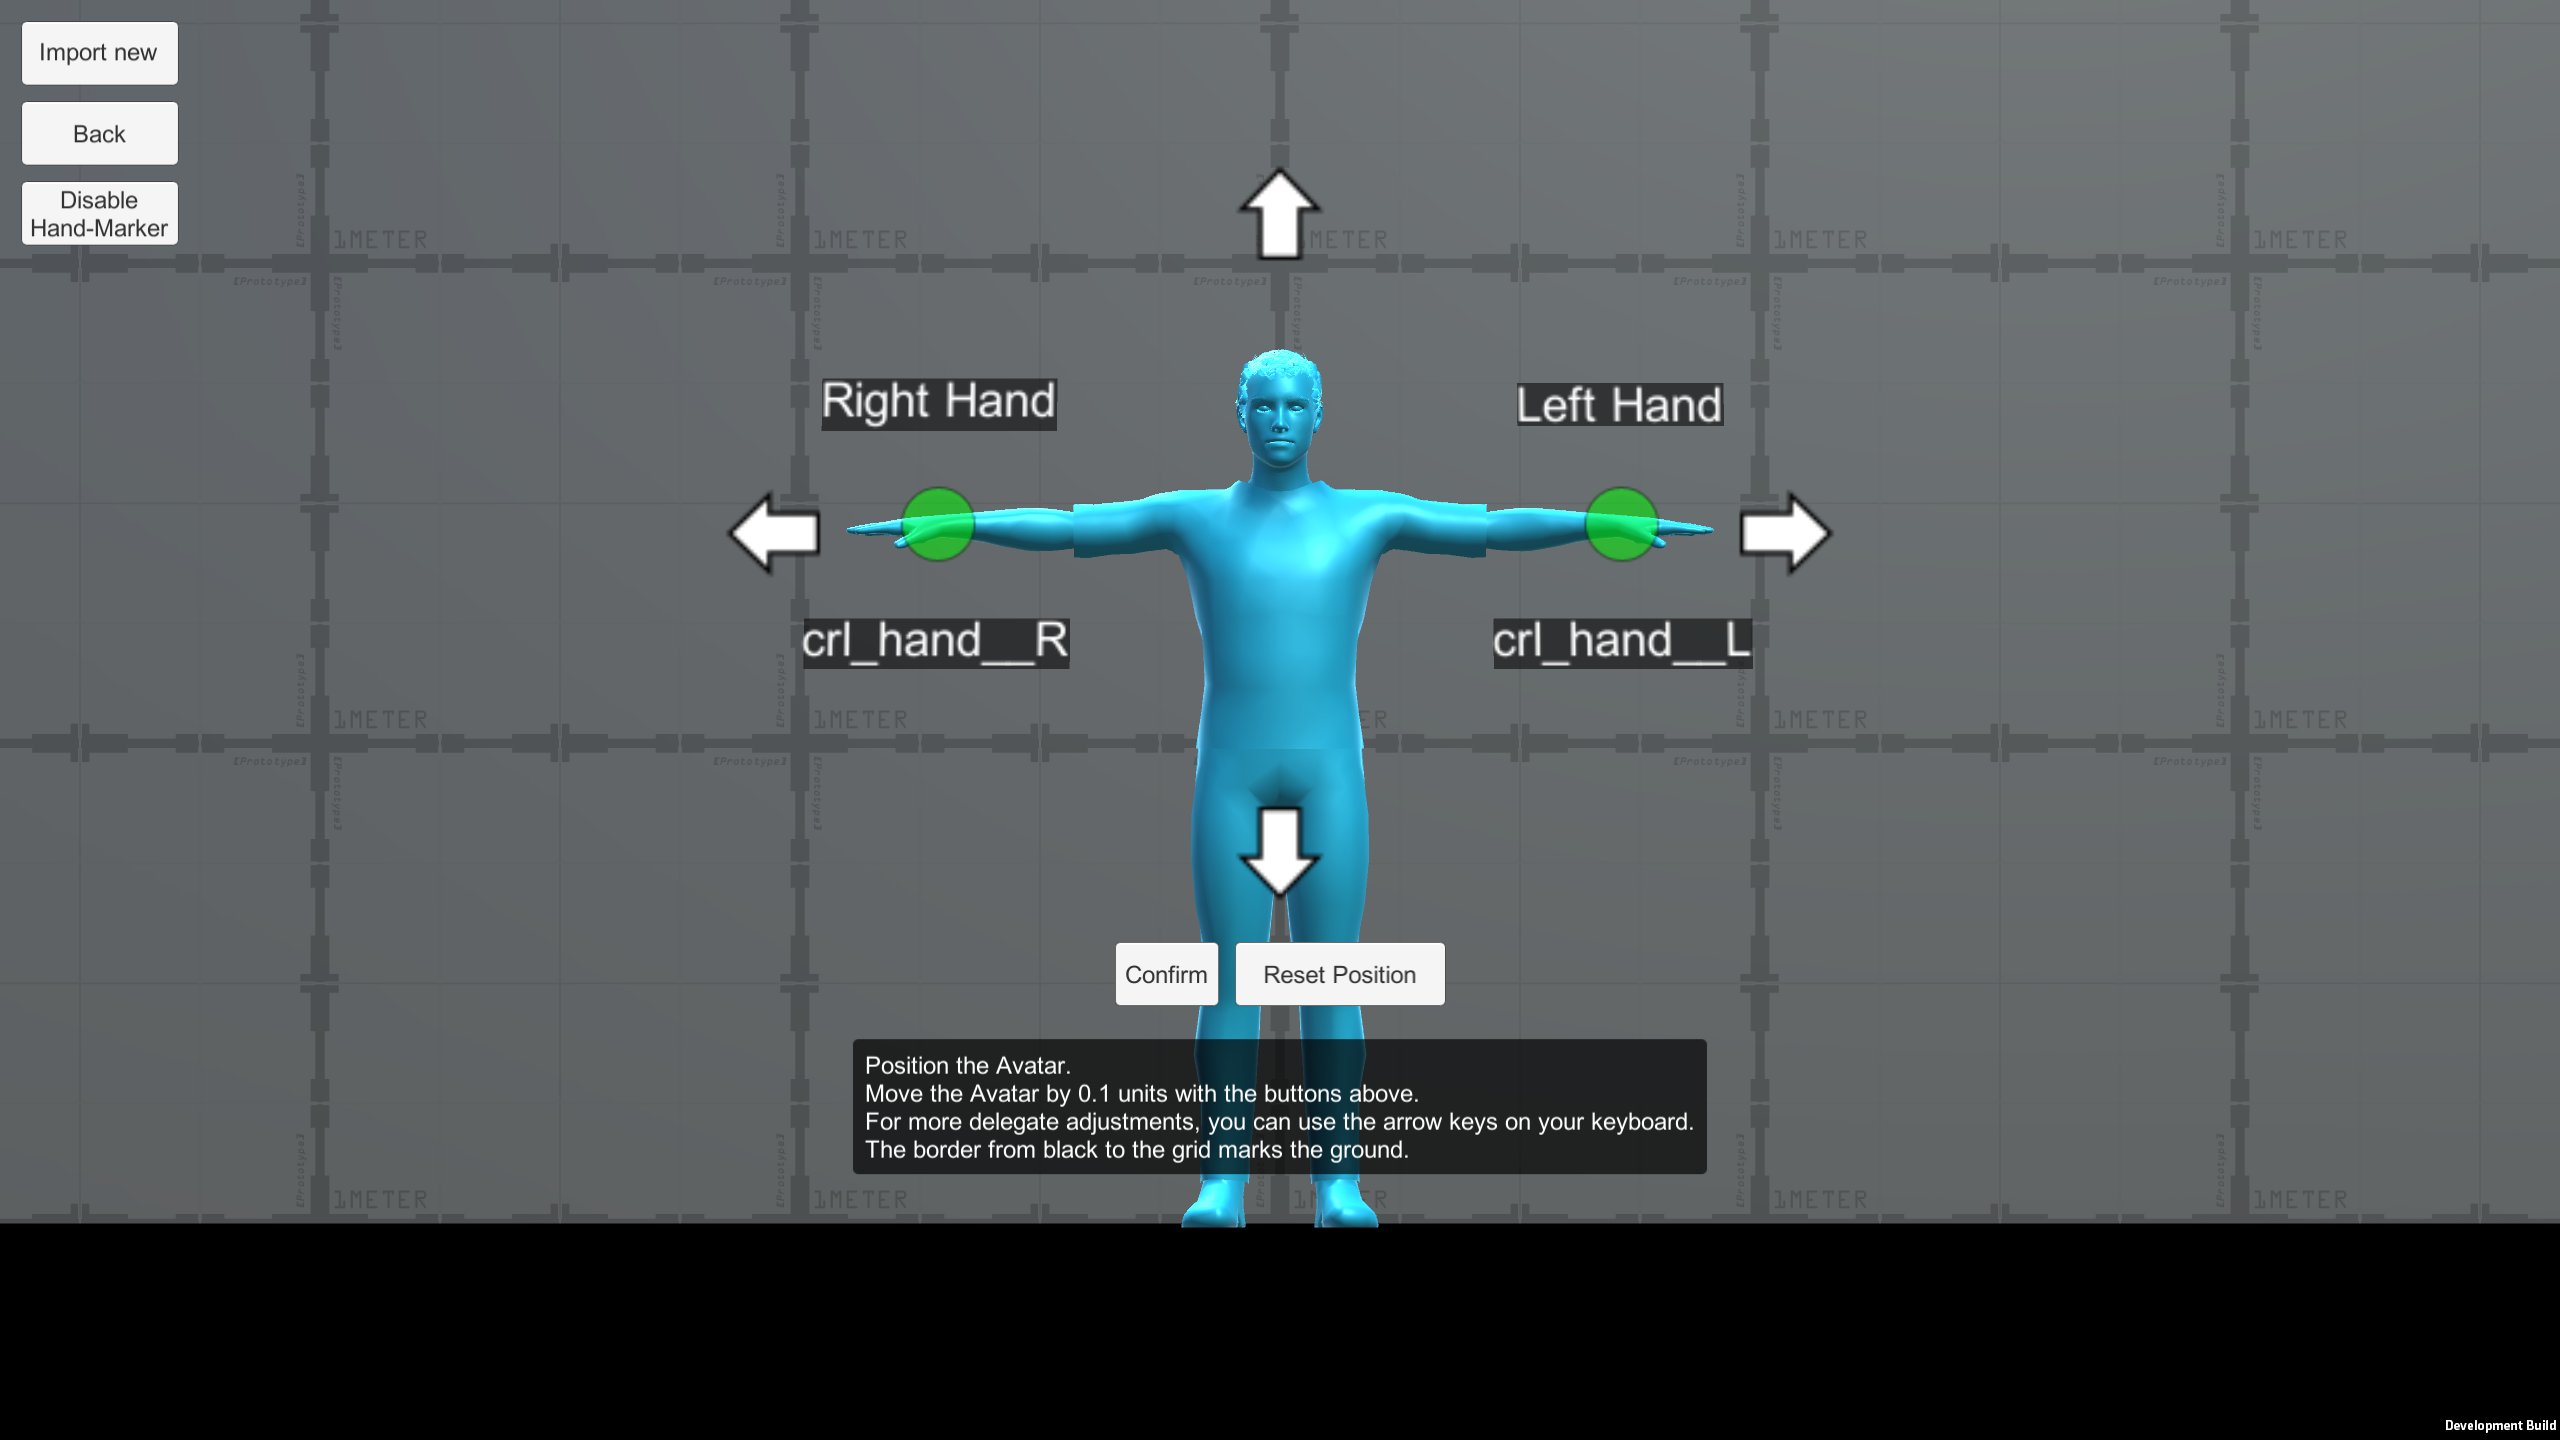
In the next steps, you will be asked to set up the avatar correctly. First, it is needed to manually select the correct root and pelvis bone of the avatar. After, the avatar should be rotated to face the camera and positioned on the ground level as well as scaled to a reasonable size.
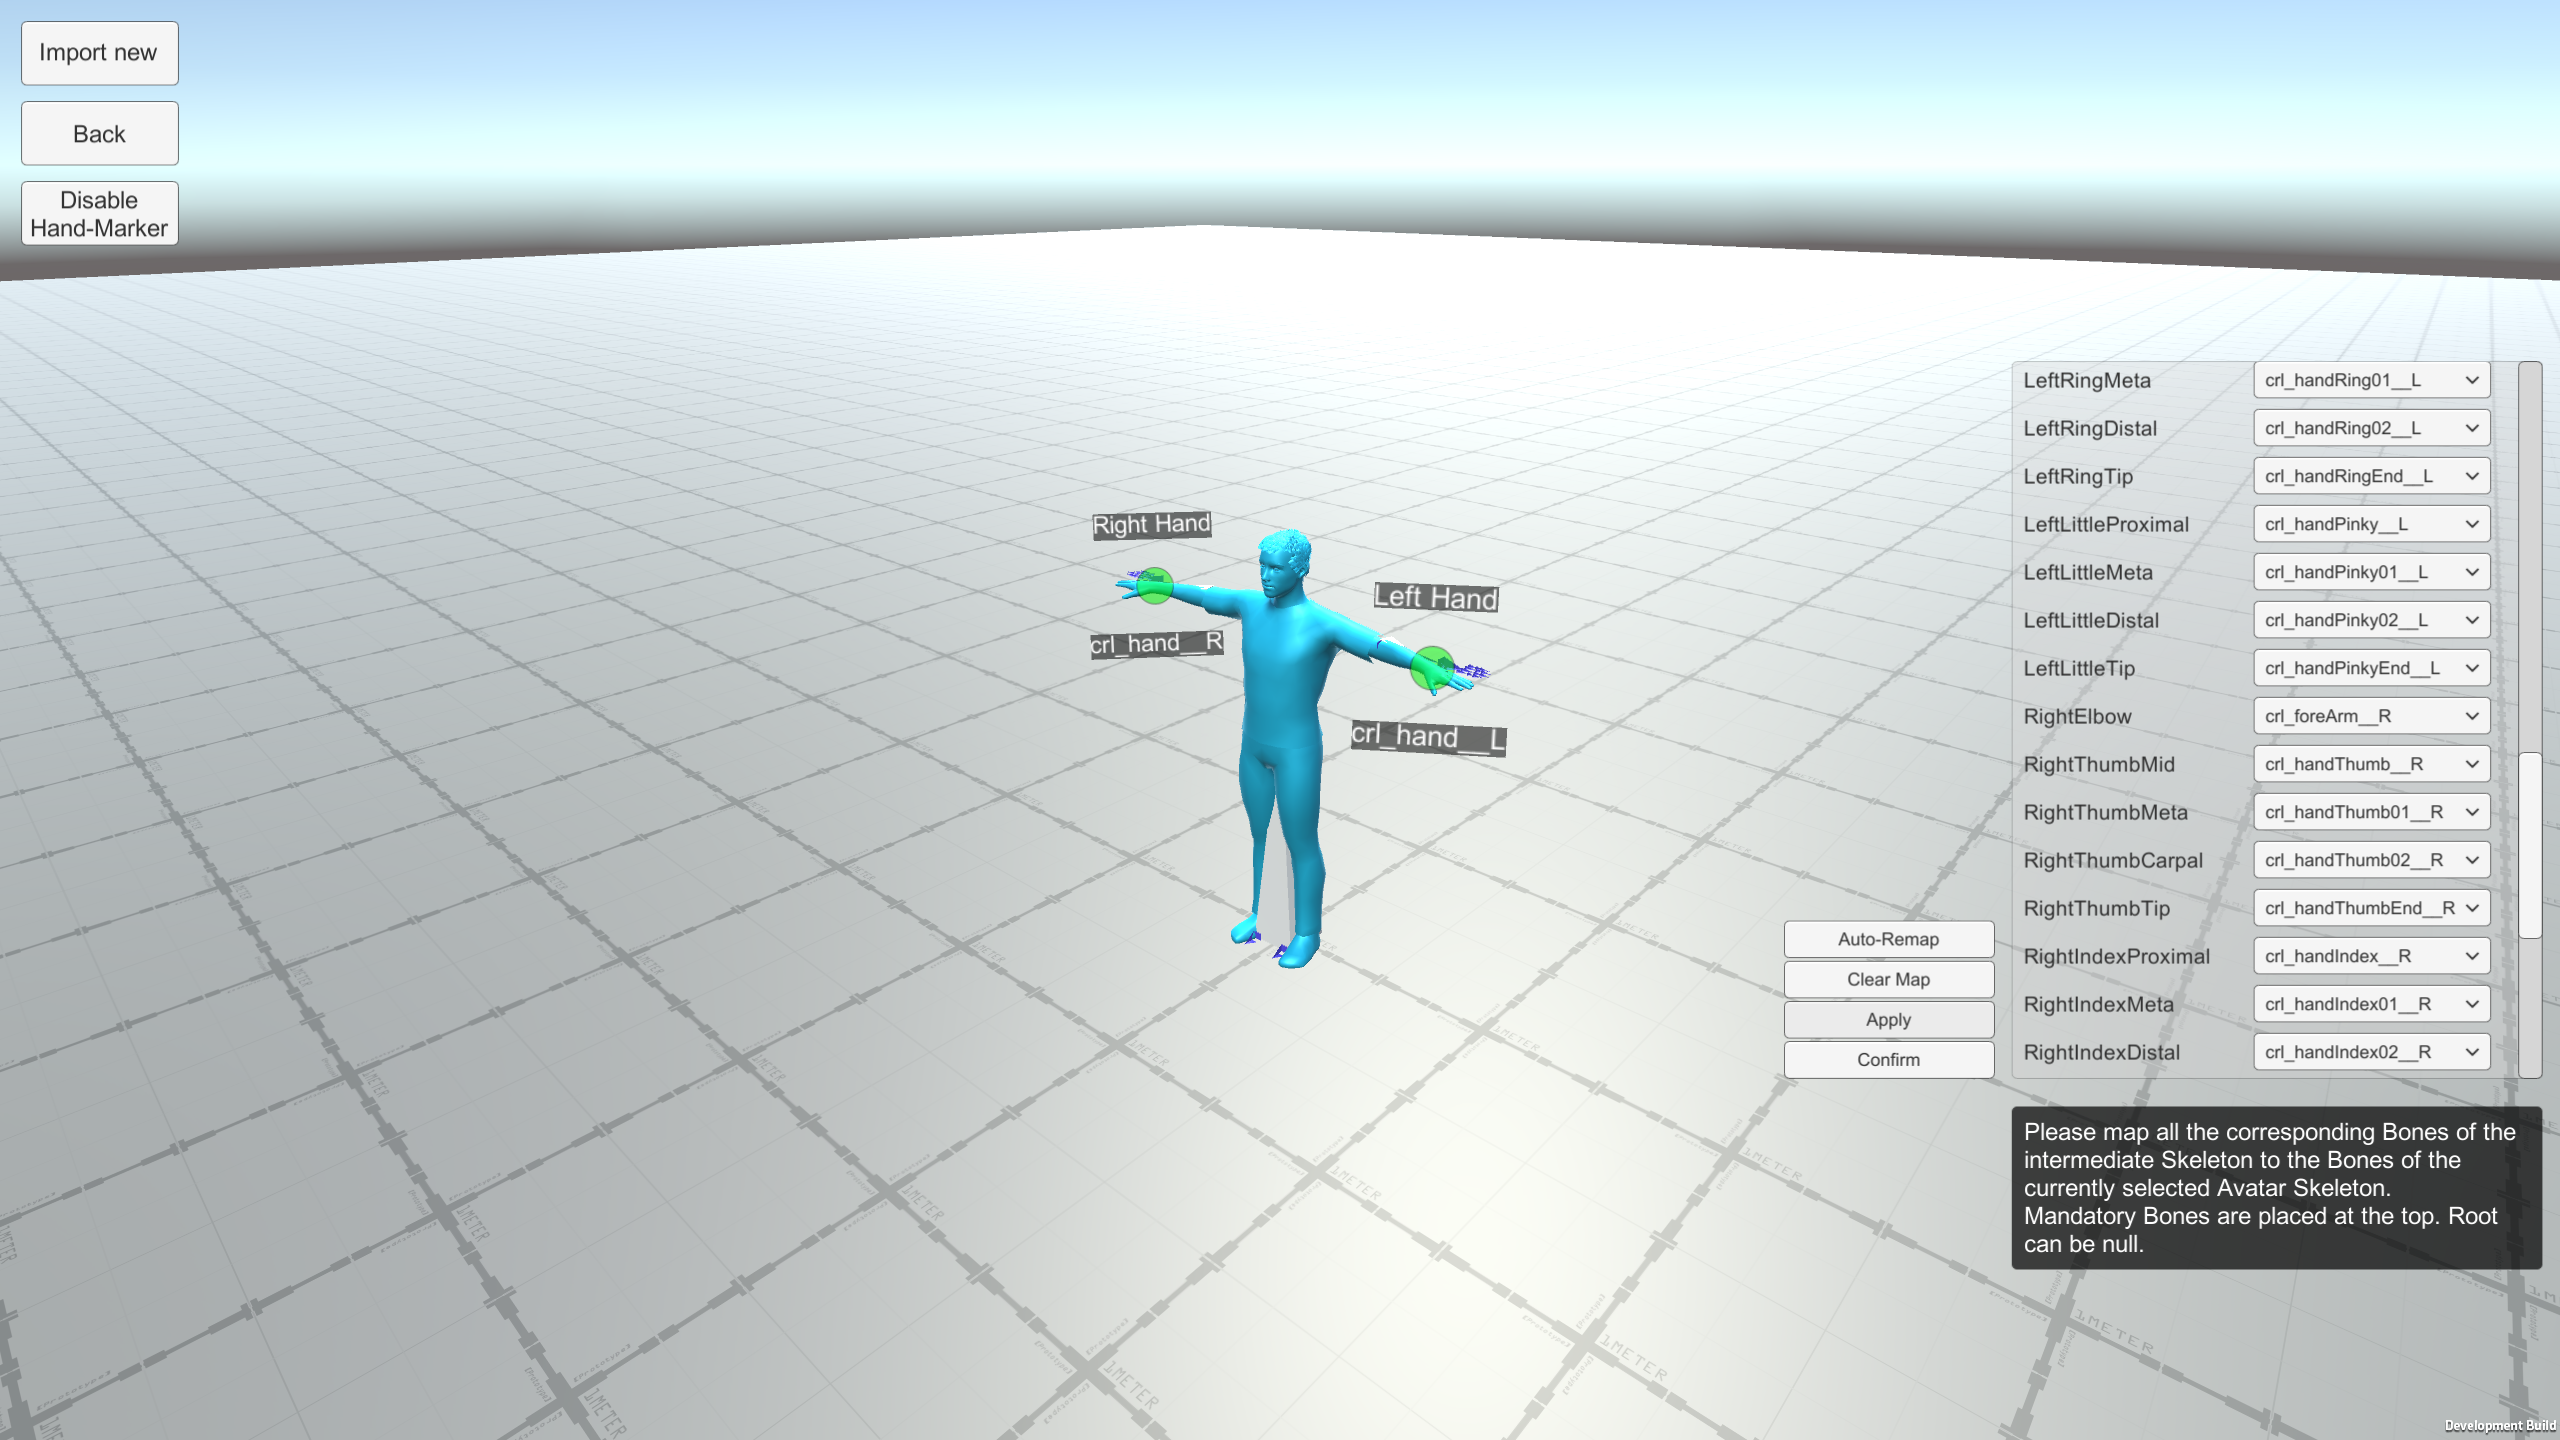
The key part of the configurator. Here, the bones of the intermediate skeleton must be mapped to the avatar's skeleton. It is important to note, that the most important bones for manual observation are placed on the top section of the map. An automatic remapping function exists and we recommend using it. The function uses the manually set bones and tries to automatically map the remaining bones following a heuristic.
When the mapping is done, you can press apply. This will verify if a correct translation was created if so the confirm button will be enabled and a visualization of the translation will be shown as a blue skeleton. Should this skeleton look unnatural in any form (e.g. hands at elbow position), we advise you to check the Joint Map again and find errors.
Common errors we found in testing are:
- Hands at the position of elbows: This happens when the shoulder joints of the intermediate skeleton are mapped wrong. This can be fixed most of the time when you select the upper arm joints as shoulder joints.
- When playing the animation, a mesh string is visible from one of the hands going outwards: This happens with Unreal Skeletons mostly. Here, please verify that the LeftThumpTip Bone is mapped to crl_handThumpEnd__L and RightThumpTip is being mapped to crl_handThumpEnd__R.
- When playing the animation, the head movement is very stiff and one of the eyes will be sucked into the head of the avatar: This also happens with Unreal Skeletons. The skeletons don't have as many spine bones as the intermediate skeleton, so the head bone will be mapped to one of the eyes by the automated remapping tool. To fix this set the head bone correctly and fix the mapping by going down the spine. It will be needed to set one of the spine bones to null. A satisfying result can be archieved by setting the T12L1Joint to null and rotating the following bones downward. So, T1T2Joint -> crl_spine01_c, C4C5Joint -> crl_neck_C and HeadJoint -> crl_Head_c.
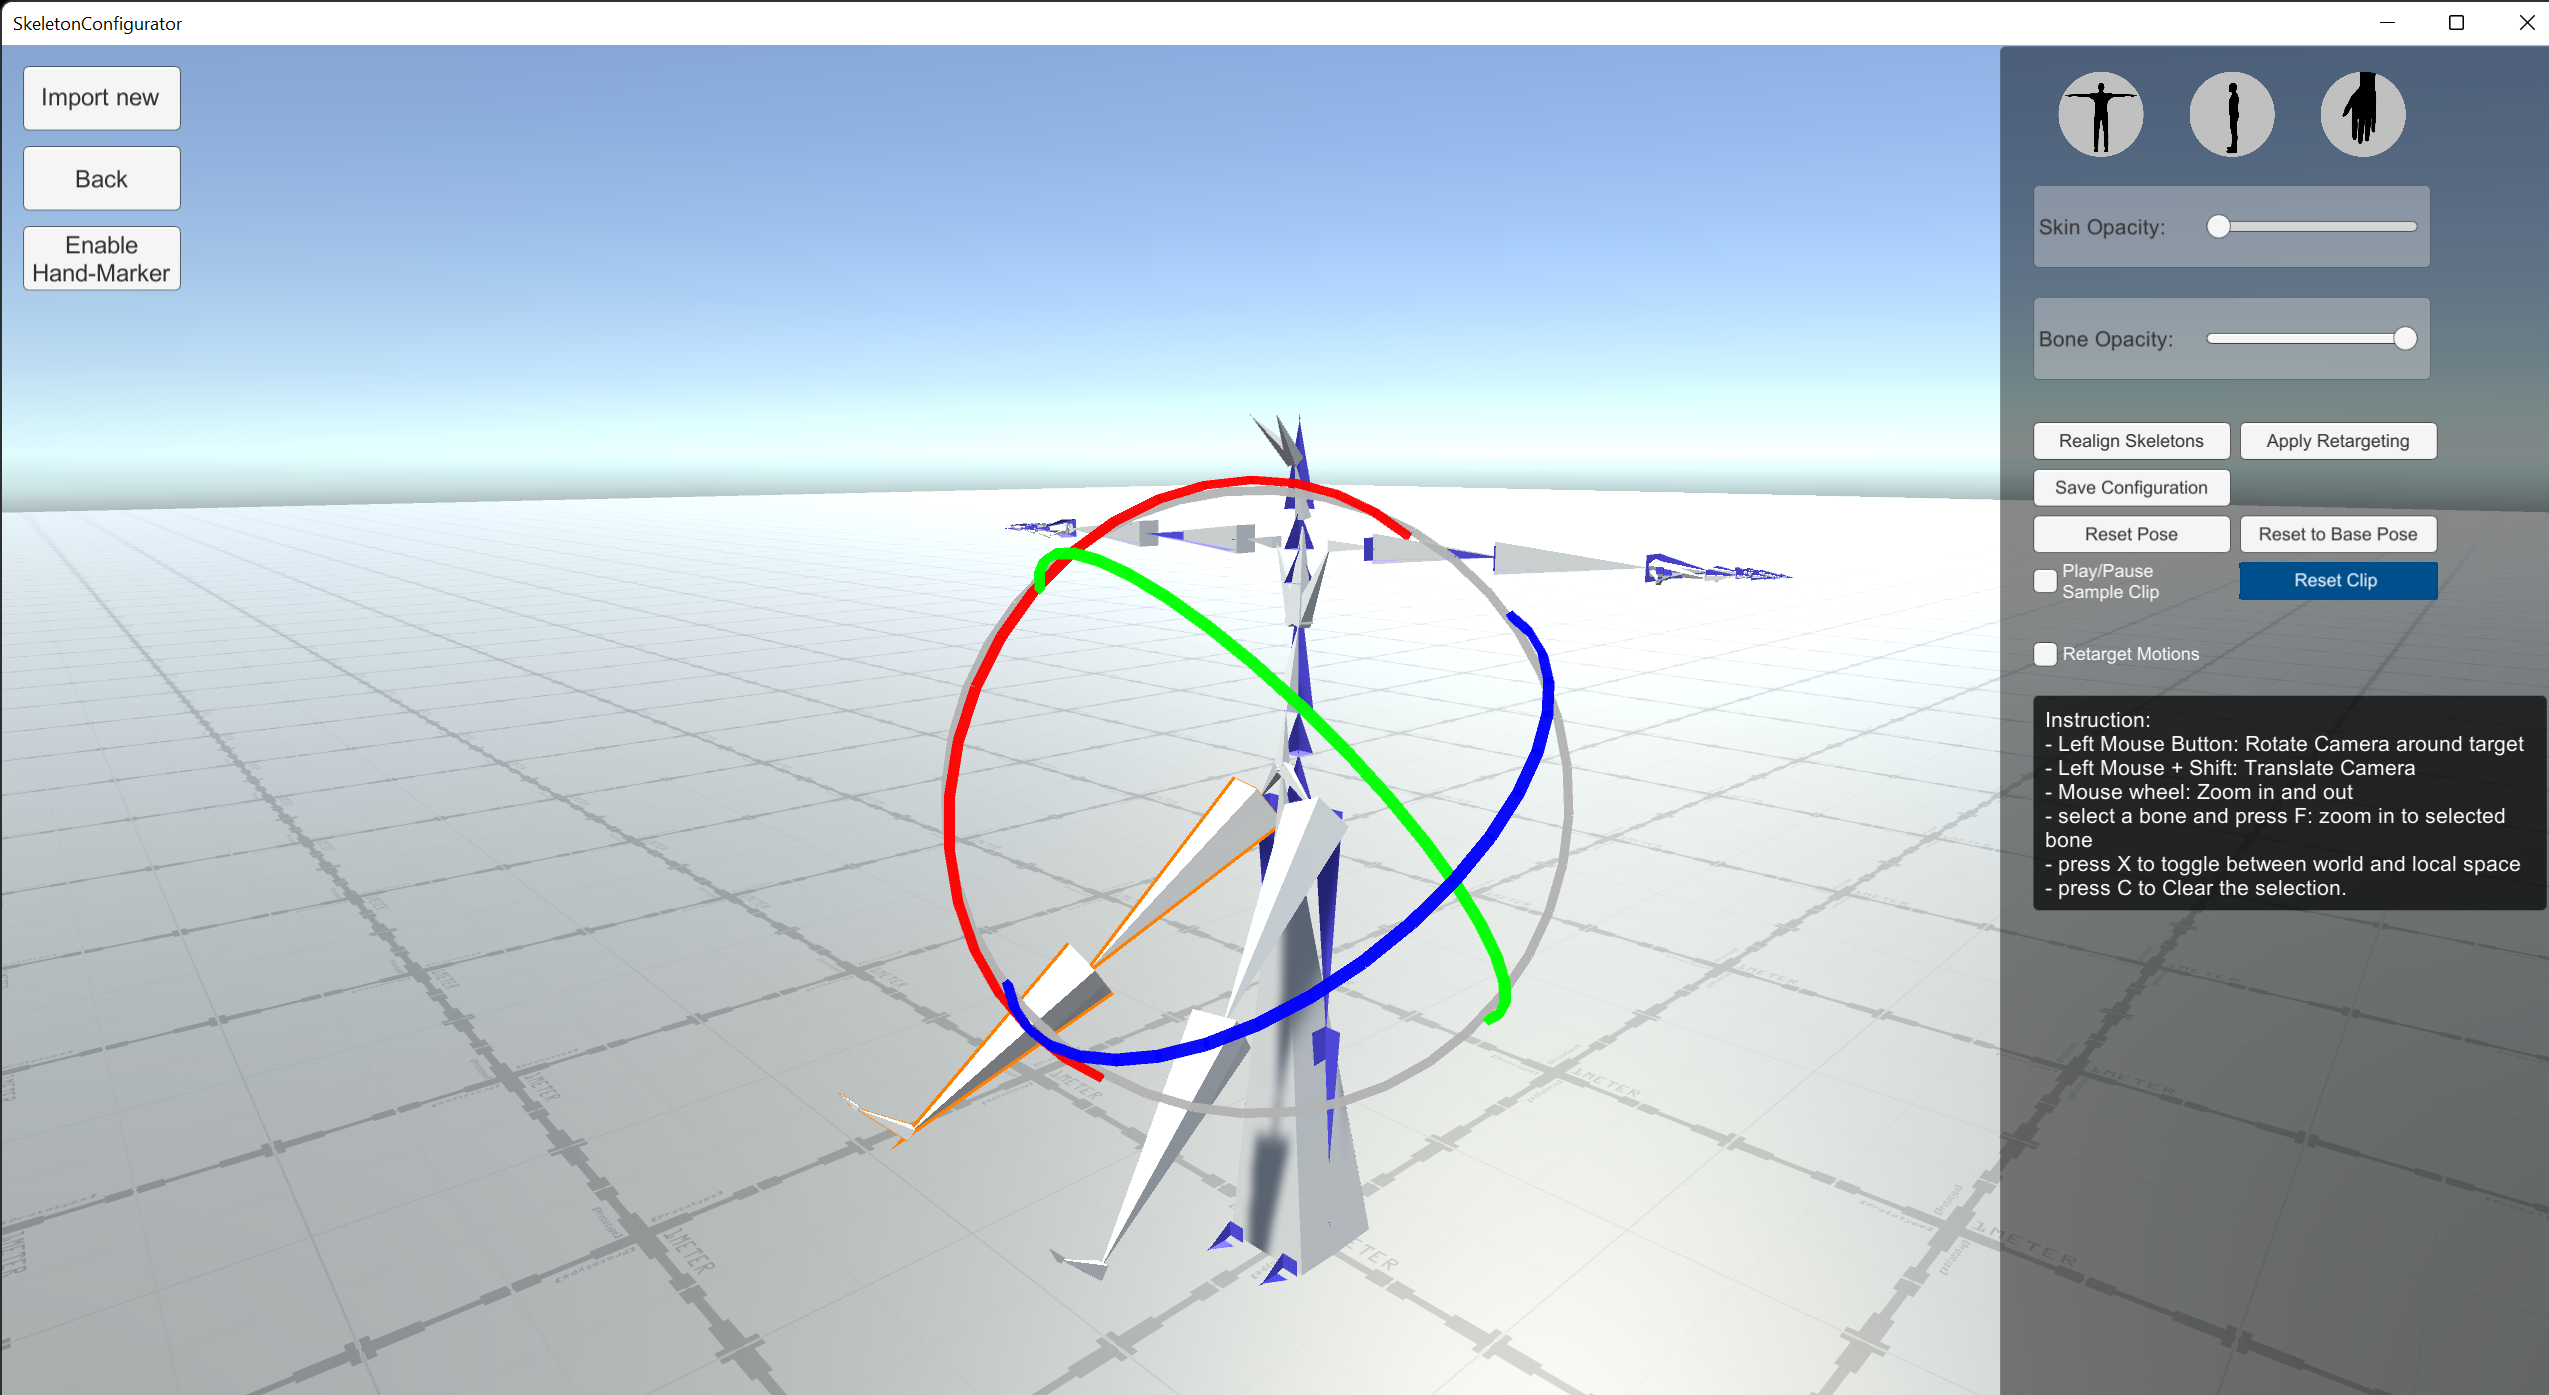
With the help of the skeleton visualization in blue adjust minor details in the posture so that the avatar's skeleton is more closely aligned with the visualization. For this, you can in- or decrease the visibility of the avatar's mesh and click on the specific bones to use a rotation gizmo on the screen. For further help, an automated realignment of the skeleton is given. Once they are aligned, apply the retargeting. You can then test the applied retargeting by playing an animation. Should any unnatural mistakes in posture be highlighted by this, verify the correctness of the joint map of the last step. Once a satisfying result is achieved, you can save the configuration in an avatar.mos file.