-
Notifications
You must be signed in to change notification settings - Fork 11
Development guide
This guide explain how to develop WebAR2DTool on eclipse.
The firts step is install eclipse.
Download from: http://www.eclipse.org/downloads/
Follow the next installation manual and install it: https://wiki.eclipse.org/Eclipse/Installation
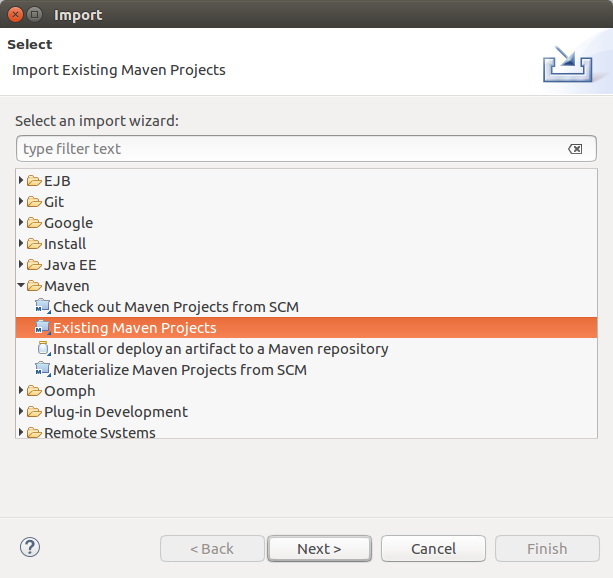
Go to "File" -> "Import" in the open window select "Maven" and click on "Existing Maven Project", on next step choose the root directory (where the pom.xml of WebAR2DTool project is located) and click finish.
The project is imported.

For configure WebAR2DTool follow the link:
Configure WebAR2DTool
In this section will explain how to run the web application for developing it.
Navigate on project explorer "src" -> "main" -> "webapp" do right click on index.jsp and click on "Run as" -> "Run on Server".
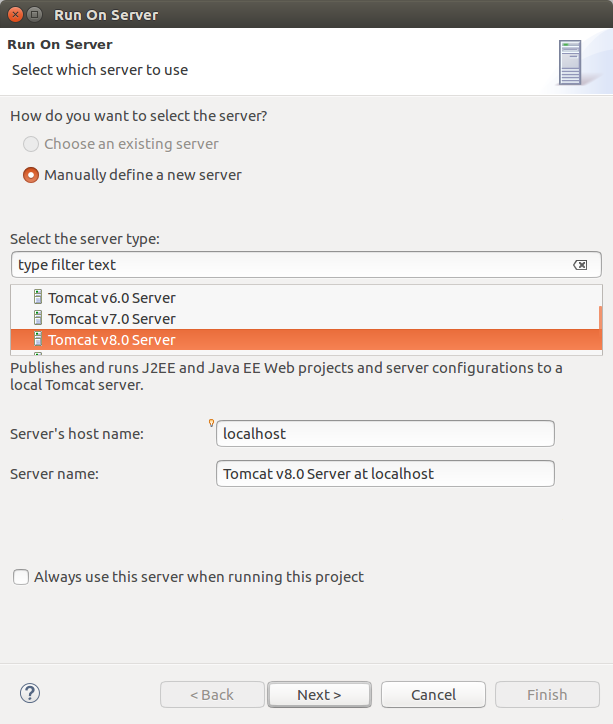
Choose your web java server.
Recommended server (Download and extract it): Apache Tomcat 8

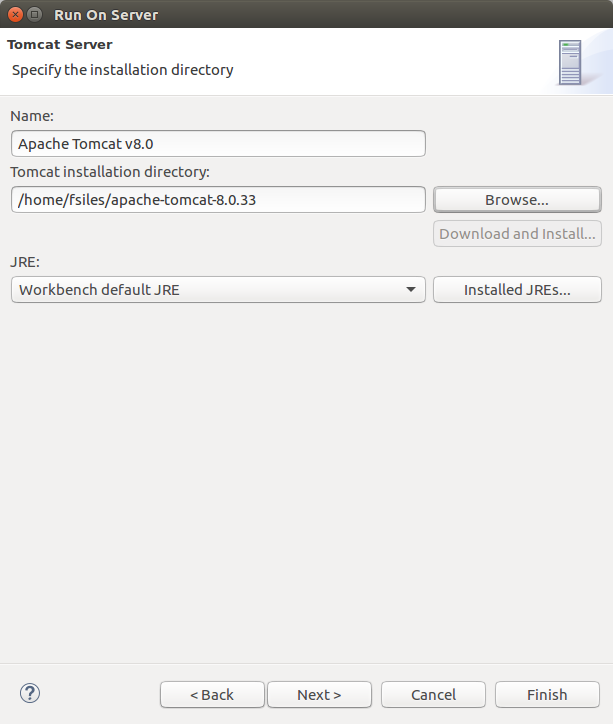
Click on "Browse..." and go to the server folder, select it.

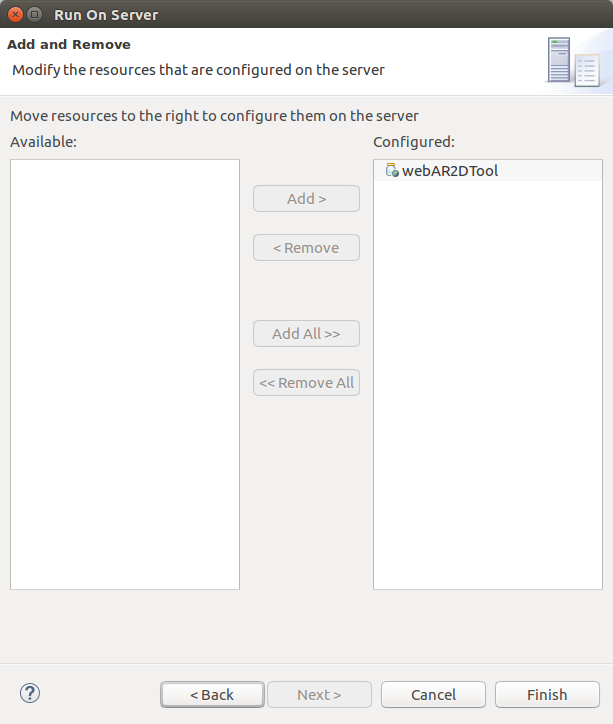
Add the project to "Configured" box and click finish.

On Eclipse appear new tab with the URL for development, if you prefer you can put this URL on a browser.
For configure the tomcat server (for choose port or other options) visit the next webpage:
http://tomcat.apache.org/tomcat-8.0-doc/config/index.html
- index.jsp:
Location: src/main/webapp/index.jsp
This file contains the HTML of WebAR2DTool (Include configuration container). - AR2DToolMethods class:
Location: src/main/java Java package: es.upm.oeg.webAR2DTool.services.AR2DToolMethods
This class contains the RESTFul services. - AR2DToolManager class:
Location: src/main/java Java package: es.upm.oeg.webAR2DTool.managers.AR2DToolManager
This class contains the code that manage each session ID. - WebAR2DToolThread class:
Location: src/main/java Java package: es.upm.oeg.webAR2DTool.threads.WebAR2DToolThread
The thread that executes AR2DTool for generate the images.