This Visual Studio Code extension is used for syntax highlighting, IntelliSense and program formating for PickBasic code development. We hope this project sparks a sense of community involvement and action within the MultiValue and Pick Database space and if that is exciting to you, we'd love to have you help out! Please see our Contribution Guidelines and Code of Conduct for more information.
This document describes how to install and use the MV Basic Linkar extension in a MultiValue Development Environment. For purposes of this guide:
- MV refers to Pick-style MultiValue application and database environments
- VS Code refers to Microsoft Visual Studio Code
- Linkar refers to the Linkar Suite application
- Linkar Server.
- Linkar Manager.
- Linkar REST API.
- MV Basic Linkar refers to the Linkar Visual Studio Code extension.
- Purpose of this guide
- Content table
- 1. Introduction
- 2. Prerequisites
- 3. Installing VS Code
- 4. Installing MV Basic Linkar extension
- 5. Creating connections
- 6. Using connections
- 7. Working with file dictionaries
- 8. MV Developer Features
- 9. MV Basic Linkar Shortcut keys
VS Code is a free, open source, feature rich, IDE that allows programmers to develop and debug code in various languages. There is also a community of developers that have developed extensions that provide functionality for VS Code that isn't built into the main program.
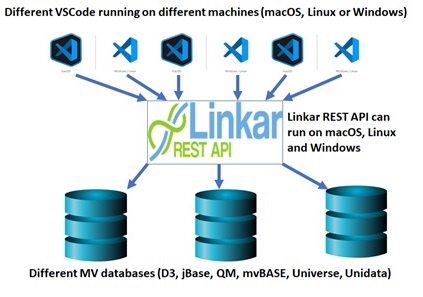
The MV Basic Linkar extension provides developers to gain the features of VS Code with MV BASIC programs. This extension provides connectivity to your MultiValue database.You can connect with any MultiValue database that Linkar supports, by now D3, jBase, mvBase,QM, Universe and Unidata.
The network architecture MV Basic Linkar needs to work is:
This extension includes the following features:
- Multiple simultaneous connections with different accounts and different databases in the same VS Code instance.
- Session pooling with the database (you can share database lines between your programmers)
- Optimistic locking in a multiuser environment
- File view selection
- Allowed to Use any file type in the MV database, including DIR, OSFI, Type19, etc.
- Use all data files under each dictionary file.
- Compile and catalog BASIC programs
- Run any TCL command
- Define compile and catalog options for each defined connection
- Run a terminal connection within a window, or launch a separate terminal emulation application.
- Filter programs inside the file using MV lists in the database
- Create, View, and Modify dictionary definitions in a structured UI.
- Insert directly VM, SV and Text marks (@VM, @SM, @TM).
- Code highlighting for MV BASIC Programs
- Intellisense for the MV BASIC Statements and Functions
- Code folding
- Code formatting
- Go to/Peek Definition. Automatically jump to and peek internal subroutines
- Go to/Peek Definition. Automatically peek/load CALL, CHAIN and INCLUDE routines, even when they are in a different file.
- Syntax checking for GOTO,GOSUB,LOOPS,CASE statements and IF THEN/ELSE END statements
- Find all References of a word in current program
VS Code is available on Windows, Linux and Mac OSX.
The following environment is required in order to use the extension.
- Windows, Linux or Mac OSX machine.
- VS Code
- An understanding of Linkar terminology and configuration, and a working installation. (http://kosday.com/Manuals/en_WEB_LINKAR)
- Access from the machine to a Linkar REST API server with API keys (The Linkar REST API server can be in any Linux, Windows or macOS machine). Linkar version 2.1 and above.
It is not necessary to have a Linkar REST API key for each VS Code instance or developer. Just one Linkar Server is enough to support all programmers to all required systems. You need at least 1 Linkar PRO license (Linkar REST API does not work with LITE licenses) You can ask for an evaluation license on our web (https://kosday.com/free-trial/). 1 Linkar Pro license, with one on-demand defined connection to the database can serve all programmers, and using only 1 database license when required.
You can have as many Linkar REST API keys as you need, pointing to the same Profile/EntryPoint (MV Database/Account) or to different ones (different MV databases, different accounts, different developers, etc.) Kosday recommends having at least 1 PRO license for each EntryPoint you will use. For instance, if you have 3 Linkar REST API keys in the same EntryPoint (same MV database/ Account), usually 1 Linkar PRO license, with 1 on demand session defined in the EntryPoint should be enough, even when you can add more for better performance. But if you have 2 Linkar REST API keys, defined in 2 different EntryPoints (2 MV databases or 2 different accounts in the same database) you will have better performance using 2 Linkar PRO licenses with one on-demand database session in each one.
As always, you can configure the Linkar EntryPoints in many different ways to obtain the best performance. Each individual case will be different. Kosday can help with all Linkar details. Also, remember you can change the configuration in seconds, and many times even with the Linkar Server started.
Kosday also recommends that you install Linkar Suite in a different machine than the one you use with VS Code to develop. You can install it in Windows, Linux or macOS. The reason is that the architecture is designed to work with many developers, so the Linkar REST API server will be used by many people. Usually your development machine, where you run VS Code, is for one developer who can stop and start it at any time. It is preferable to install Linkar Suite in one of your organization servers so the Linkar REST API server will be running 24 hours a day / 7 days a week. This is not for resources; Linkar Suite can run even in a Raspberry Pi. It is much more a security matter. Imagine you have programmers working remotely or that you have contract programmers in any part of the world, you can give them access only to the machine that runs the Linkar REST API and in the TCP port defined for it, using a Linkar user with minimum privileges in the API Key you generate for them. They can work with VS Code perfectly (the only limit will be the terminal access to the database for debugging.
VS Code can be downloaded from the following link: https://code.visualstudio.com/download
The easiest way to use this extension is to download it from the Visual Studio Code Marketplace. Please be aware that VS Code may require a reload after installation or updating.
Start VS Code and select the Extensions Button. In the search box, type "linkar".
Select the MV Basic Linkar extension by clicking on the item in the list then choose install. Once the extension is installed we are ready to start using VS Code on your MV databases (source code files and data file dictionaries)
You can create as many connections as you need. MV Basic Linkar extension allows you to work with all of them simultaneously.
Connection name: The name you want for this connection.
Database type: Type of the database (D3, jBase, mvBASE, QM, Universe, Unidata)
Server: URL of the Web Server of Linkar Suite where the Linkar REST API server is installed.
Port: TCP Port of the Web Server of Linkar Suite where the Linkar REST API server is installed (usually 11201).
SSL: You must activate this if Linkar is using SSL.
API Key: The API key you are going to use to connect to the database. Refer to https://kosday.com/linkar-rest-api-how-to/ to know how to create API Keys.
Plugin Ref: If this connection is going to be usedby a plugin, the Linkar plugin reference. Usually keep this empty.
Custom Vars: This is a free text field to send in the transaction. If not empty, subroutine SUB.LK.MAIN.CONTROL.CUSTOM will be called. Add custom code to that subroutine to define special behaviors for some or all transactions.
Free Text: A free text that you can include to identify this connection in the Linkar Manager or to use in the SUB.LK.MAIN.CONTROL.CUSTOM subroutine.
Language: If languages other than English are defined for use with Linkar, you can use the Linkar Schemas language definition.
Load automatically on start: The Connection will be loaded when you start VS Code.
Included files: The program files you want to load in this connection. If you leave this empty, all the files from the account will be loaded. You must separate the files with "|" (pipe). We recommend specifying the files here in order to have better performance and more security, only giving programmers access to the files they need. You can change the file list at any time, and just reload the connection. You can also use a database saved list with the program files you want to work with using GET.LIST <list name>.
Max. records per file: The maximum number of records per file allowed in download. This parameter is included as security against the possible existence of files with many records, which can slow down the load.
BASIC command: The TCL command you use to compile your programs, usually BASIC or COMPILE but you can use your own if you have a precompiler in the database.
BASIC arguments: Arguments for the BASIC command. For instance, if you want to compile with Flash BASIC in D3 you will put "(O".
CATALOG command: The TCL command you use to catalog programs in the database.
CATALOG arguments: Arguments for the TCL command, for instance "LOCAL", "GLOBAL", "(G", etc.
Custom Terminal Emulation Command: OS command to start an emulator (Accuterm, Putty, Telnet, SSH...) in the machine where VS Code is running. Depending on the command you use it will run in a new Window or inside the VS Code terminal window. For instance ssh@mydatabaseip will start an SSH connection with the database inside the VS Code terminal window, telnet mydatabase 4242 will start a Telnet connection with a QM database inside the VS Code terminal, "C:\Program Files (x86)\atwin80\atwin80.exe" will start Accuterm in a new window. All these connections will use a new database license when connected. If you want to use “telnet.exe” or “ssh.exe” in Windows you must activate them (in W10 they are deactivated by default). Refer to https://social.technet.microsoft.com/wiki/contents/articles/910.windows-7-enabling-telnet-client.aspx or https://docs.microsoft.com/en-us/windows-server/administration/openssh/openssh_install_firstuse
New Connection (1): Create a new connection.
Search Items (2): Searches all open Linkar connections for item names matching the text to be searched. You will be able to open the chosen items.
View Recent Opened Items (3): View the last 50 opened items in any connection.
Collapse all the Linkar explorer tree (4): Collapse all the tree, connections, files and programs.
Dictionaries Management (5):Opens a text box to write the filename. Then you can see, create, delete, update the file dictionaries.
Execute TCL Command (6): Opens a textbox to write the TCL command and then execute it in the database. The result appears in the output tab of the Vs Code Terminal.
WARNING!! Do not use this resource to test programs, if the TCL Command execution crashes all the EntryPoint line will crash, and you and the rest of team may lose all connections.
Open custom terminal (7): Opens a telnet or SSH session with the database. It can be used for debugging purpose inside the VS Code environment (it uses a database line).
Delete connection (8): Delete the connection.
Edit connection (9): Edit the connection to change the preferences. You can add files, etc.
Unload connection (10): Unload all the files of that connection.
Load connections (11): Load all the files of that connection.
If you right click the mouse in the code:
Insert Value Mark: Insert a char(253) character , @VM, in the BASIC Code.
Insert SubValue Mark: Insert a char(252) character, @SV, in the BASIC Code.
Insert Text Mark: Insert a char(251) character in the BASIC Code.
Write-BASIC: Save and compile the BASIC Code. The result appears in the output tab of the VS Code terminal.
Write-BASIC-Catalog Program: Save, compile and catalog the BASIC Code. The result appears in the output tab of the VS Code terminal.
BASIC Program: Compile the BASIC Code. The result appears in the output tab of the VS Code terminal.
Catalog Program: Catalog the program. The result appears in the output tab of the VS Code terminal.
Save as: Save the BASIC code with a new name. By default in the same file and you can select another Connection or File if you desire.
Delete Item: Delete the program or subroutine.
Command Palette: Open the VS Code box commands palette. If you write the word Linkar in the box you will see all the MV BASIC Linkar extension commands.
File tree options:
Dictionary Management (1): You can see, create, delete, update the file dictionaries.
Open saved list (2): Open all items in a MV database previous saved list.
New Item (3): Create a new program or subroutine in the selected file.
Refresh file (4): Refresh the list of items in the file.
Item record options (program or subroutine)
Delete Item (1): Delete the program or subroutine.
Rename Item (2):Rename the program or subroutine.
Save as Item (3): Save the BASIC code with a new name. By default in the same file and you can select another Connection or File if you desire.
Dictionaries (1): List of all dictionaries in the file.
Delete Dicts (2): Delete the dictionary item. You must click on the delete icon and later click on Save Changes to delete all the dictionary items you have mark for delete.
New Dict (3): Create a new dictionary in the file.
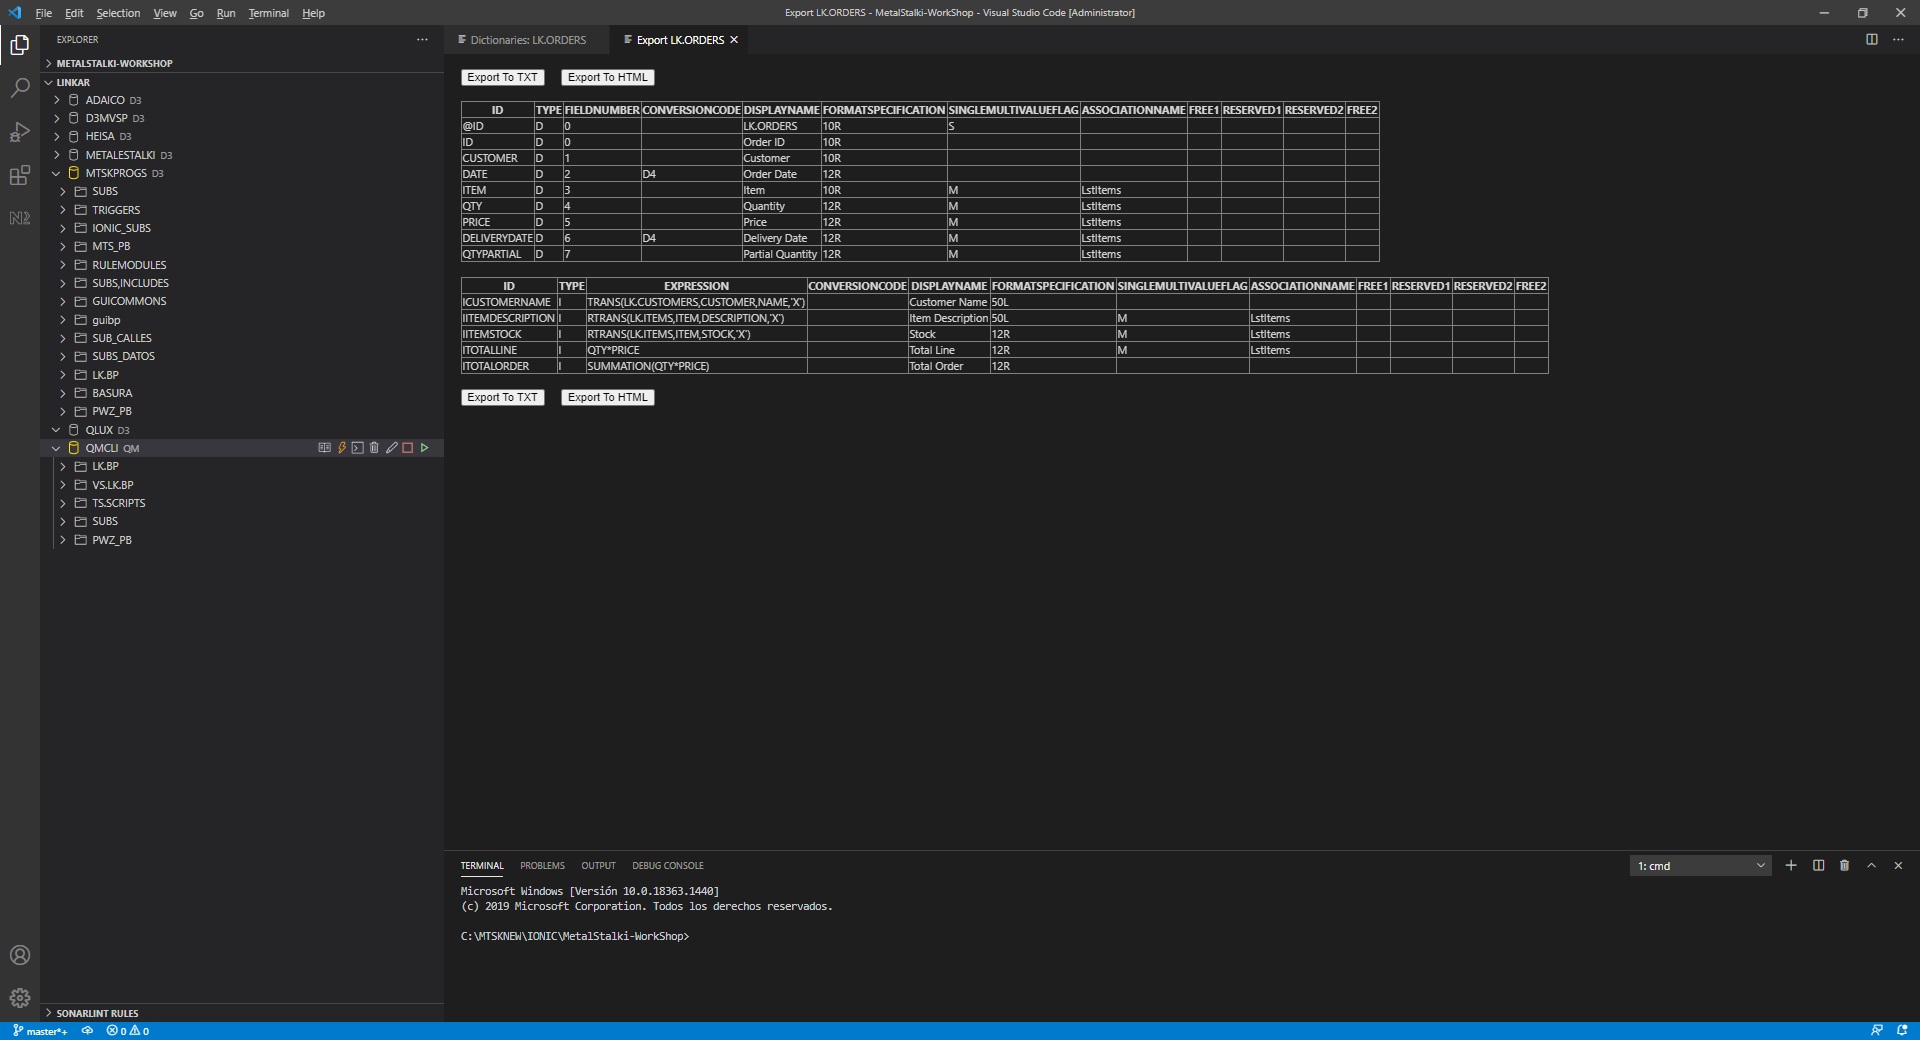
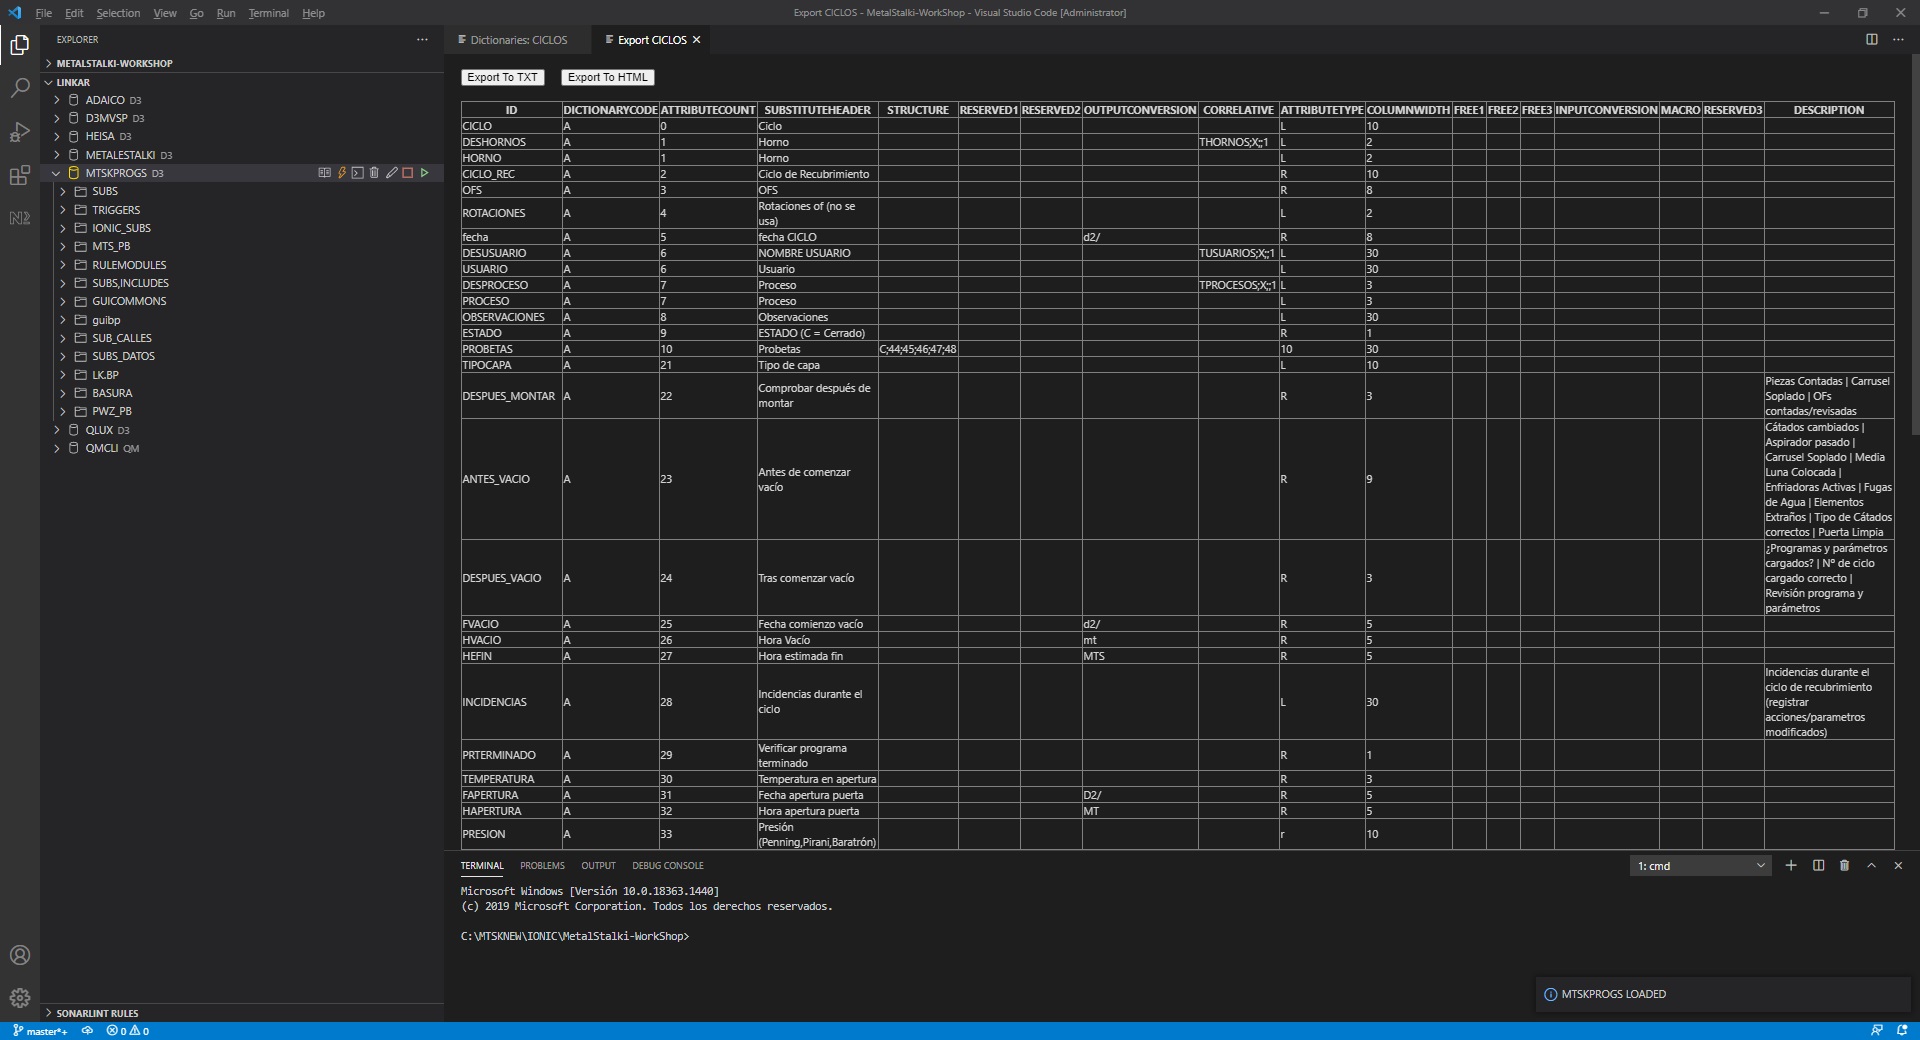
Export (4): Displays a table of all the dictionaries that can be exported to TXT or HTML.
Generate Equates (5): Generate equates with all the dictionary items in the file so you can copy/paste them in your source code.
Save changes: Save all new dictionary items and changes in the database.
Discard Changes: Discard all changes and new dictionary items.
The following is a list of features that the extensions offer MV Developers when using VS Code.
Syntax
Code is highlighted based on the current theme selected for VS Code.
Intellisense
As you type your program, you will be prompted with available statements and functions including the syntax and description.
Note that syntax highlighting and other code matching are not yet dynamically linked to this selection but that update will be forthcoming.
Find All References
You can find all references to a word in your program by right clicking on a word and selecting Find All References from the menu.
The display consists of two panels, the right containing the line that the word is in and the actual code block is in the left. Clicking on a line in the right panel will take you to the code block.
Goto/Peek Definition
If you right click on a internal or external subroutine name and select Peek Definition, a window appears showing the internal or external subroutine.
If you select Go to Definition , the cursor is moved to start of the subroutine.
If the subroutine is not in the same file, a text list will appear to choose the file that has the subroutine.
Internal Subroutine lookup
Pressing Ctl+Space after the words GOTO, GOSUB or GO TO, will allow you to select from defined internal subroutines in your program.
| KEYS | EFFECT |
|---|---|
| ALT+A + ALT+V | Insert char(253) character, @VM |
| ALT+A + ALT+S | Insert char(252) character, @SV |
| ALT+A + ALT+T | Insert char(251) character, @TM |
| ALT+S + ALT+B | Save and compile the code record |
| ALT+S + ALT+C | Save, compile and catalogue the code record |
| ALT+A + ALT+B | Compile the code record |
| ALT+A + ALT+C | Catalog the code record |
| ALT+A + ALT+I | Compare with Database |
| ALT+A + ALT+F | Search Items in live Connections |
| ALT+A + ALT+H | View Recent Items |
| ALT+A + ALT+D | Clear the Linkar history records |
VS Code's optimistic locking system does not compare with the actual record in the database. The extension includes its own optimistic blocking control, each time it is recorded, it checks with the database in case there has been any modification in the original record read at the time.
If a modification is found, an alarm goes off.
The retry button will always return the error. Maintained by VS Code Standard control.
The Save As button saves the record with another name.
The Discard button returns the original record when VS Code read the record (not the current one from the database).
The top X button closes the window. It is recommended by default. Once the window is closed, clicking the right button should use the Compare with Database option. It will check the differences between the open record and the one that exists in the database and act accordingly.
You have to make changes in this window, then you have to save them from here so that the original record will be updated with your change on the database avoiding the optimistic locking error.
Licence Copyright (c) 2020 MVExtensions Group
MIT License Permission is here by granted, free of charge, to any person obtaining a copy of this software and associated documentation files (the "Software"), to deal in the Software without restriction, including without limitation the rights to use, copy, modify, merge, publish, distribute, sublicense, and/or sell copies of the Software, and to permit persons to whom the Software is furnished to do so, subject to the following conditions:
The above copyright notice and this permission notice shall be included in all copies or substantial portions of the Software.
THE SOFTWARE IS PROVIDED "AS IS", WITHOUT WARRANTY OF ANY KIND, EXPRESS OR IMPLIED, INCLUDING BUT NOT LIMITED TO THE WARRANTIES OF MERCHANTABILITY, FITNESS FOR A PARTICULAR PURPOSE AND NONINFRINGEMENT. IN NO EVENT SHALL THE AUTHORS OR COPYRIGHT HOLDERS BE LIABLE FOR ANY CLAIM, DAMAGES OR OTHER LIABILITY, WHETHER IN AN ACTION OF CONTRACT, TORT OR OTHERWISE, ARISING FROM, OUT OF OR IN CONNECTION WITH THE SOFTWARE OR THE USE OR OTHER DEALINGS IN THE SOFTWARE.
All other trademarks and service marks are property of their respective holders.
This extension uses code created in the MVBasic VSCode Extension:
MV Basic Linkar includes code of the MvBasic Language module. It includes colors, intellisense, peek, references, etc.
Actually MV Basic Linkar has included the original code, so you do not need to install the MVBasic extension.
https://marketplace.visualstudio.com/items?itemName=mvextensions.mvbasic


