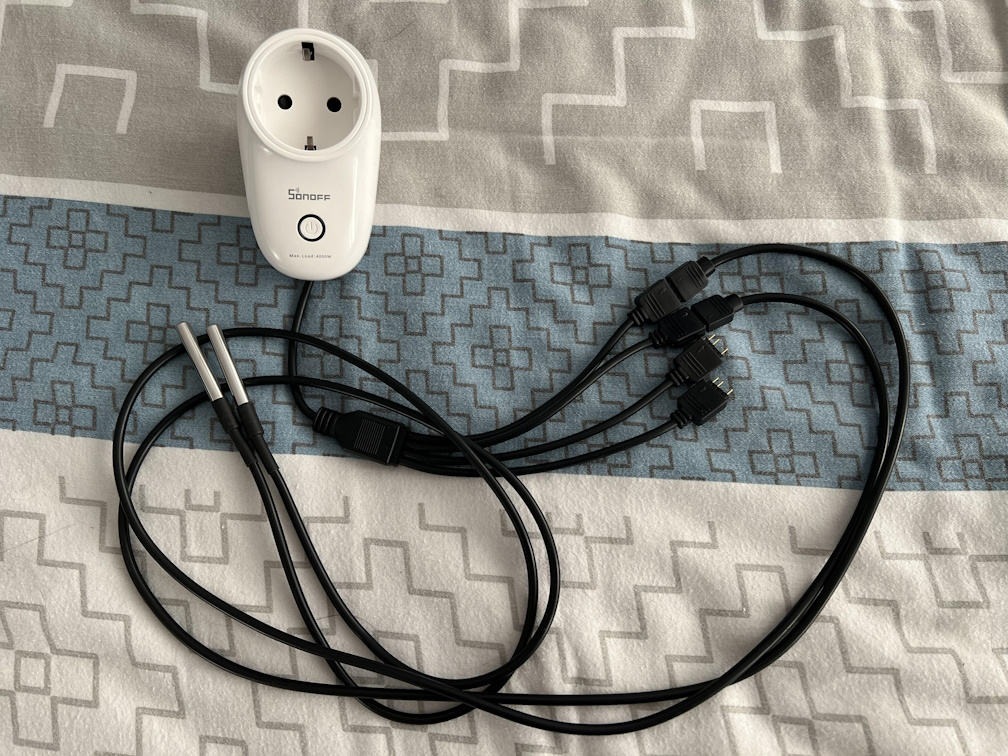
Are you tired of high electricity bills and inefficient heating systems in your home? The Smart Pump Control is the solution you've been waiting for. With this innovative device, you can enhance the performance of your heat pump in combination with central heating, ensuring optimal comfort, control and savings.
Report Bug
·
Request Feature
Table of Contents
Are you using floor heating and struggling with low temperature issues? The Smart Pump Control has the answer! By integrating this intelligent device into your heating system, you can optimize your energy consumption and maintain the perfect temperature in your home.
The Smart Pump Control is designed to work seamlessly with your heat pump and central heating system. It detects when either of these sources is producing heat and then intelligently activates your floor heating pump. This means you no longer have to keep the pump running continuously, wasting electricity when it's not needed. Instead, your heating system operates at its peak efficiency, saving you money on your energy bills.
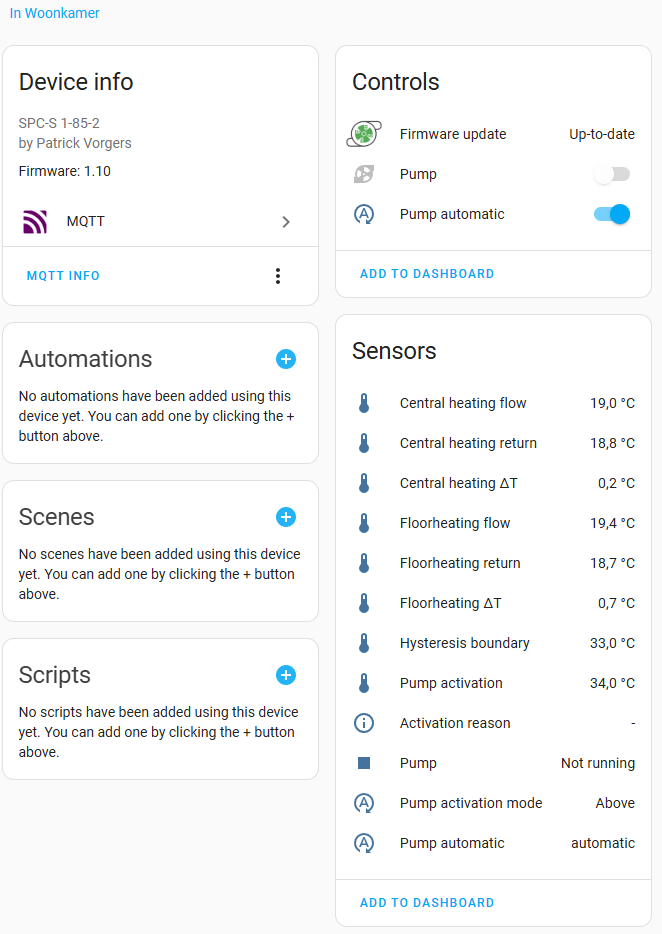
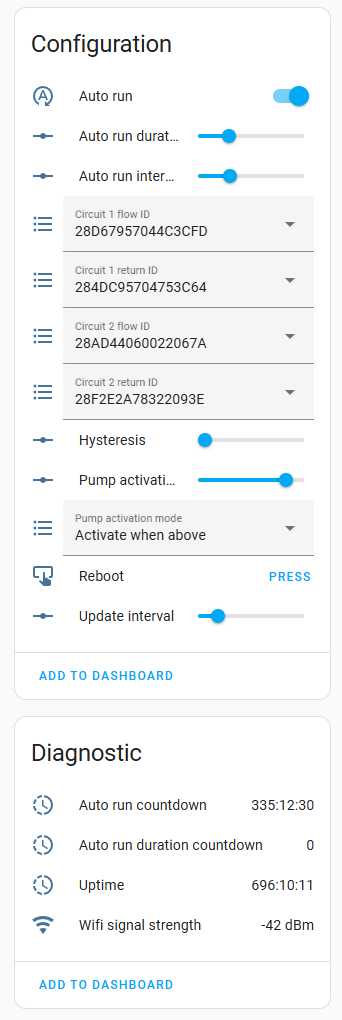
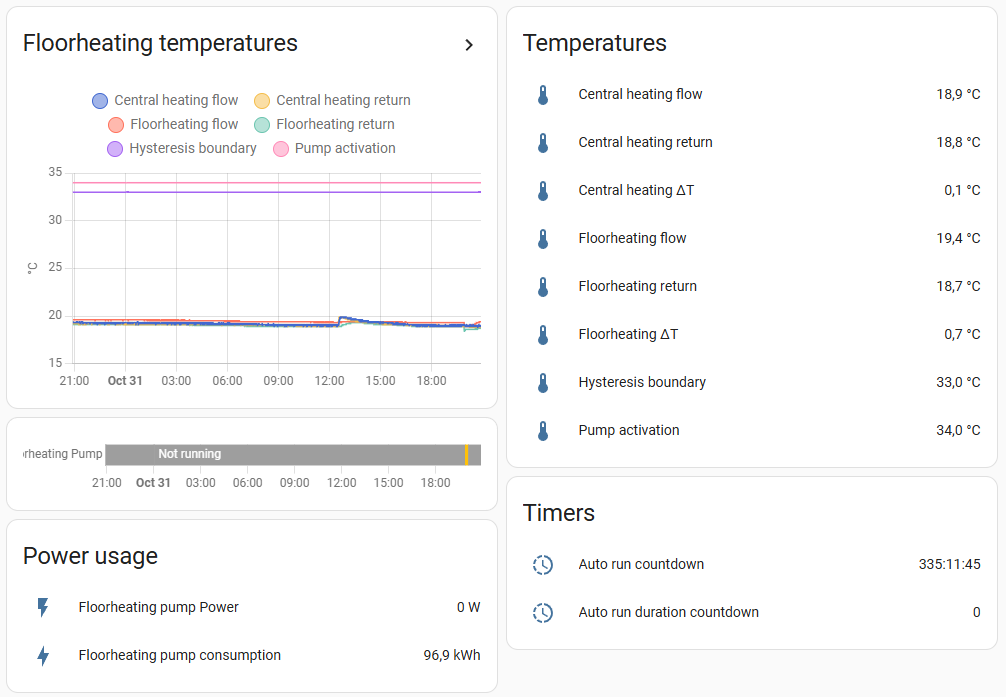
With the Smart Pump Control, you're gaining more control. You can easily monitor and manage your Smart Pump Control through popular home automation systems like Home Assistant. Adjust settings from the convenience of your smartphone or computer. It's a smarter, more connected way to manage your pump.
- Energy Savings: Reduce electricity consumption by only running your pump when necessary.
- Easy Installation: Simple setup ensures you can start saving in no time.
- Standalone operation: A Home Automation system is not required to operate.
- Home Automation Integration: Seamlessly integrate with Home Assistant or other automation systems for remote control and monitoring.
- Multiple forms of activation: Temperature based activation (threshold or delta) but also on external state triggers.
- Temperature based activation: Activate the pump based on a temperature trigger (threshold / delta).
- Autorun: Automatically run the pump based on a period of inactivity to prevent damage to the system.
- Frostprotection: Automatically run the pump when the registered temperature it too low to prevent frost damage.
- WebUI: Fully configure the SPC using a WebUI.
- Full API support: All userinterface functionality is also available as an API.
- MQTT support: Status information can be published via MQTT and used in any system that supports MQTT.
- Home Automation integration: Home Assistant autodiscovery of the device and monitoring and configuration via Home Assistant.
- External Trigger support: Trigger the Smart Pump Control based on an external JSON information. This can be any system that provides JSON data. For instance: Home Assistant or Heat pump systems.
- Automatic trigger configuration for Quatt heat pump systems by auto-detecting the Quatt
- Multiple devices: Support for multiple SPC's on the same network.
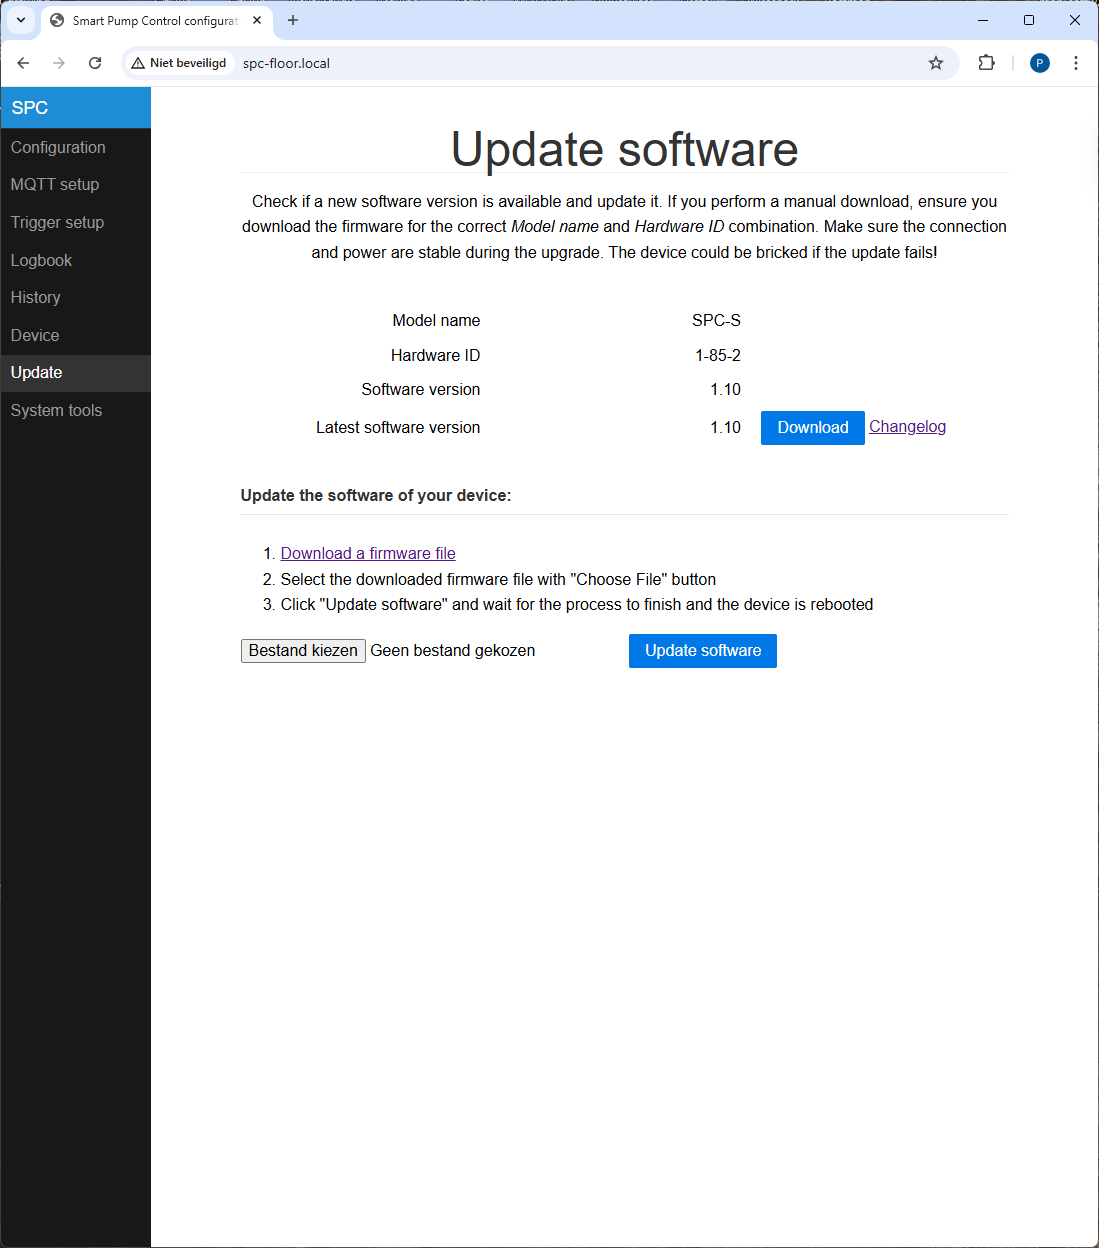
- Firmware update: New firmware releases are automatically detected. Upgrade can be initiated via WebUI and API.
Follow these simple steps to setup your Smart Pump Control
- In case temperature sensors can be connected, connect the temperature sensors to the device.
- Plug the device in an electrical outlet and wait for the blue led to start blinking (WiFi accesspoint mode).
- On your phone connect to the WiFi accesspoint and follow the steps to connect the Smart Pump Control to your WiFi network. It can take some time before the accessportal pops up so please be patient.
- SPC-S-AP for the socket version
- SPC-SC-AP for the socket version with no temperature sensors (core version)
- SPC-AP for the basic version
- After the Smart Pump Control has been connected to the WiFi, the Smart Pump Control can be accessed via the below links
- http://spc-s.local for the socket version
- http://spc-sc.local for the socket version with no temperature sensors (core version)
- http://spc.local for the basic version.
- On the device page it is possible to rename the device into a more meaningfull name (needed when using multiple Smart Pump Control's on the same network)
- In case temperature sensors can be connected, identify the temperature sensors by holding a single temperature sensor in your hand and monitor for 30 seconds on the SPC startpage the temperature of the sensors. On the configuration page the identified temperature sensor can be assigned (if needed) to another circuit and/or flow/return role.
- Update the configuration to your liking
Single press the button on the device. This will restart the device and preserve the configuration.
Double press the button on the device. This will restart the device and reset all the settings to the factory defaults except for the WiFi connection.
Press and hold the button on the device for at least 3 seconds. This will restart the device and reset all the settings to the factory defaults including the WiFi connection. After restart the blue led will start blinking to indicate that the device is in WiFi accesspoint mode and that the WiFi needs to be configured.
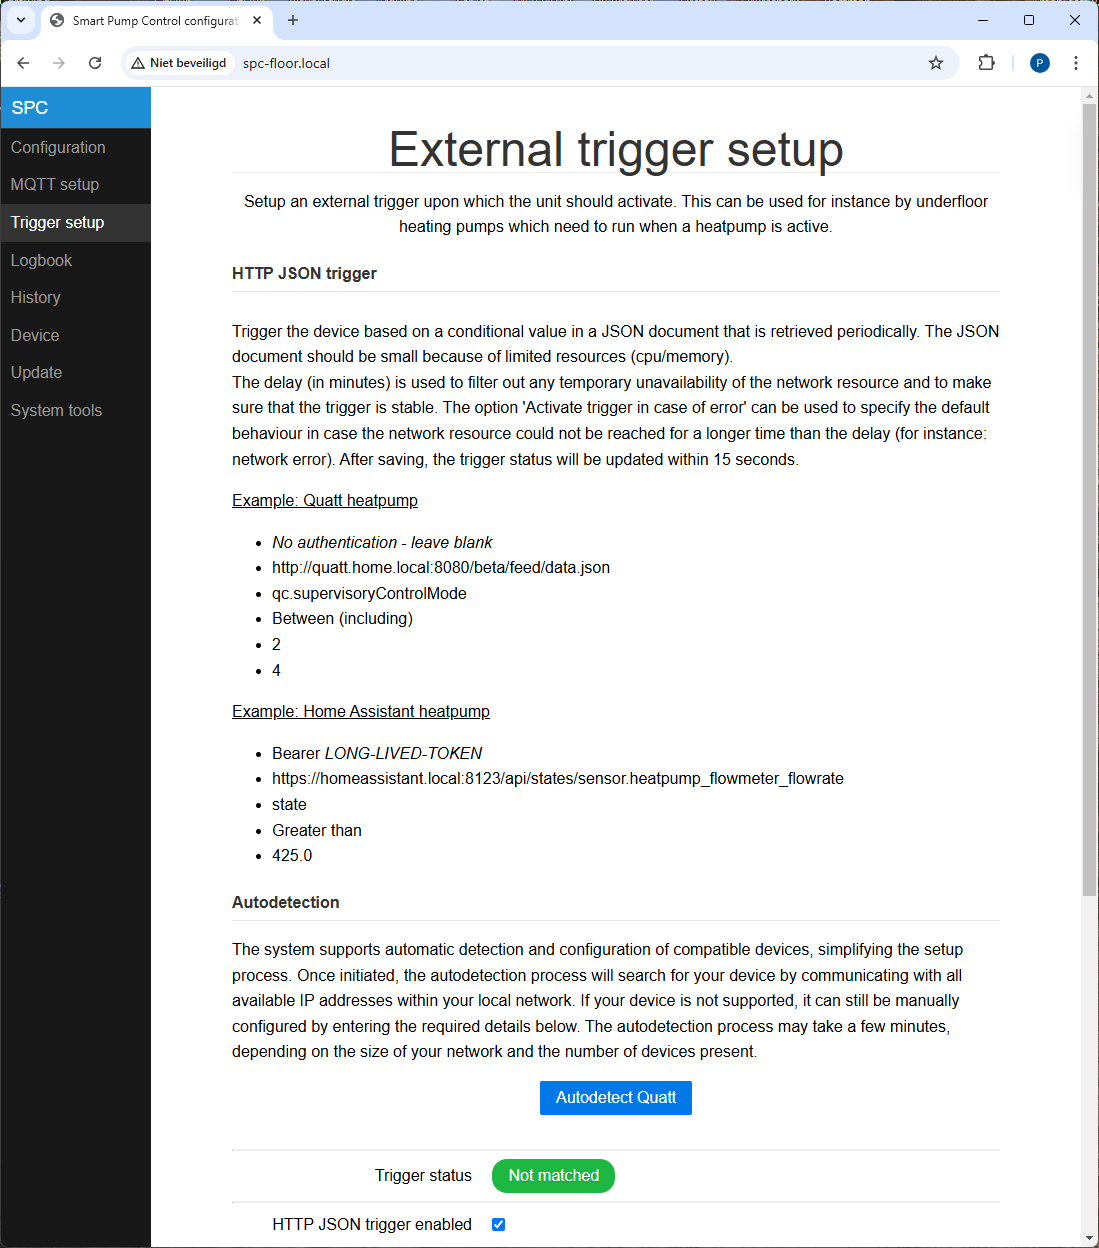
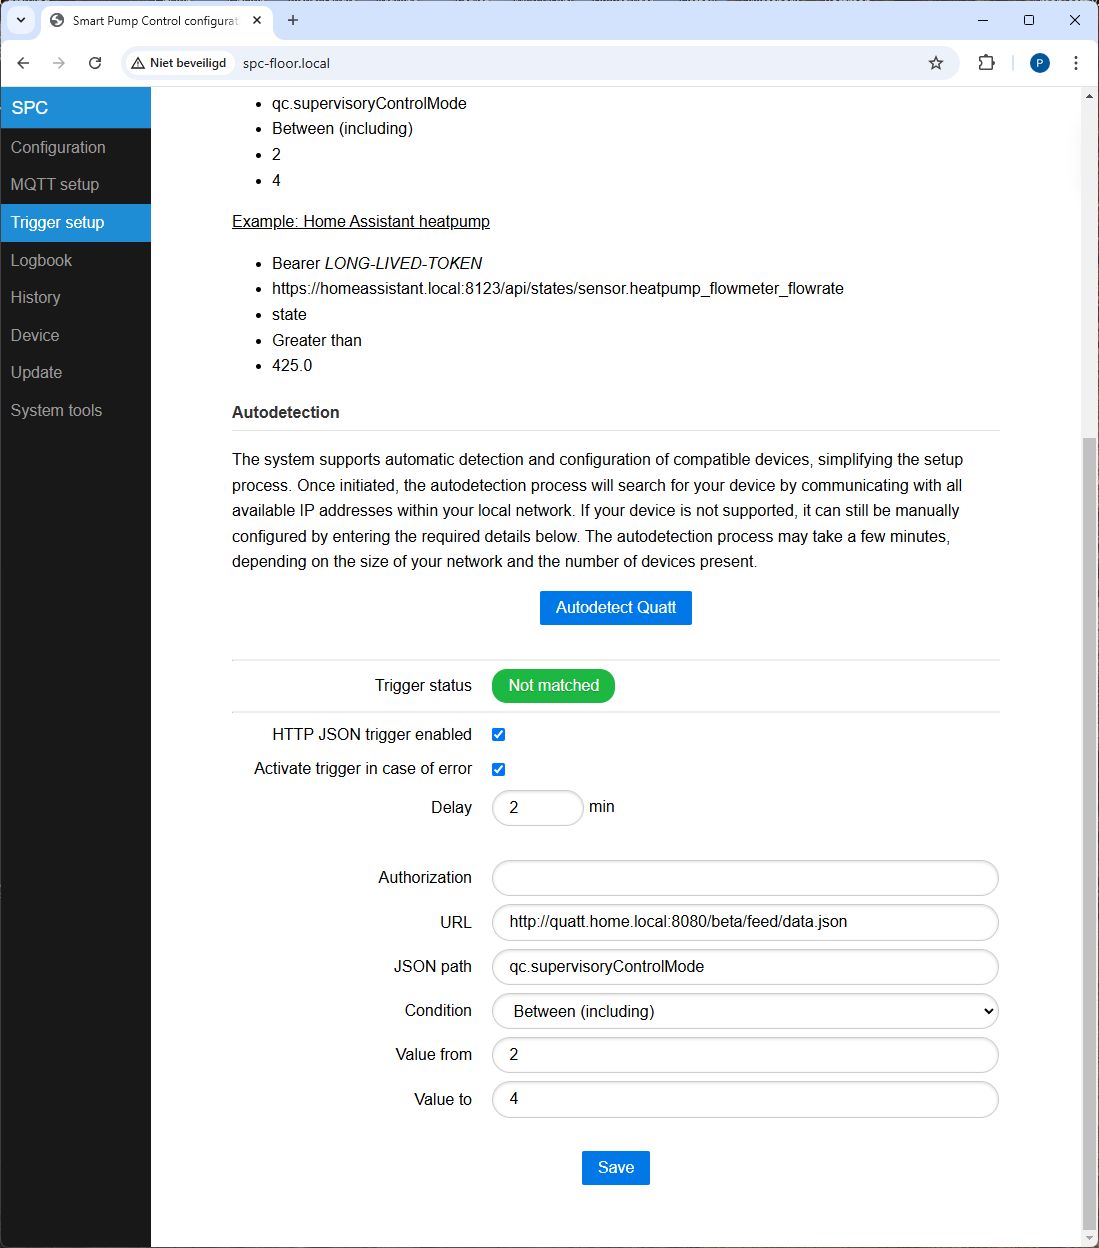
With trigger activation, it is possible to initiate the SPC based on an external trigger. Currently, it can make an API call and, based on the response, activate the pump. Trigger conditions can be customized to accommodate different activation requirements, allowing for greater flexibility and precision in pump control. This setup enables seamless integration with other systems, enhancing automation capabilities.
Example: Quatt heatpump
- No authentication - leave blank
- http://quatt.home.local:8080/beta/feed/data.json
- qc.supervisoryControlMode
- Between (including)
- 2
- 4
Example: Home Assistant heatpump
- Bearer LONG-LIVED-TOKEN
- https://homeassistant.local:8123/api/states/sensor.heatpump_flowmeter_flowrate
- state
- Greater than
- 425
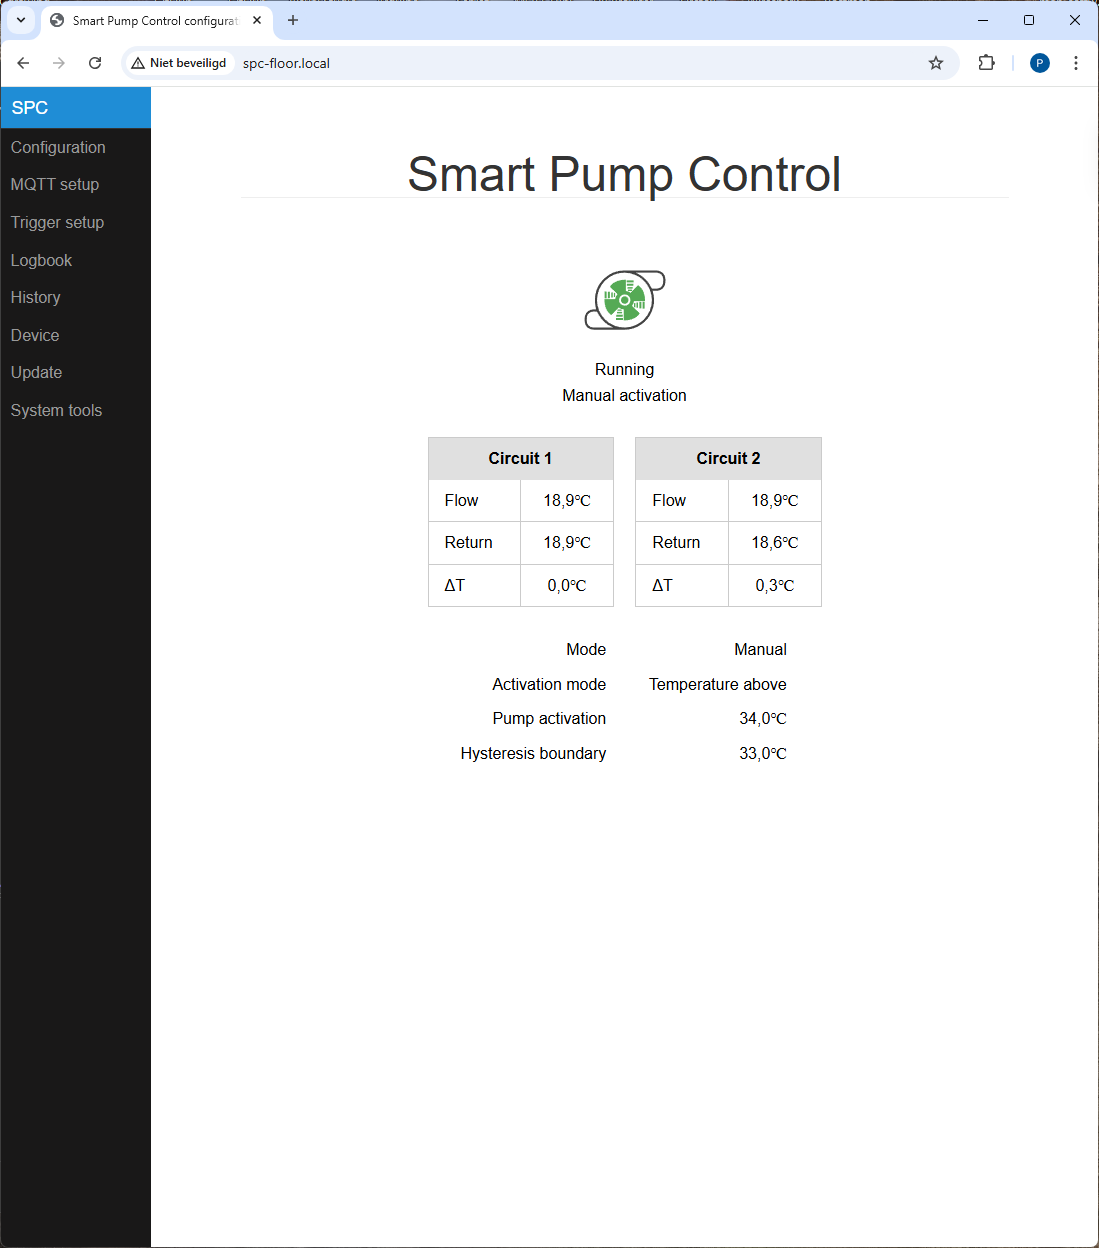
Main screen showing the state of the pump and temperature sensors
Trigger configuration for automatically starting/stopping the pump (autodetection for Quatt devices)
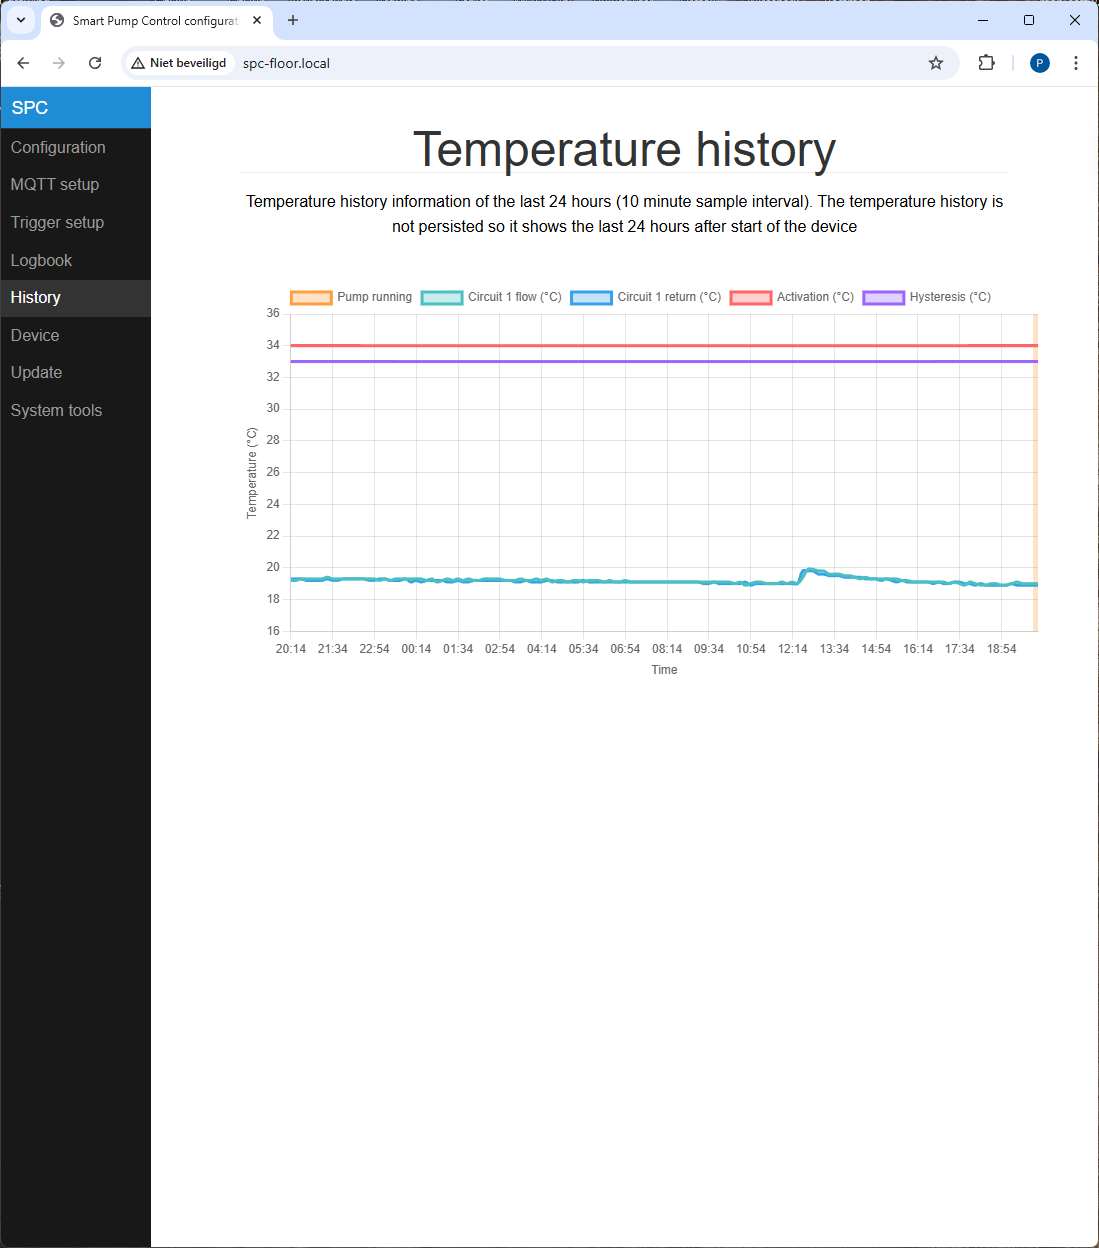
24h temperature history including pumpstate
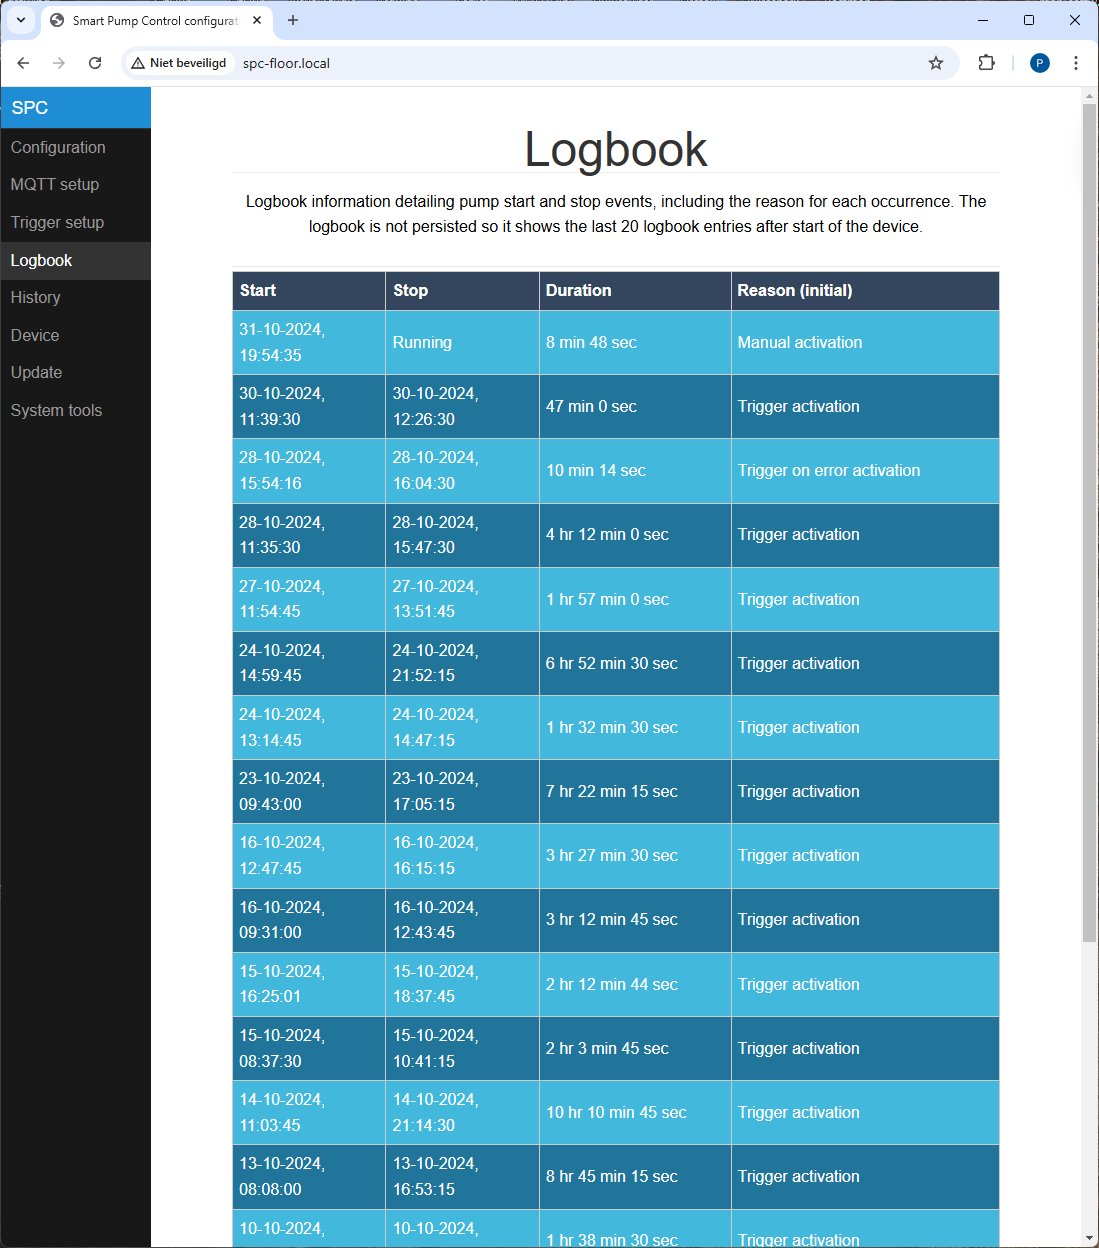
Logbook show when the pump was activated
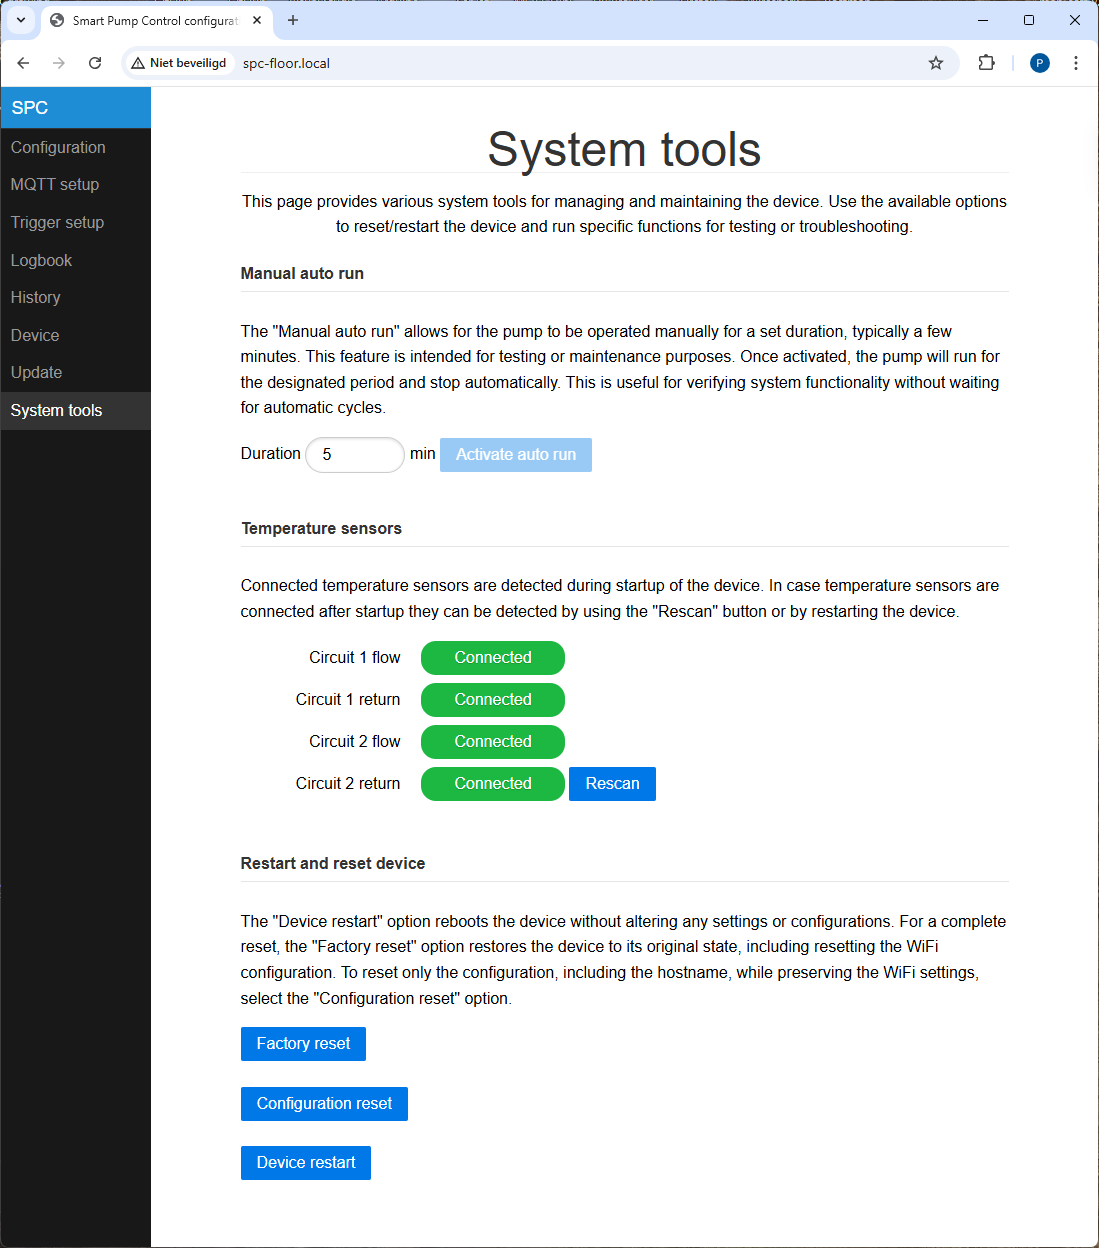
Configuration tools
Firmware update
- Autodetect IP of the external trigger system
- Different pump activation temperatures for summer and winter
- Default behaviour when the external trigger system is not available (activate pump / deactivate pump)
- Delta triggering, when difference between two sensors is above or below a threshold activate the pump (scenario: difference between flow and return)
- Logbook of trigger events and their duration
See the open issues for a full list of proposed features (and known issues).
Project Link: https://github.com/patrickvorgers/SPC

