How to achieve data migration from Kafka to AutoMQ through CloudCanal
With the rapid development of big data technology, Apache Kafka®, as a high-throughput, low-latency distributed messaging system, has become a core component for real-time data processing in enterprises. However, as businesses expand and technology evolves, enterprises face increasing storage costs and operational complexity. To better optimize system performance and reduce operational expenses, enterprises are seeking more advantageous messaging system solutions. Among these, AutoMQ [1], a cloud-native redesigned messaging system, stands out as an ideal choice for enterprises due to its significant cost advantages and elasticity.
AutoMQ redesigns Kafka based on cloud infrastructure, separating storage to object storage. While maintaining 100% compatibility with Apache Kafka®, it offers users up to 10 times the cost advantage and a hundredfold elasticity advantage. AutoMQ offloads storage to shared cloud storage provided by cloud providers such as EBS and S3 through its S3Stream, a stream storage repository built on S3. This provides low-cost, low-latency, high-availability, high-durability, and virtually unlimited capacity for stream storage. Compared to traditional Shared Nothing architecture, AutoMQ adopts a Shared Storage architecture, significantly reducing storage and operational complexity while enhancing system elasticity and durability.
AutoMQ's design philosophy and technical advantages make it an ideal choice for replacing existing Kafka clusters in enterprises. By adopting AutoMQ, enterprises can significantly reduce storage costs, simplify operations, and achieve automatic scaling and self-balancing of clusters, thus more efficiently responding to changing business demands.
CloudCanal [2] is a data synchronization and migration tool that helps enterprises build high-quality data pipelines. It boasts advantages such as real-time efficiency, precise interconnectivity, stability, scalability, one-stop deployment, hybrid deployment, and complex data transformation. CloudCanal supports data migration, data synchronization, schema migration and synchronization, data validation, and correction functionalities, meeting the high demands of enterprises for data quality and stability in data management processes. By consuming the incremental operation logs from the source data source, CloudCanal can replay these operations in near real-time on the destination data source to achieve data synchronization.
In the daily operations of an enterprise, upgrading and migrating data systems is inevitable. For example, when an enterprise's e-commerce platform faces a surge in traffic and explosive data growth, the existing Kafka cluster may fail to meet the demand, leading to performance bottlenecks and significant increases in storage costs. To address these challenges, an enterprise may decide to migrate to the more cost-effective and elastic AutoMQ system.
In this migration process, both full synchronization and incremental synchronization are critical steps. Full synchronization can migrate all existing data in Kafka to AutoMQ, ensuring the integrity of the foundational data. Incremental synchronization, after completing full synchronization, captures and synchronizes newly added and modified data in Kafka in real-time, ensuring data consistency between the two systems during the migration process. Next, I will take incremental synchronization as an example to detail how to use CloudCanal to achieve data migration from Kafka to AutoMQ, ensuring data consistency and completeness during the migration process.
Before proceeding with data reassignment, ensure that the following prerequisites are met. This article will use one Kafka node and one AutoMQ node to demonstrate the incremental synchronization process.
-
Kafka Node: A deployed and running Kafka node. Ensure the Kafka node can normally receive and process messages, and that the Kafka node's network configuration allows communication with the CloudCanal service.
-
AutoMQ Node: A deployed and running AutoMQ node. Ensure the AutoMQ node can normally receive and process messages, and that the AutoMQ node's network configuration allows communication with the CloudCanal service.
-
CloudCanal Service: A deployed and configured CloudCanal service.
Refer to AutoMQ official documentation: QuickStart | AutoMQ [3]
Refer to Apache Kafka official documentation: QuickStart | Kafka [4]
- Install Basic Tools
## ubuntu
sudo apt update
sudo apt install apt-transport-https ca-certificates curl gnupg-agent software-properties-common
sudo apt-get install -y lsof
sudo apt-get install -y bc
sudo apt-get install -y p7zip-full
- Download the Installation Package
Log in to the CloudCanal official website [5], click the download button for the Private Deployment version to get the software package download link. Download and extract it to the /opt/ directory.
cd /opt
# download
wget -cO cloudcanal.7z "${the download link of software package}"
# extract
7z x cloudcanal.7z -o./cloudcanal_home
cd cloudcanal_home/install_on_docker
The content of the install_on_docker directory includes
-
Images: Four compressed files with tar extension in the images directory
-
docker container orchestration file: docker-compose.yml file
-
Scripts: Scripts for managing and maintaining CloudCanal containers
- Prepare Docker environment
Please ensure the following ports are not occupied
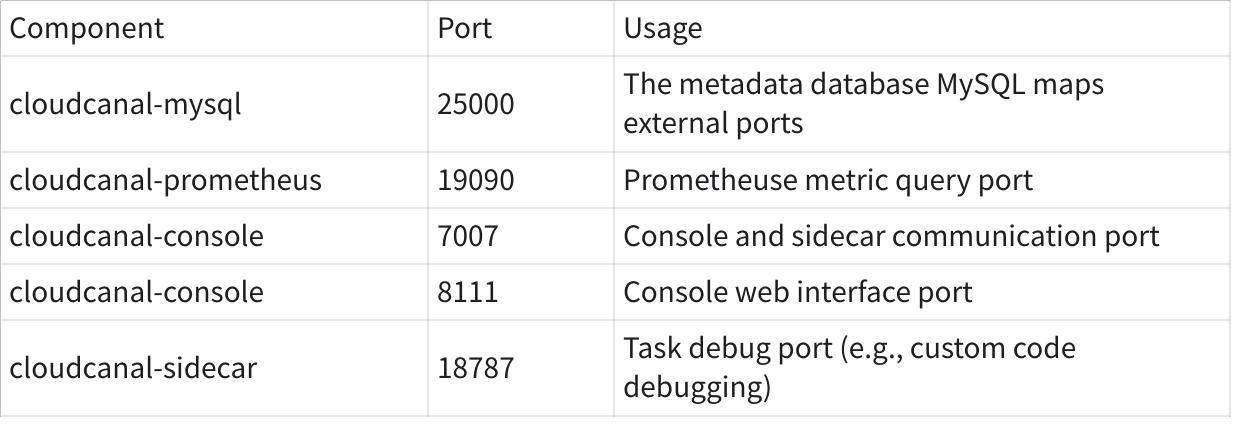
If you do not have Docker and Docker Compose environments, you can refer to the [Docker official documentation] [6] (version 17.x.x and above). You can also directly use the scripts provided in the directory for installation:
## ubuntu,enter install_on_docker directory
bash ./support/install_ubuntu_docker.sh
- Start CloudCanal by executing the installation script:
## ubuntu
bash install.sh
If the following message appears, the installation is successful.
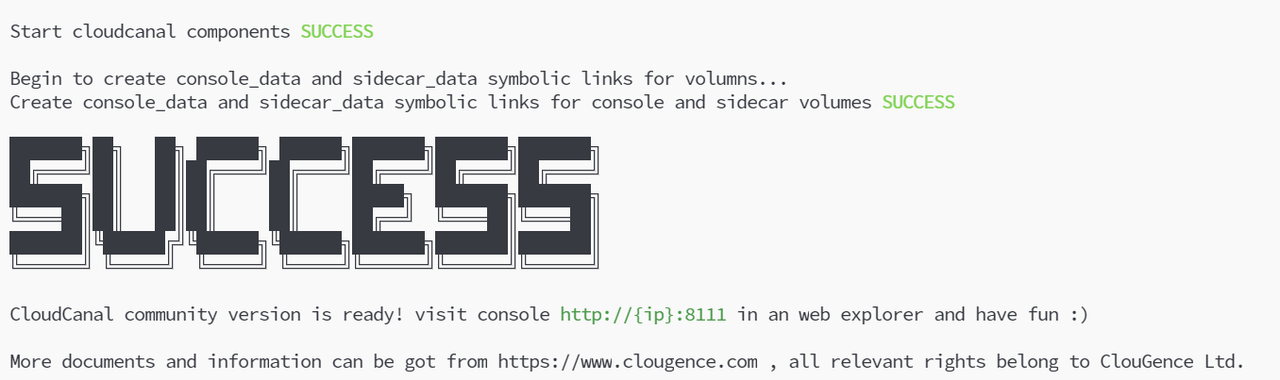
Once the installation is successful, you can access the CloudCanal console through your browser at http://{ip}:8111.
Note: If you are unable to access the page, try updating the current version of CloudCanal using the following command:
# enter the installation directory
cd /opt/cloudcanal_home/install_on_docker
# stop current CloudCanal
sudo bash stop.sh
# update and start new CloudCanal
sudo bash upgrade.sh
-
After entering the login page, log in using the trial account.
-
Account: [email protected]
-
Password: clougence2021
-
Default verification code: 777777
-
-
Login successful. Activation of the CloudCanal account is required for normal use. Apply for a free license and activate: License Acquisition | CloudCanal [7]. After successful activation, the main interface status will be:

Following options are available:
-
The data synchronization process from MySQL to Kafka provided by CloudCanal can be referred to here: MySQL to Kafka Synchronization | CloudCanal [8]
-
Preparing data using the Kafka SDK
-
Manually producing messages using Kafka-provided scripts
Here, I will prepare the data using the Kafka SDK. Below is the reference code:
import org.apache.kafka.clients.admin.AdminClient;
import org.apache.kafka.clients.admin.AdminClientConfig;
import org.apache.kafka.clients.admin.NewTopic;
import org.apache.kafka.clients.producer.KafkaProducer;
import org.apache.kafka.clients.producer.ProducerConfig;
import org.apache.kafka.clients.producer.ProducerRecord;
import org.apache.kafka.clients.producer.RecordMetadata;
import org.apache.kafka.common.serialization.StringSerializer;

import java.util.ArrayList;
import java.util.List;
import java.util.Properties;
import java.util.concurrent.ExecutionException;

public class KafkaTest {

    private static final String BOOTSTRAP_SERVERS = "${kafka_broker_ip:port}"; //change to your own Kafka node address
    private static final int NUM_TOPICS = 50;
    private static final int NUM_MESSAGES = 500;

    public static void main(String[] args) throws Exception {
        KafkaTest test = new KafkaTest();
        test.createTopics();
        test.sendMessages();
    }

    // create 50 Topic,with Topic-n format
    public void createTopics() {
        Properties props = new Properties();
        props.put(AdminClientConfig.BOOTSTRAP_SERVERS_CONFIG, BOOTSTRAP_SERVERS);

        try (AdminClient adminClient = AdminClient.create(props)) {
            List<NewTopic> topics = new ArrayList<>();
            for (int i = 1; i <= NUM_TOPICS; i++) {
                topics.add(new NewTopic("Topic-" + i, 1, (short) 1));
            }
            adminClient.createTopics(topics).all().get();
            System.out.println("Topics created successfully");
        } catch (InterruptedException | ExecutionException e) {
            e.printStackTrace();
        }
    }
    // Send a total of 1000 messages in Json format, sequentially numbered from 1 to 1000, for each of the 50 Topic-n.
    public void sendMessages() {
        Properties props = new Properties();
        props.put(ProducerConfig.BOOTSTRAP_SERVERS_CONFIG, BOOTSTRAP_SERVERS);
        props.put(ProducerConfig.KEY_SERIALIZER_CLASS_CONFIG, StringSerializer.class.getName());
        props.put(ProducerConfig.VALUE_SERIALIZER_CLASS_CONFIG, StringSerializer.class.getName());

        try (KafkaProducer<String, String> producer = new KafkaProducer<>(props)) {
            for (int i = 1; i <= NUM_TOPICS; i++) {
                String topic = "Topic-" + i;
                for (int j = 1; j <= NUM_MESSAGES; j++) {
                    String key = "key-" + j;
                    String value = "{\"userId\": " + j + ", \"action\": \"visit\", \"timestamp\": " + System.currentTimeMillis() + "}";
                    ProducerRecord<String, String> record = new ProducerRecord<>(topic, key, value);
                    producer.send(record, (RecordMetadata metadata, Exception exception) -> {
                        if (exception == null) {
                            System.out.printf("Sent message to topic %s partition %d with offset %d%n", metadata.topic(), metadata.partition(), metadata.offset());
                        } else {
                            exception.printStackTrace();
                        }
                    });
                }
            }
            System.out.println("Messages sent successfully");
        }
    }
}
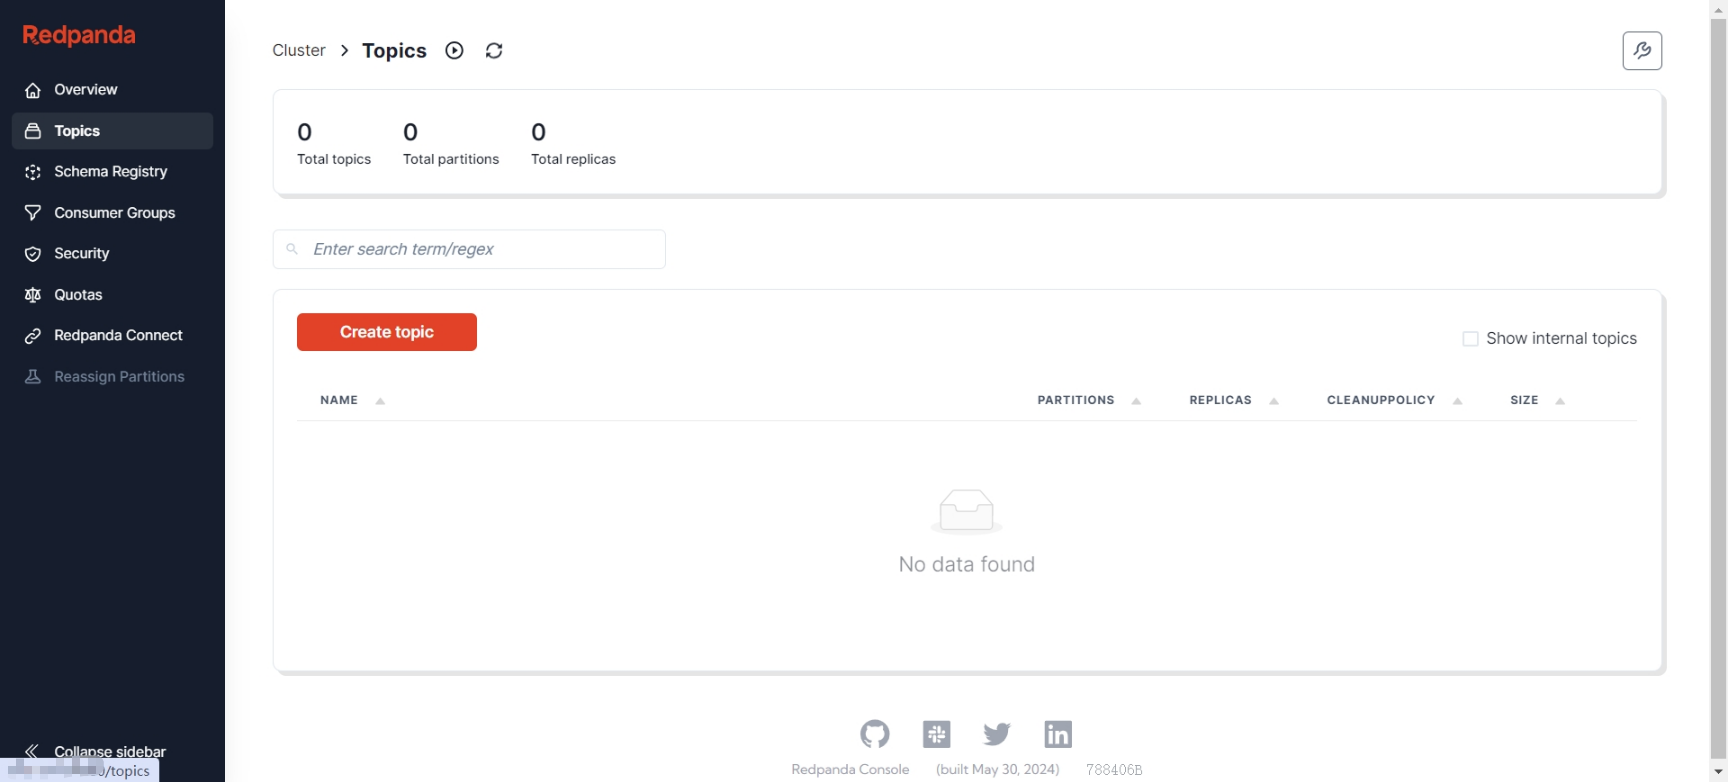
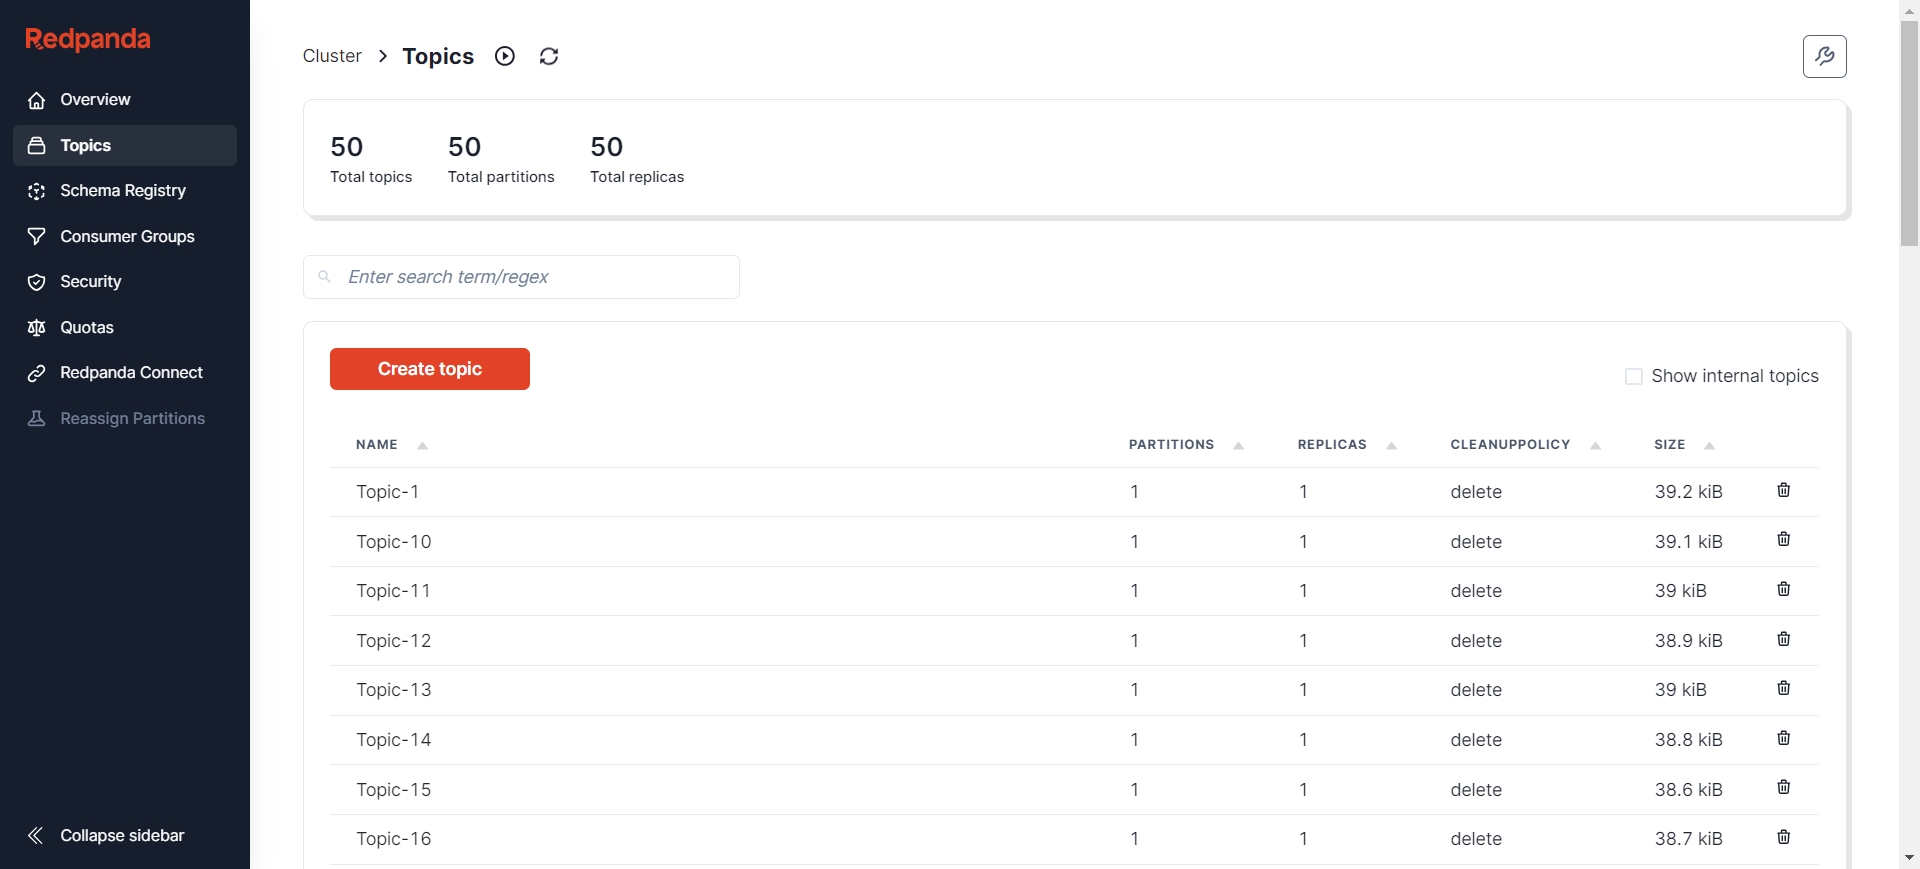
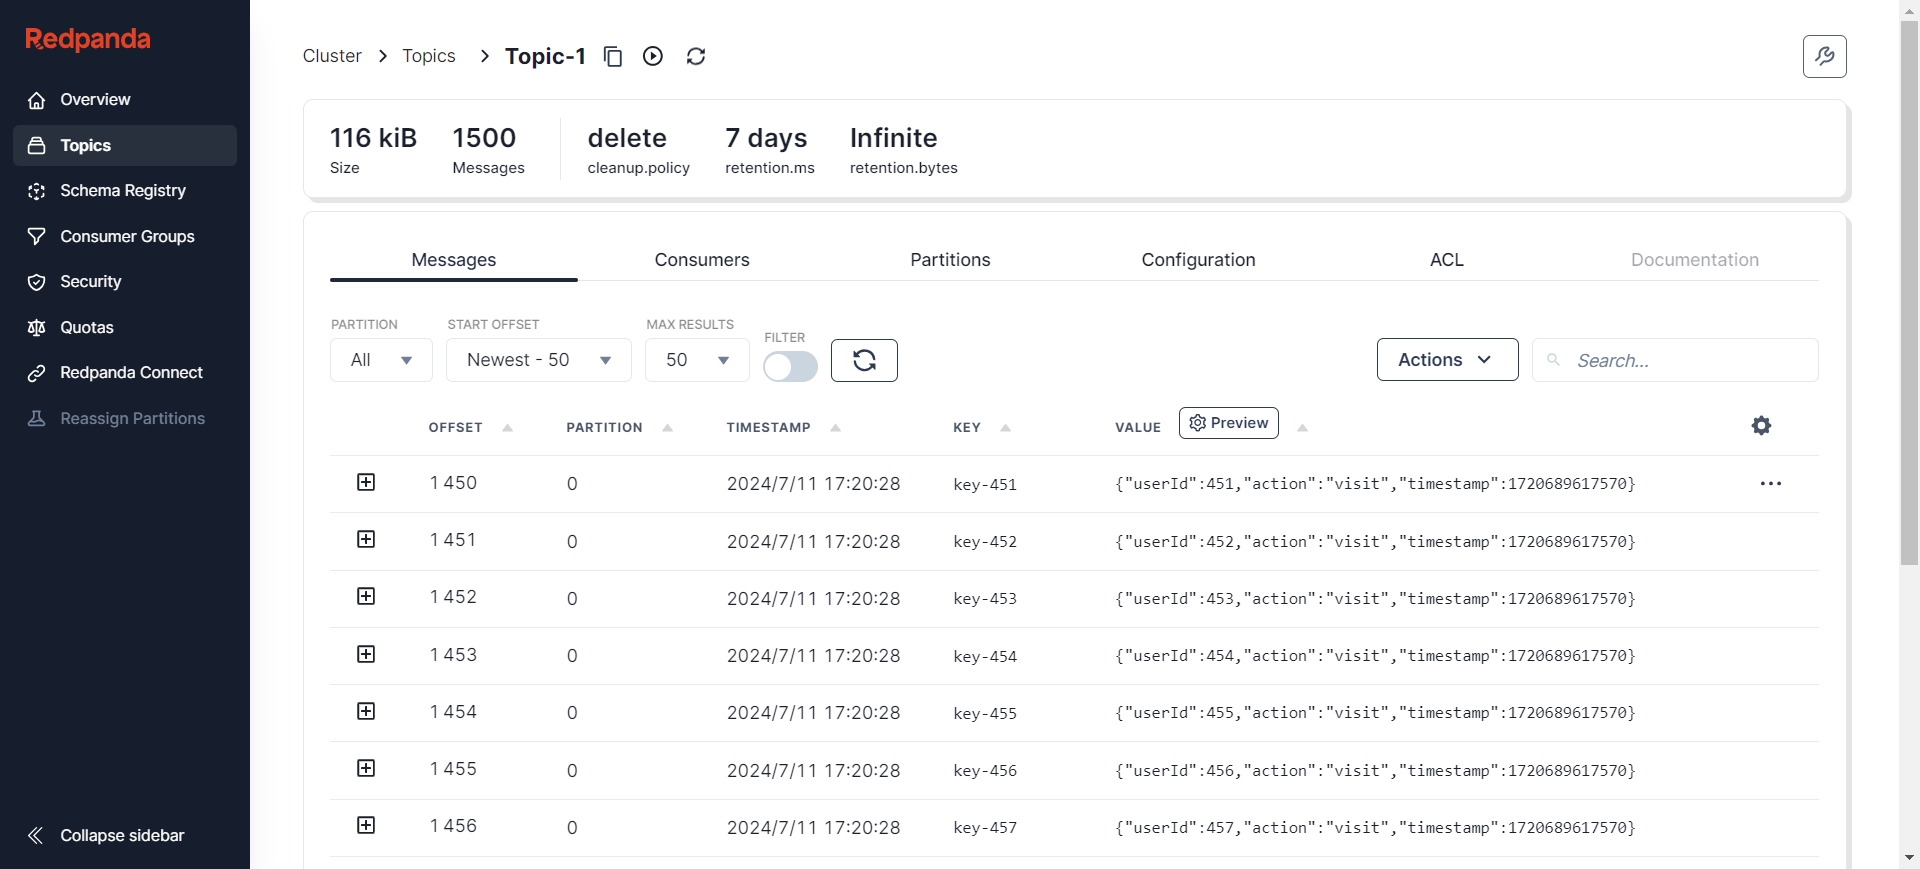
After creation, you can view the status of Kafka nodes through various visualization tools such as Redpanda Console [9], Kafdrop [10], etc. Here, I choose Redpanda Console, where you can see there are already 50 Topics, and each Topic has 500 initial messages.

The messages are in JSON format:
{
    "action": "INSERT/UPDATE/DELETE",
    "bid": 1,
    "before": [],
    "data": [{
        "id":"string data",
        "username":"string data",
        "user_id":"string data",
        "ip":"string data",
        "request_time":"1608782968300","request_type":"string data"}],
    "db": "access_log_db",
    "schema": "",
    "table":"access_log",
    "dbValType": {
        "id":"INT",
        "username":"VARCHAR",
        "user_id":"INT",
        "ip":"VARCHAR",
        "request_time":"TIMESTAMP",
        "request_type":"VARCHAR",},
    "jdbcType": {
        "id":"0",
        "username":"0",
        "user_id":"0",
        "ip":"0",
        "request_time":"0",
        "request_type":"0",},
    "entryType": "ROWDATA",
    "isDdl": false,
    "pks": ["id"],
    "execTs": 0,
    "sendTs": 0,
    "sql": ""}
Furthermore, the AutoMQ nodes currently have no data.
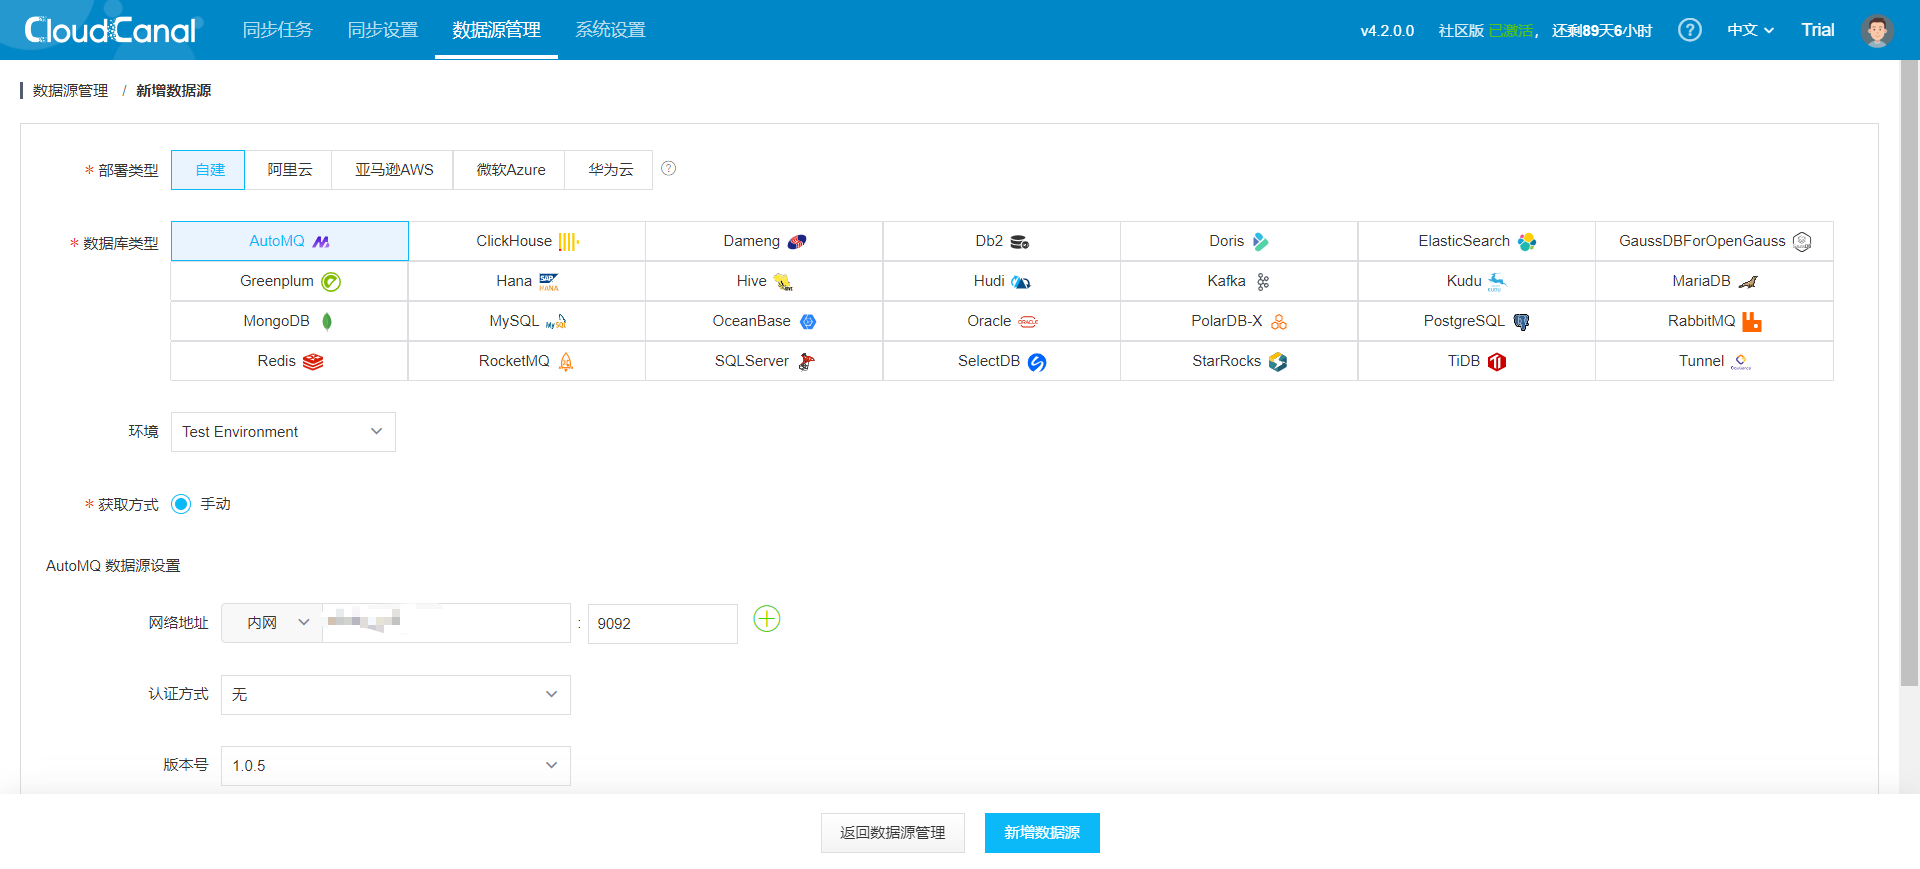
On the CloudCanal interface, navigate to Data Source Management -> Add Data Source.
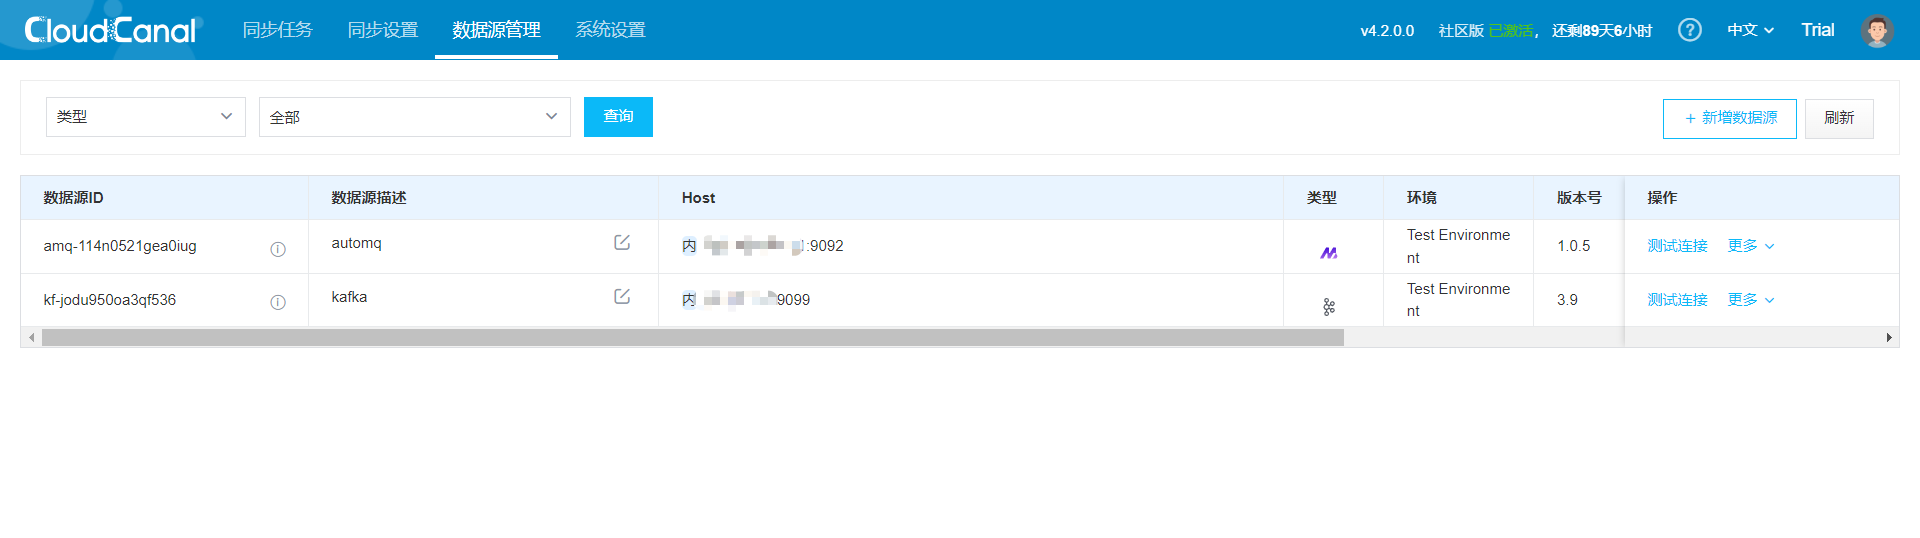
Similarly, add a Kafka data source and perform connection tests on both nodes. The results are as follows:
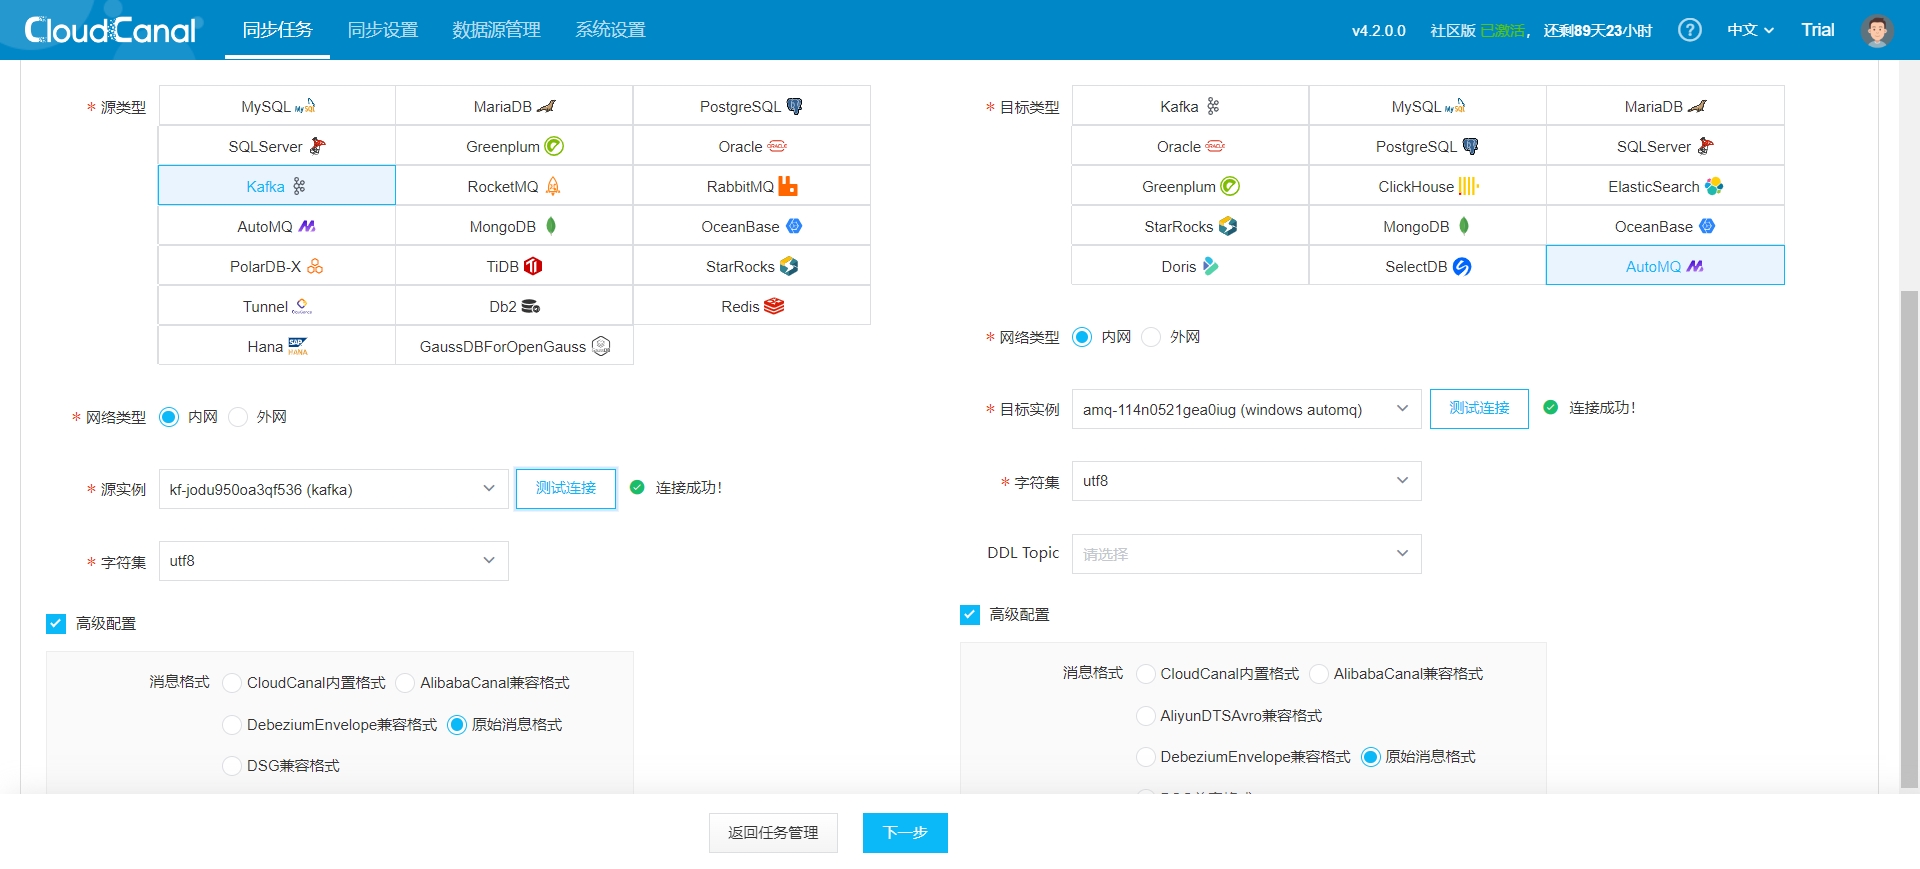
- On the CloudCanal interface, navigate to Sync Tasks -> Create Task.
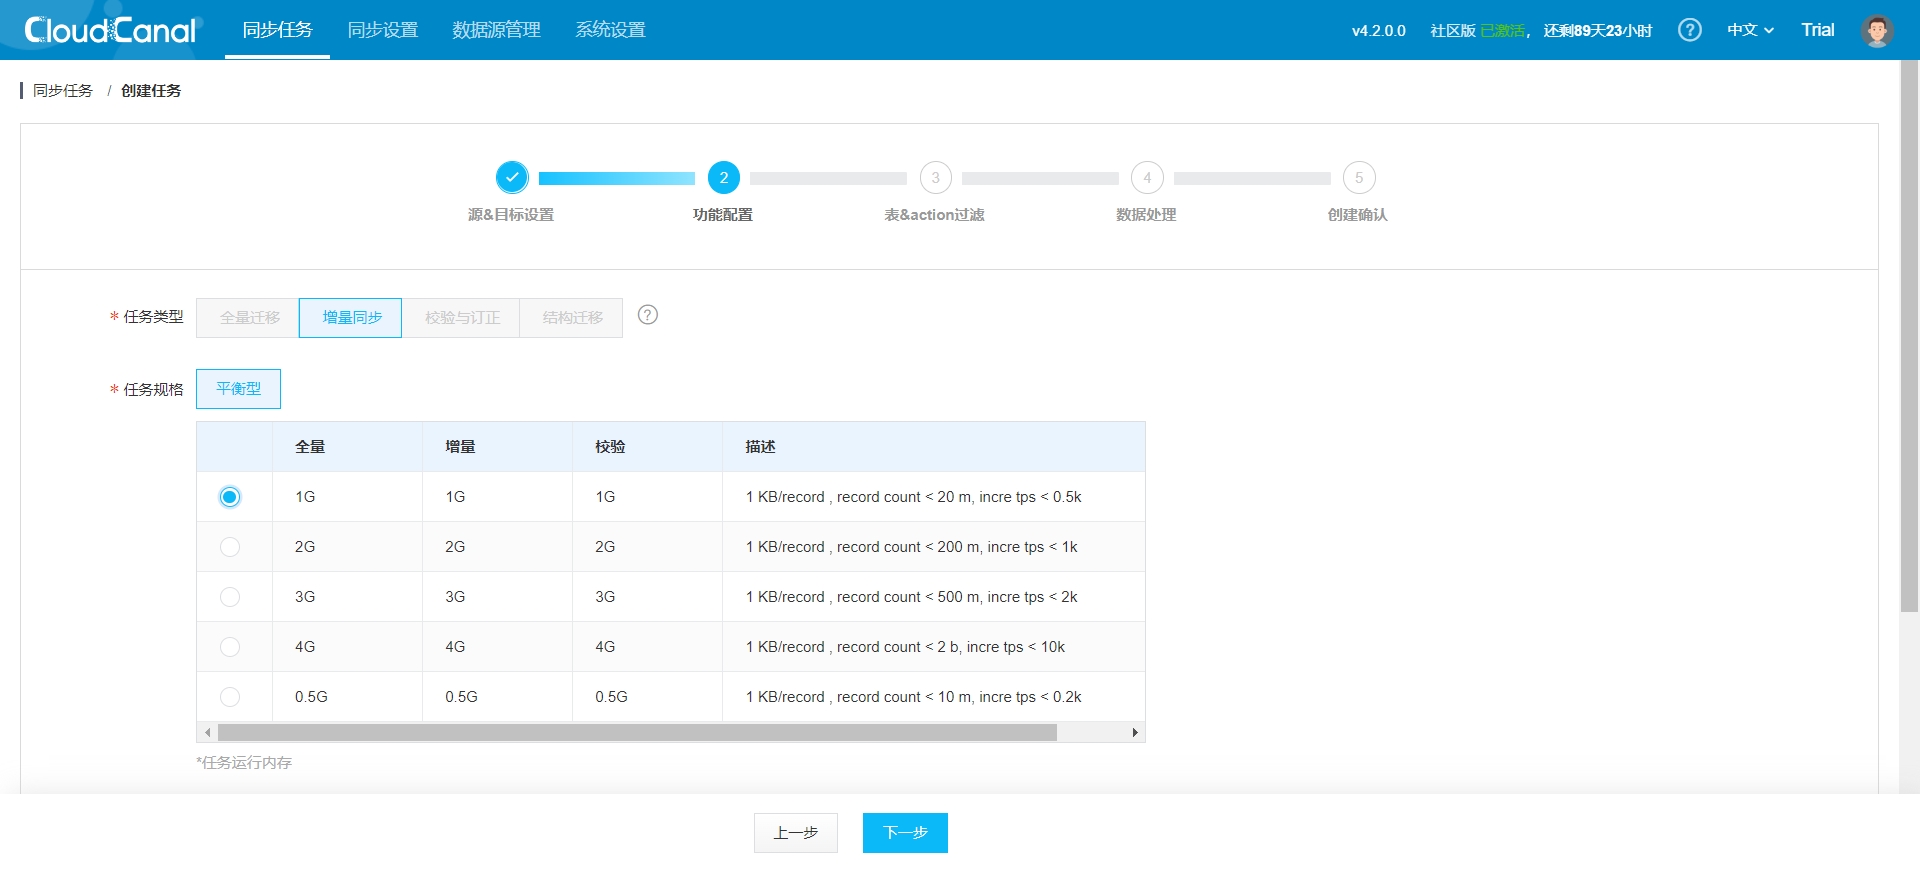
- Choose task specifications depending on the amount of data you need to reassign:
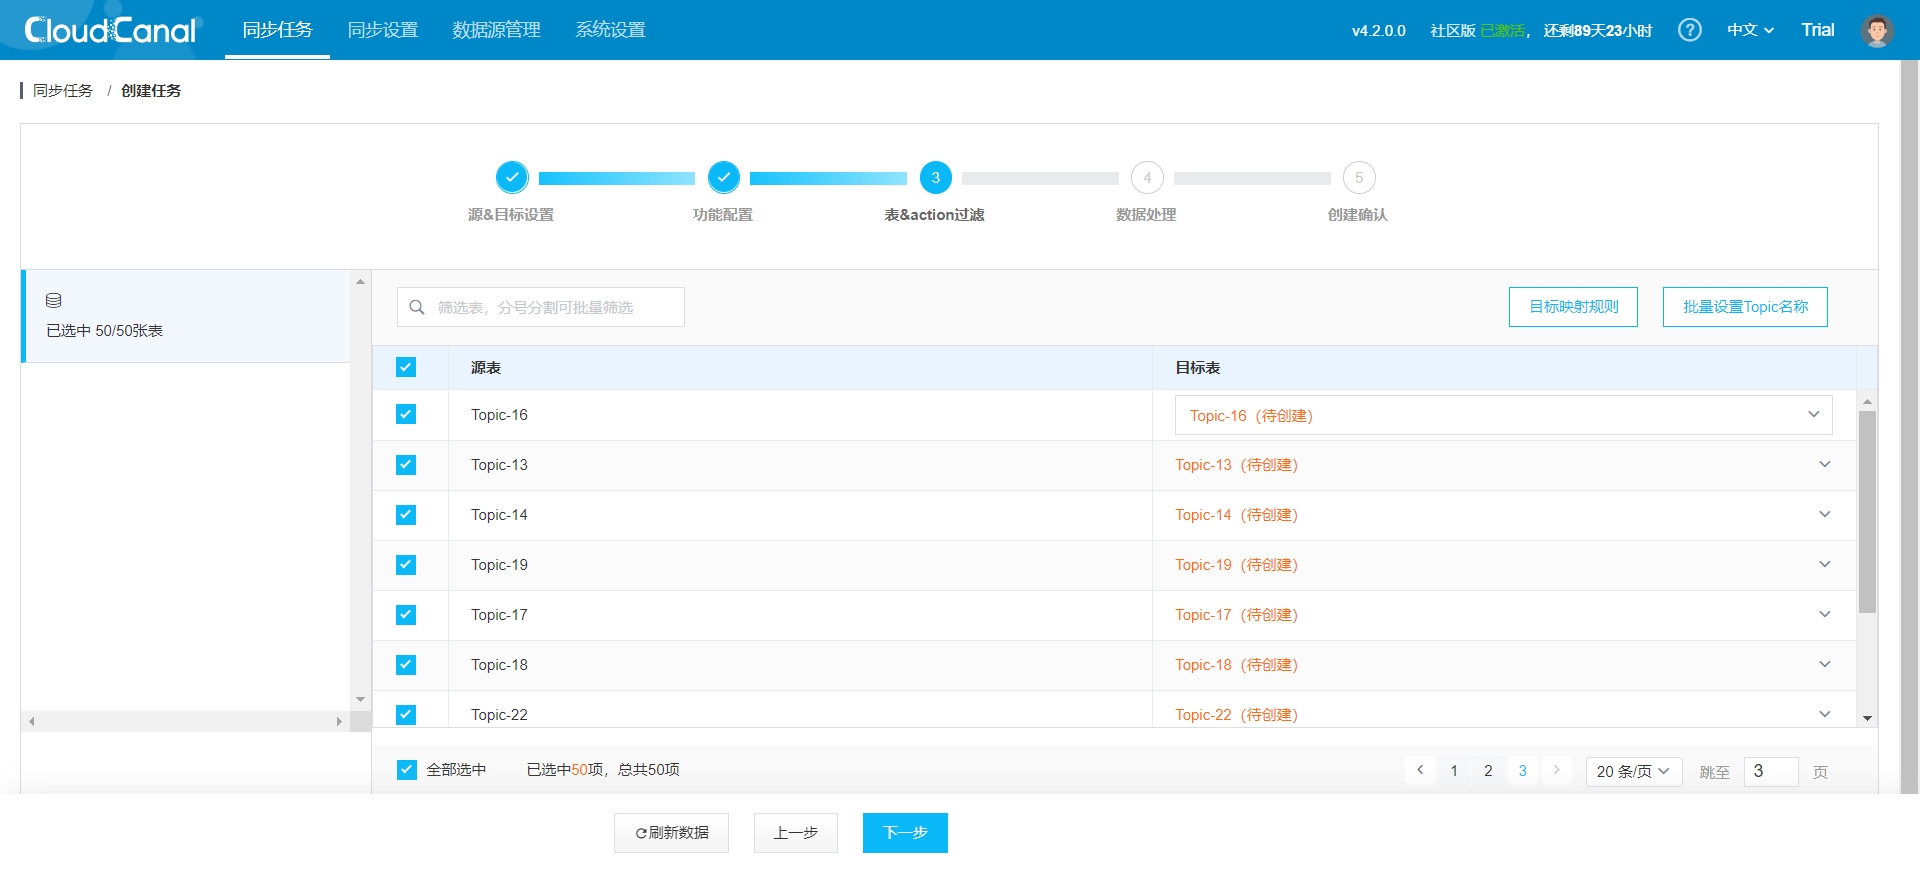
- Choose the Topics for data reassignment:
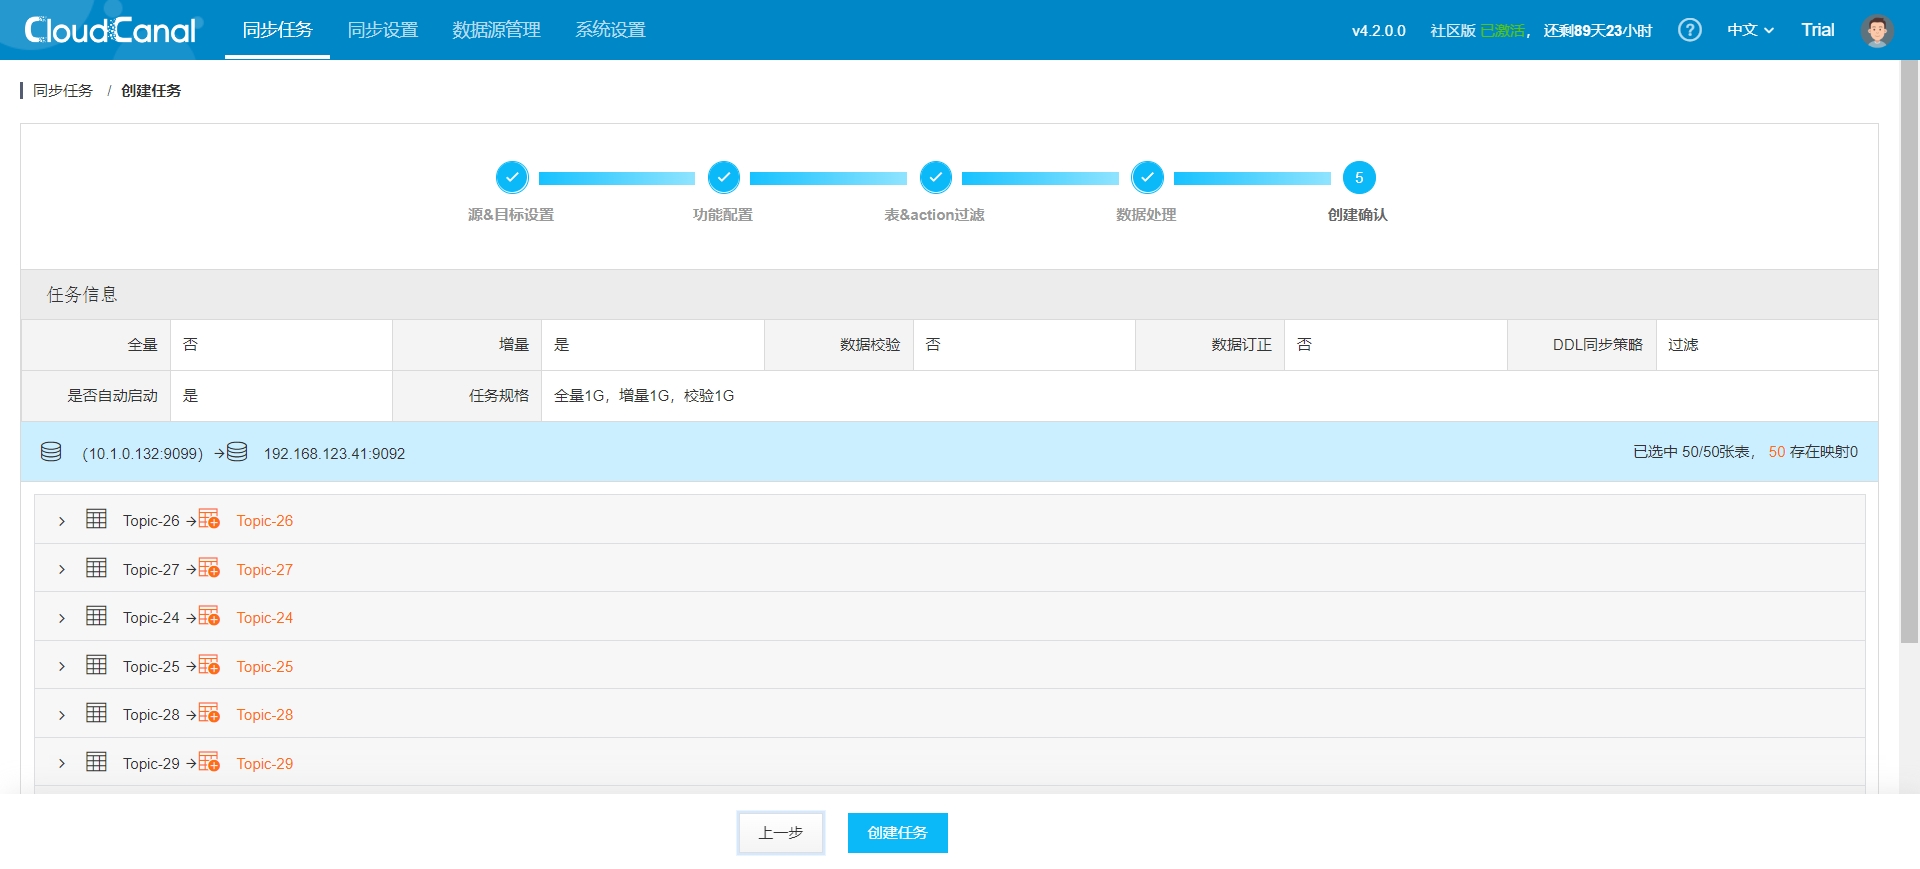
- Task confirmation:
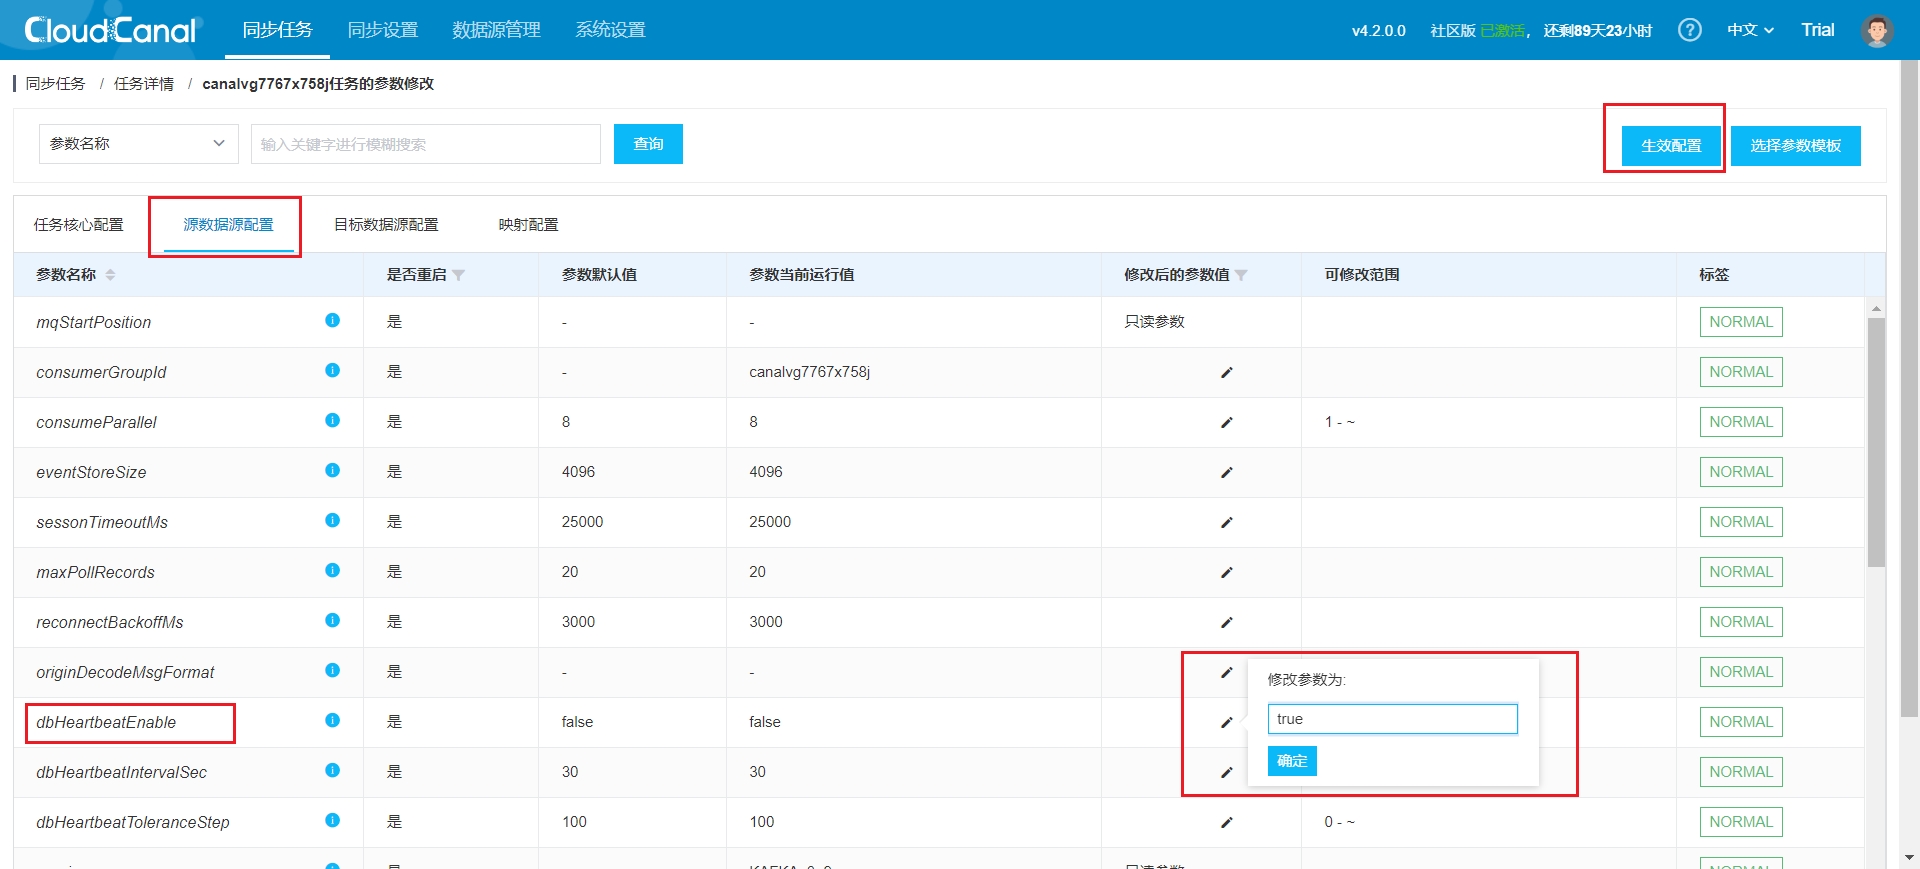
- Once the task is created, it starts automatically and redirects to the task list. You will need to modify the source data source configuration to enable heartbeat configuration, which updates the task status in real-time. Follow these steps: Task Details -> Source Data Source Configuration -> Modify Configuration -> Apply Configuration:
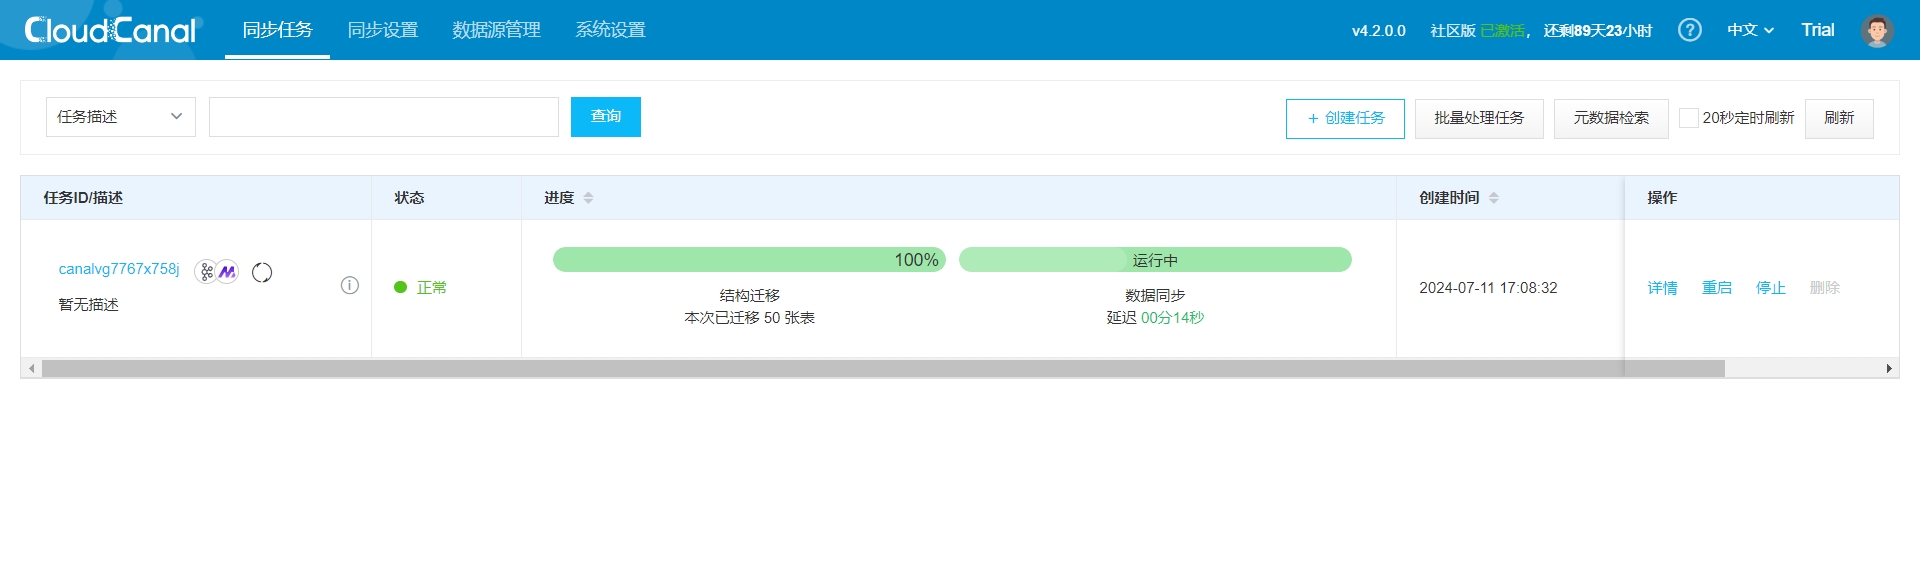
- Wait for the task to restart, and you should see the following:
Note: If you encounter connection issues or high task latency, refer to the official CloudCanal documentation: FAQ Index | CloudCanal [11]
- Verify whether the Topic structure has been correctly created in AutoMQ

The task is running correctly. Next, we need to prepare incremental data so that the reassignment task can sync the incremental data to AutoMQ. Here, we still use the Kafka SDK to add new data. After adding new data, we can check the task execution status via Task Details -> Incremental Sync -> View Logs -> Task Run Logs:
2024-07-11 17:16:45.995 [incre-fetch-from-buffer-14-thd-0] INFO  c.c.c.mq.worker.reader.kafka.KafkaIncreEventBroker - getWithoutAck successfully, batch:64, real:64
2024-07-11 17:16:45.995 [incre-fetch-from-buffer-14-thd-0] INFO  c.c.c.mq.worker.reader.kafka.KafkaIncreEventBroker - getWithoutAck successfully, batch:64, real:64
2024-07-11 17:16:45.996 [incre-fetch-from-buffer-14-thd-0] INFO  c.c.c.mq.worker.reader.kafka.KafkaIncreEventBroker - getWithoutAck successfully, batch:64, real:64
2024-07-11 17:16:45.996 [incre-fetch-from-buffer-14-thd-0] INFO  c.c.c.mq.worker.reader.kafka.KafkaIncreEventBroker - getWithoutAck successfully, batch:64, real:64
2024-07-11 17:16:45.996 [incre-fetch-from-buffer-14-thd-0] INFO  c.c.c.mq.worker.reader.kafka.KafkaIncreEventBroker - getWithoutAck successfully, batch:64, real:64
2024-07-11 17:16:45.997 [incre-fetch-from-buffer-14-thd-0] INFO  c.c.c.mq.worker.reader.kafka.KafkaIncreEventBroker - getWithoutAck successfully, batch:64, real:64
2024-07-11 17:16:45.997 [incre-fetch-from-buffer-14-thd-0] INFO  c.c.c.mq.worker.reader.kafka.KafkaIncreEventBroker - getWithoutAck successfully, batch:64, real:64
2024-07-11 17:16:45.997 [incre-fetch-from-buffer-14-thd-0] INFO  c.c.c.mq.worker.reader.kafka.KafkaIncreEventBroker - getWithoutAck successfully, batch:64, real:64
2024-07-11 17:16:45.998 [incre-fetch-from-buffer-14-thd-0] INFO  c.c.c.mq.worker.reader.kafka.KafkaIncreEventBroker - getWithoutAck successfully, batch:64, real:64
2024-07-11 17:16:45.998 [incre-fetch-from-buffer-14-thd-0] INFO  c.c.c.mq.worker.reader.kafka.KafkaIncreEventBroker - getWithoutAck successfully, batch:64, real:64
2024-07-11 17:16:45.998 [incre-fetch-from-buffer-14-thd-0] INFO  c.c.c.mq.worker.reader.kafka.KafkaIncreEventBroker - getWithoutAck successfully, batch:64, real:64
2024-07-11 17:16:45.999 [incre-fetch-from-buffer-14-thd-0] INFO  c.c.c.mq.worker.reader.kafka.KafkaIncreEventBroker - getWithoutAck successfully, batch:64, real:64
Verify whether AutoMQ correctly syncs the Messages:
Even after adding new data multiple times, the reassignment still completes successfully:
You can see that during the execution of the incremental sync task, all the new data added to Kafka has been synced to AutoMQ. At this point, our reassignment process is entirely complete.
As enterprise data scales and business needs diversify, data reassignment and synchronization become increasingly important. This article has detailed how to use CloudCanal to achieve incremental data reassignment from Kafka to AutoMQ to address storage costs and operational complexity. During the reassignment process, incremental sync technology ensures data consistency and business continuity, providing enterprises with an efficient and reliable solution.
I hope this article provides valuable references and guidance on data migration and synchronization, helping to achieve smooth system transitions and performance optimization!
[1] AutoMQ: https://docs.automq.com/docs/automq-opensource/HSiEwHVfdiO7rWk34vKcVvcvn2Z
[2] CloudCanal: https://www.clougence.com/?src=cc-doc
[3] QuickStart | AutoMQ: https://docs.automq.com/docs/automq-opensource/EvqhwAkpriAomHklOUzcUtybn7g
[4] QuickStart | Kafka: https://kafka.apache.org/quickstart
[5] CloudCanal Official Website: https://www.clougence.com/?src=cc-doc-install-linux
[6] Docker Official Documentation: https://docs.docker.com/engine/install/
[7] License Acquisition | CloudCanal: https://www.clougence.com/cc-doc/license/license_use
[8] MySQL to Kafka Synchronization | CloudCanal: https://www.clougence.com/cc-doc/bestPractice/mysql_kafka_sync
[9] Redpanda Console: https://redpanda.com/redpanda-console-kafka-ui
[10] Kafdrop: https://github.com/obsidiandynamics/kafdrop
[11] FAQ Index | CloudCanal: https://www.clougence.com/cc-doc/faq/cloudcanal_faq_list