-
Notifications
You must be signed in to change notification settings - Fork 9
Creating a map
Warning: Unplug the Kokam (the one that says CHARGE) and Segway charging cables if you want to navigate around with the robot!!!
We currently use gmapping to create maps with Vizzy's front laser. This page presents a way to create new maps, edit them (if needed) and use them.
- Required YARP applications (right click on each Module and hit run):
- On Entities -> Application -> Vizzy_Startup_with_ROS (double click to open window):
- yarprobotinterface (the robot will move to calibrate!)
- yarpidl_rosmsg
- vizzyUpperBodyJoints
- On Entities -> Application -> Vizzy_Startup_with_ROS (double click to open window):
To make the process (just a bit) less cumbersome we created two launch files in the vizzy_demos package. The first step is to run (on vizzy-desktop after doing ssh or mosh) the appropriate launcher for this:
roslaunch vizzy_demos map_creator.launch
then on another terminal launch rviz (on vizzy-laptop, i.e. without doing ssh or mosh):
rosrun rviz rviz
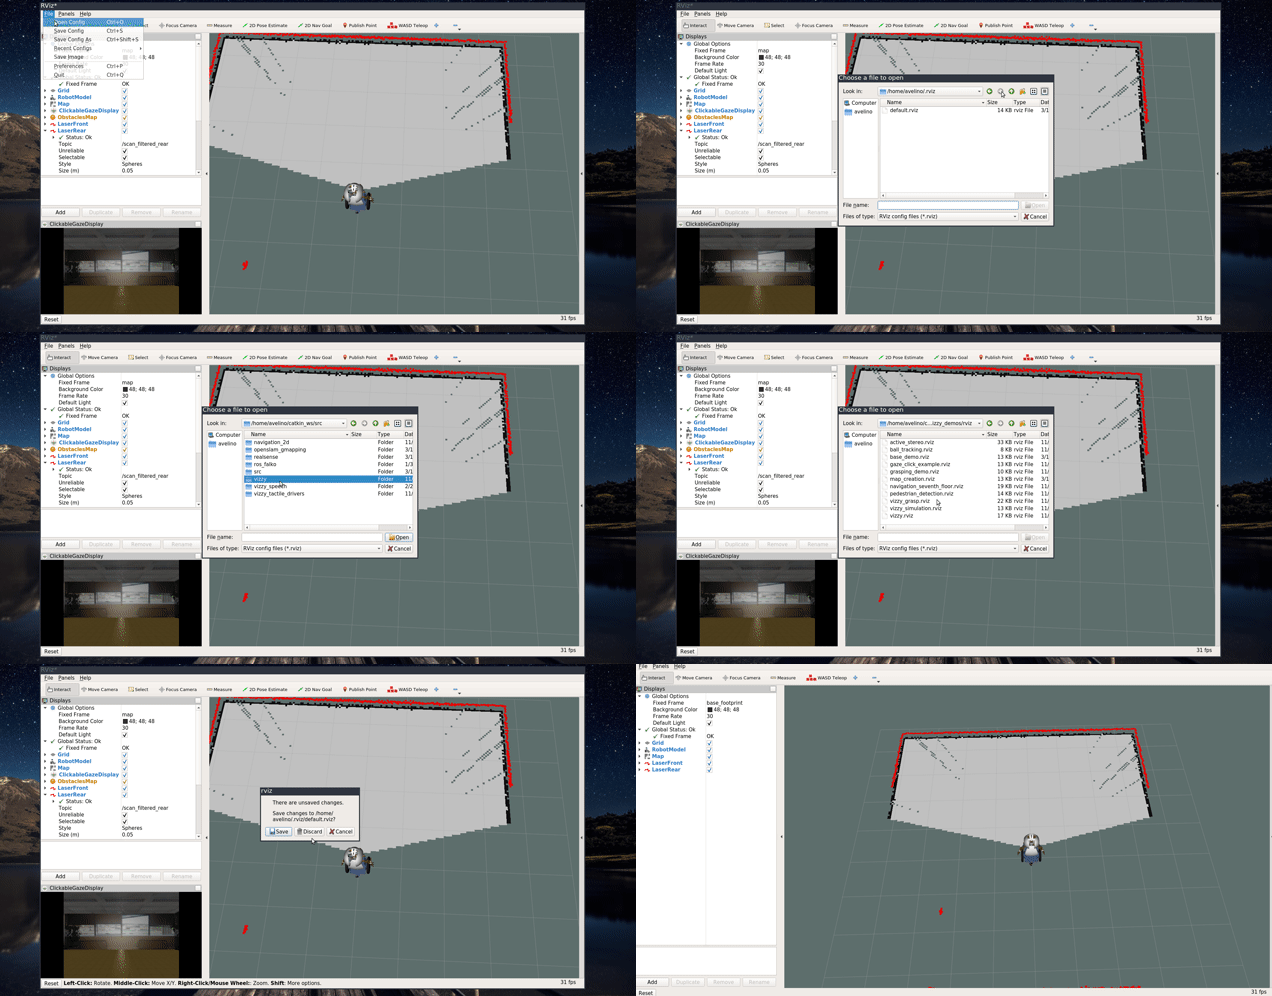
and load the map_creation.rviz configuration:

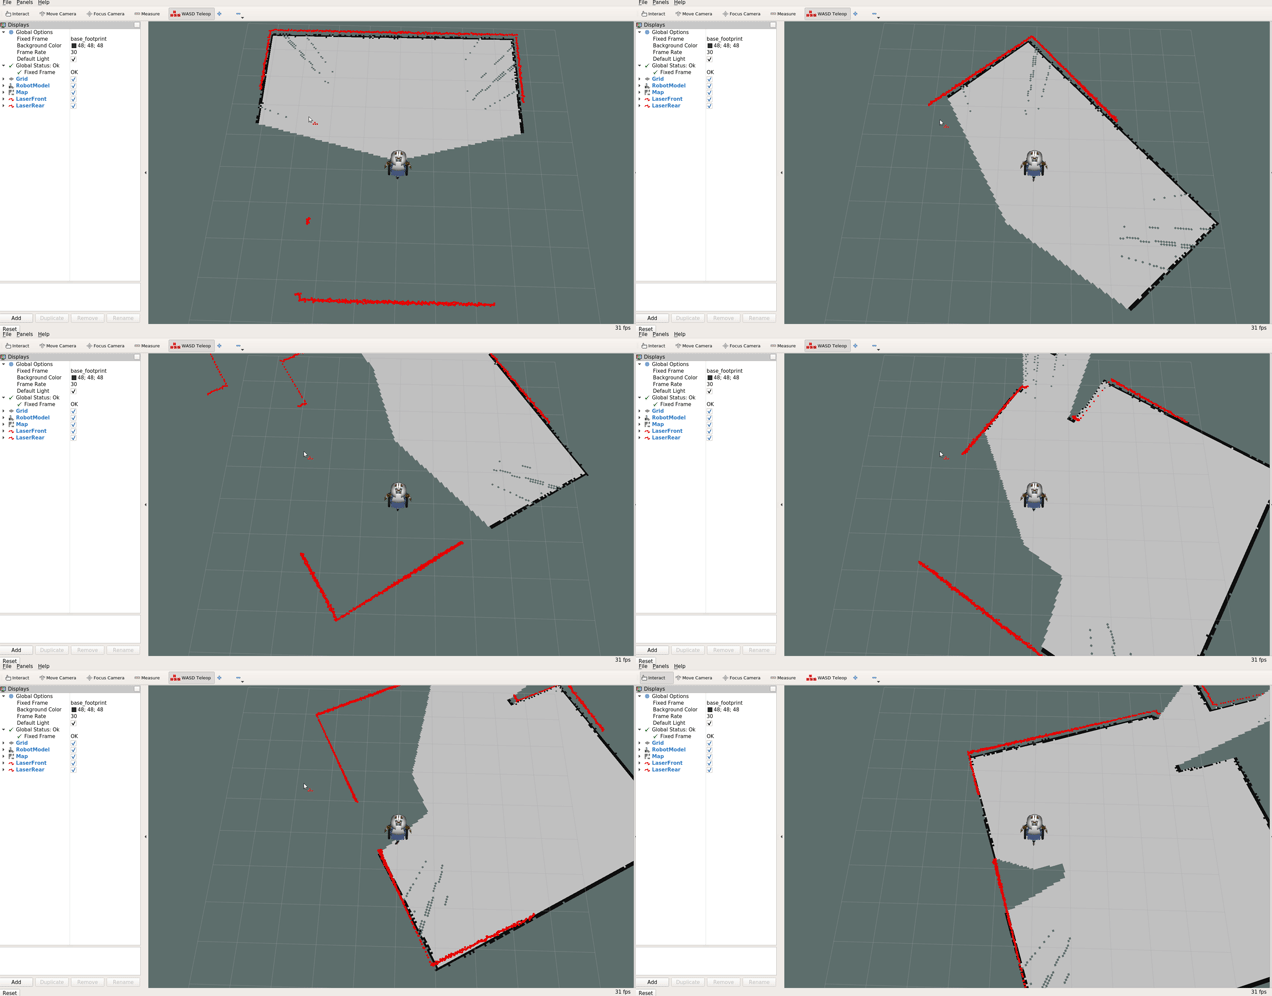
To build the map you just have to navigate manually with the WASD teleop tool and the W, A, S and D keyboard keys. You should avoid turning around too much and attempt to perform smooth movements while controlling the robot to get a high quality map:

When you are satisfied with the map must save it. To do that you must open a new terminal and ssh or mosh to vizzy-desktop:
mosh vizzy@vizzy-desktop
Then navigate to the maps folder
roscd vizzy_navigation/maps/
and finally execute the following command to save the map:
roslaunch vizzy_demos save_map.launch map_name:=fancy_name_for_a_map
where fancy_name_for_a_map is the name you wnat to give to the new map. This command is going to create two files with the fancy_name_for_a_map name with two different extensions: .yaml and .pgm in the maps folder.
The mapper will perform a good job at detecting obstacles and put them on the map. However it won't be able to detect obstacles that are not on the laser plane. To deal with obstacles that the laser cannot detect (tables, glass doors, stairs!) we have an extra layer that has no influence on robot localization but makes sure the robot does not autonomously navigate to dangerous areas (or simply shows them to a Wizard on Rviz). Therefore we need to add obstacles manually to the map using an image processing program like Gimp.
The first step is to transfer the map files you just did to vizzy-laptop, for instance using scp. Open a terminal on vizzy-laptop and do the following:
cd Desktop
scp vizzy@vizzy-desktop:~/catkin_ws/src/vizzy/vizzy_navigation/maps/fancy_name_for_a_map.*
The map files will be copied to your desktop. Now, change their names to fancy_name_for_a_map_obst.yaml and fancy_name_for_a_map_obst.pgm. As a reminder, use the name you want instead of fancy_name_for_a_map... Afterwards, edit the .yaml with your favourite editor (for intance gedit). The file should have the a similar content to the following:
image: fancy_name_for_a_map.pgm
resolution: 0.050000
origin: [-100.000000, -100.000000, 0.000000]
negate: 0
occupied_thresh: 0.65
free_thresh: 0.196
Once again, change the fancy_name_for_a_map.pgm to fancy_name_for_a_map_obst.pgm.
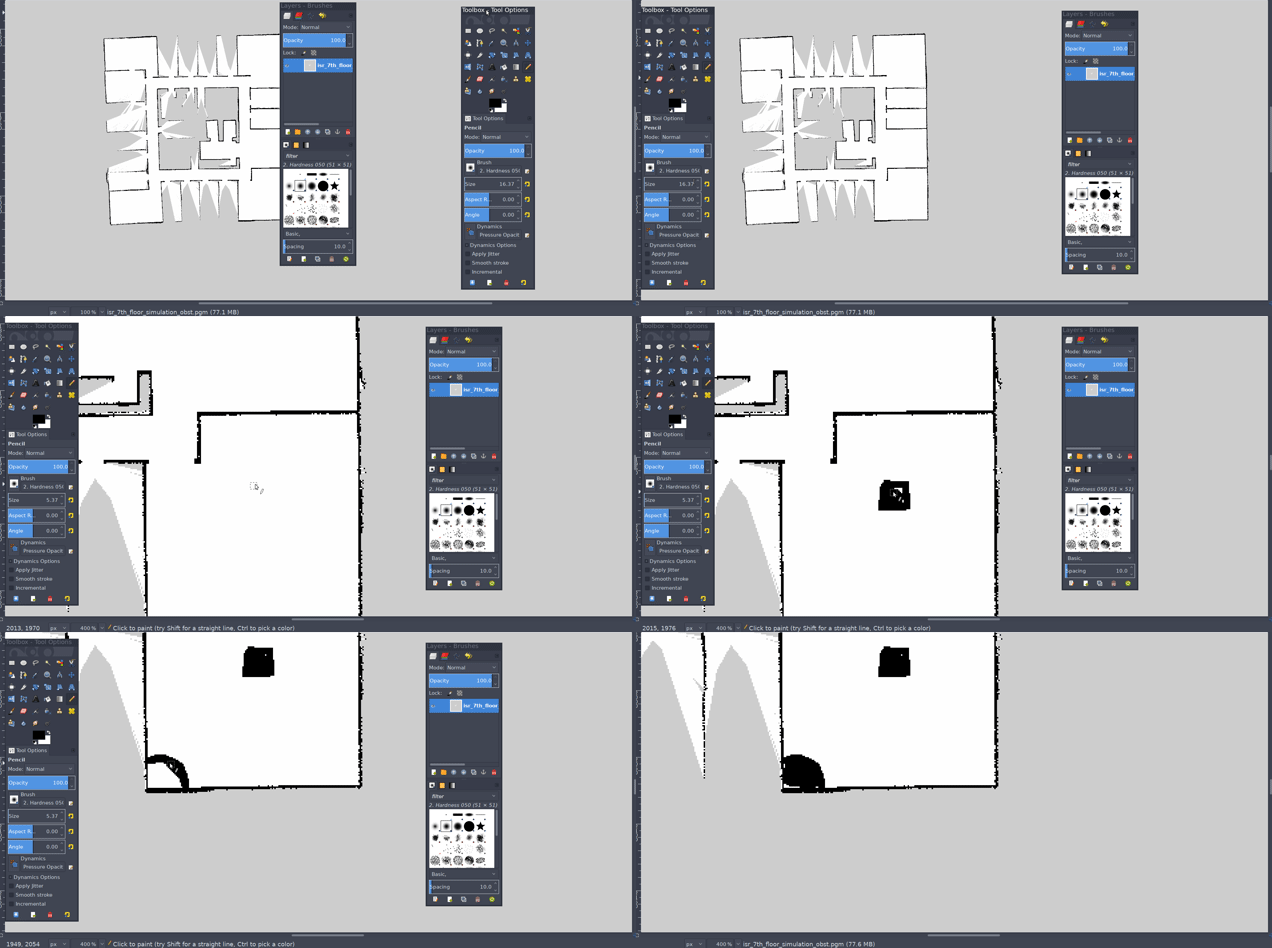
Now, it's time to manually add the obstacles. Open the fancy_name_for_a_map_obst.pgm with GIMP.
To add obstacles paint map areas with black. Use the pencil tool instead of the paintbrush tool:

To save the image go to File -> Override fancy_name_for_a_map_obst.pgm
Now transfer the map files back to vizzy-desktop:
scp fancy_name_for_a_map_obst.* vizzy@vizzy-desktop:~/catkin_ws/src/vizzy/vizzy_navigation/maps/
Now that the files are ready you can use this map in your demos in two ways:
When launching the demo just set the map_file and obstacle_map_file arguments to the name of your new map. For instance, for the Base demo wiki page (this is a single line command!):
roslaunch vizzy_launch vizzy_real.launch map_file:=fancy_name_for_a_map.yaml obstacles_map_file:=fancy_name_for_a_map_obst.yaml
Or for the Wizard of Oz demo (reminder: this is a single line command!):
roslaunch vizzy_speech_servers fullWozSystem.launch map_file:=fancy_name_for_a_map.yaml obstacles_map_file:=fancy_name_for_a_map_obst.yaml
If it does not work, then that means your launcher is not receiving these arguments, and in that case you should add them!
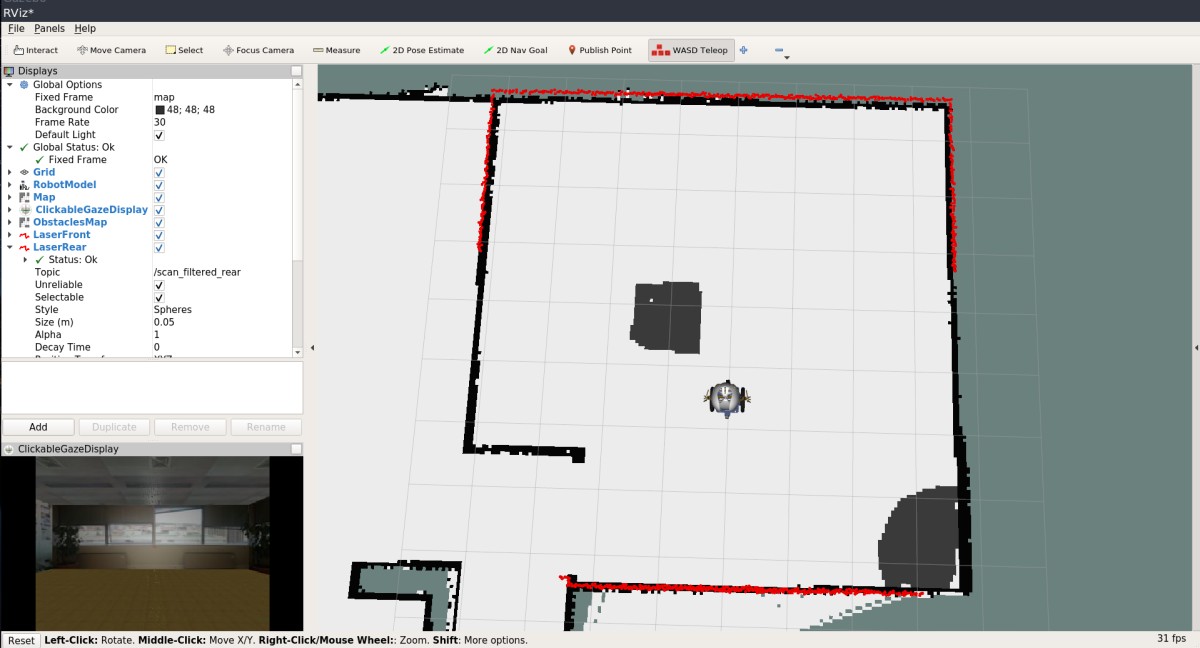
The map was loaded and both Vizzy and Wizard can see dangerous areas as gray pixels:

