-
Notifications
You must be signed in to change notification settings - Fork 9
How to start Vizzy up
This is the guide to start Vizzy up and prepare it to run the demos. Before following this guide please read the Hardware page very carefully. You will have information about the power sources, power plugs, and emergency buttons there. Also information about the cameras that will be needed for sure. You have been warned!
First, make sure the battery to power source cable (the one that says LOAD) is plugged:

There are two switches next to the waist of Vizzy. The switches are labelled as “Power” and “Boards”. The “Power” one is the main switch (currently does nothing due to a relay problem), which provides battery power to the pc and power boards of motor control. You should turn on these switches. Notice that after turning on the boards switch you will see the control boards' leds turning on. If that does not happen, then the power source cable (LOAD) is probably disconnected:
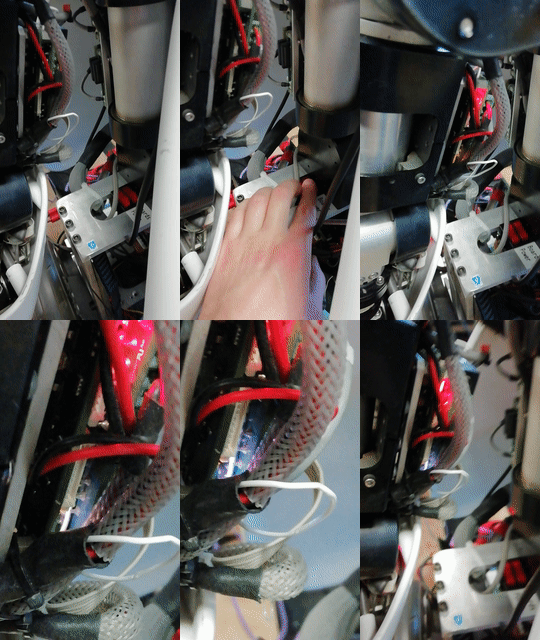
The PC (vizzy-desktop) must be turned on by pushing power button on the motherboard in the robot's front left corner approximately (See picture below) 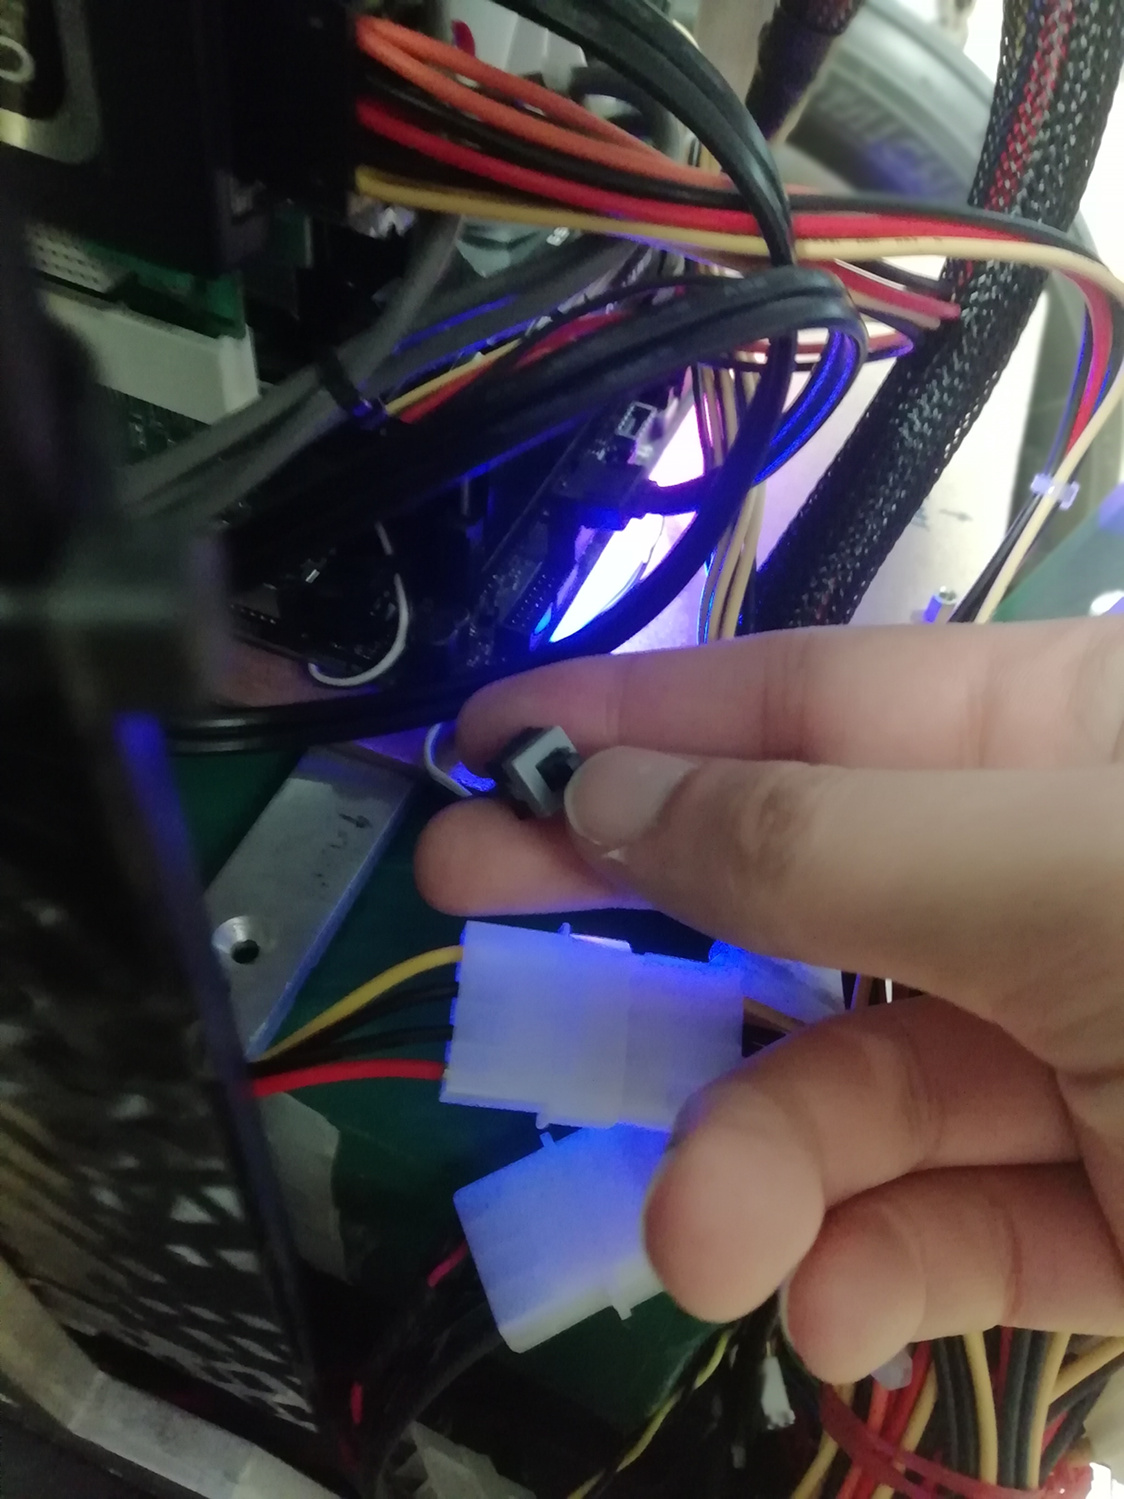 . The switch closer to the motor (“Boards”) turns on the power and control boards of the motors. When switched on the boards should start blinking:
The segway has two buttons, a yellow button with a thunder and a green button. Push first the green button on and then the yellow one. 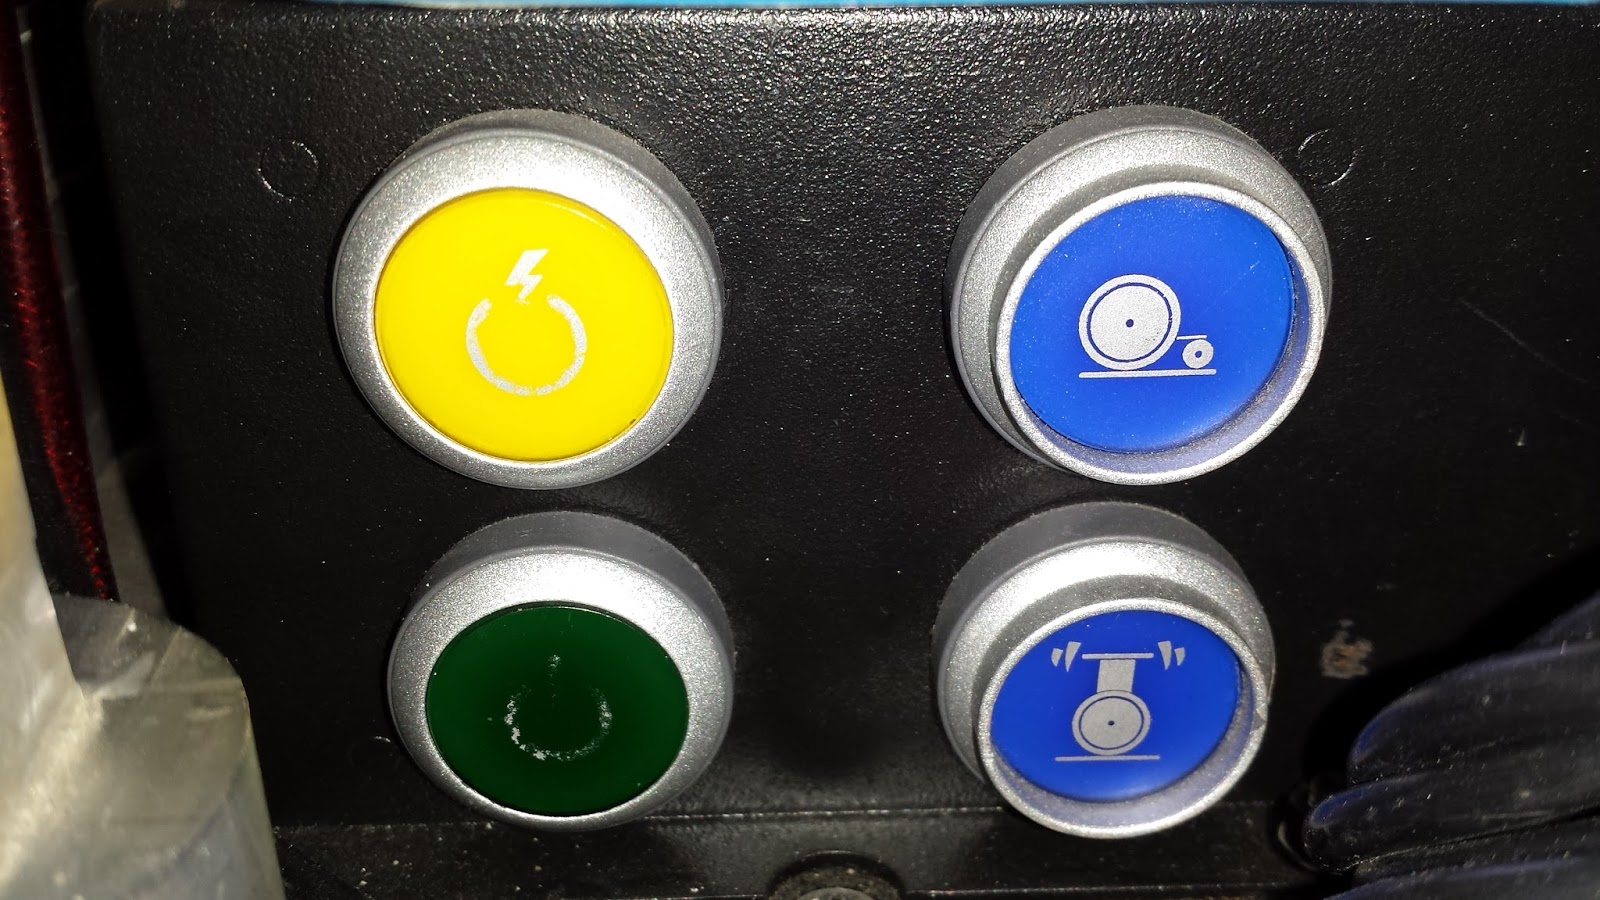
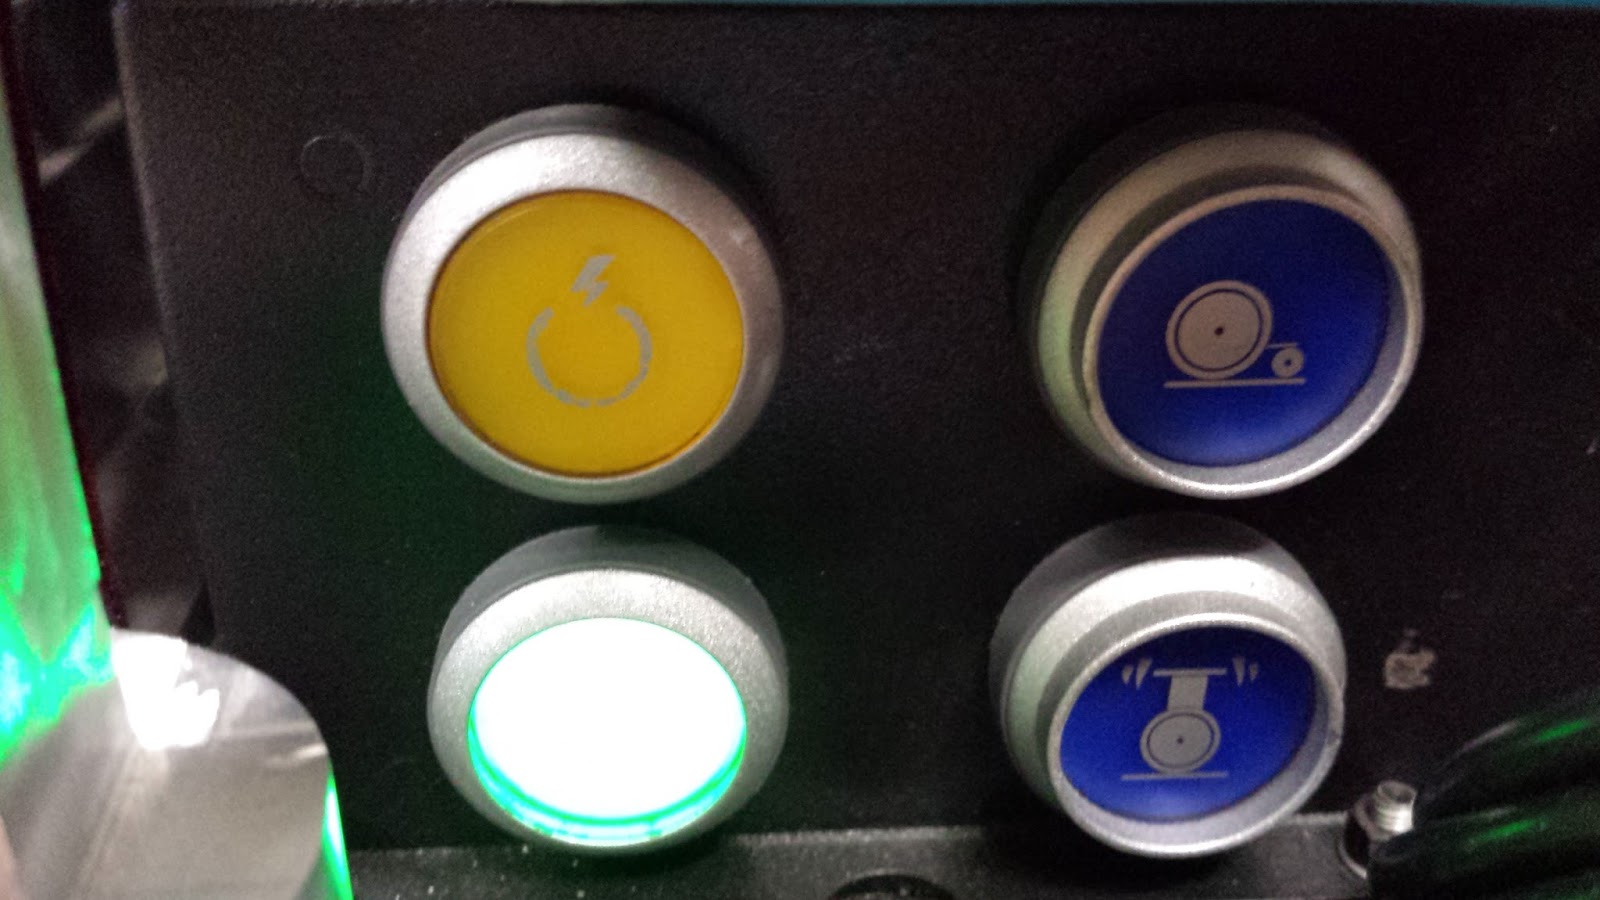
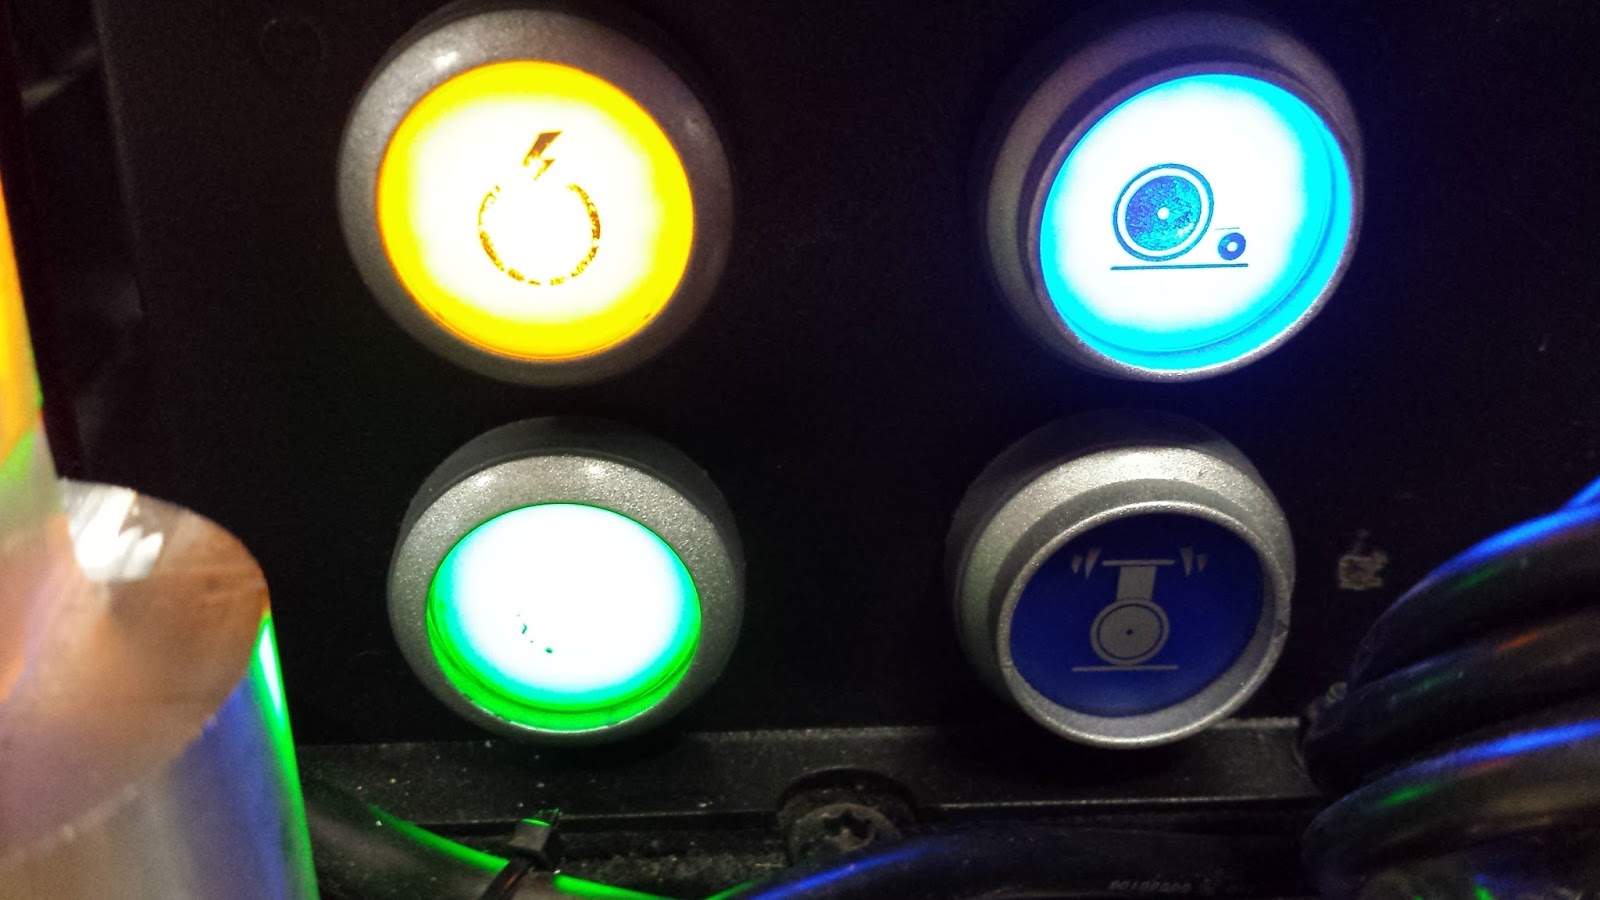 The sequence is illustrated in the above picture.
After turning on the laptop, select the Ubuntu option in the boot loader. Then, login with user vizzy and the corresponding password. In order to connect remotely to the PC (vizzy-desktop), find the wireless Access Point Vizzy_5G and connect to it. The IP addresses are:
10.10.1.90	Access Point (Vizzy 5G)
10.10.1.80	vizzy-desktop
10.10.1.82	vizzy-laptop (check this out)
10.10.1.53	vislab-PORTEGE-R930 (Old laptop. The new laptop's name is vizzy-laptop)
The netmask is: 255.255.0.0
In case something is not working, the connection to the Access Point may be the problem. There is also the option of connecting the laptop to the Access Point with Ethernet cable, which is very useful if you want to debug code and run GUI software such as yarpmmotorgui and yarplogger. To do this, just plug the Ethernet cable from the laptop to the router and select the connection “Ethernet 10.10.1.53” (TBD on the new laptop)
If you want to connect to Vizzy_5G with another device (computer, tablet, phone, etc...) you will need to manually configure your IP address, since Vizzy does not have an active DHCP server. You will need to choose an IP address that is different from the ones in the previous list. (A guide for Ubuntu and Android is on this page)
The default way to communicate with Vizzy is through its Wi-Fi network's Access Point (AP, named Vizzy_5G). You should connect vizzy-laptop (or other device) to the Vizzy_5G Wi-Fi network.
The AP does not provide internet access to vizzy-desktop. So if you want to access the internet (usually just for commits and pulls), you need to connect the purple ethernet cable underneath the table where Vizzy usually is, and plug it to the router, which allows to connect to the 10.10.1.X network (visnet). In order to check the wired connection, ping to 10.10.1.80. The default connection is through the AP and to set it up you just need to plug the short purple cable between the AP and the ethernet plug of vizzy-desktop. If any of the connections does not work just unplug the ethernet cable and wait for 30 seconds, and then connect it again. The gateway (10.10.1.254) needs to be set properly.
The difference to the above connection, is just to delete the gateway from the Vizzy5G connection using the command sudo nm-connection-editor, and plug the Vodafone wifi modem to one of the USB ports. You may need to unplug and plug again the network cable on vizzy-desktop.
- icub-cluster.py (at laptop), graphical interface for running yarpserver and yarprun remotely. You can run the following command in a terminal:
icub-cluster.py vizzy-cluster-at-vizzy-laptop.xml
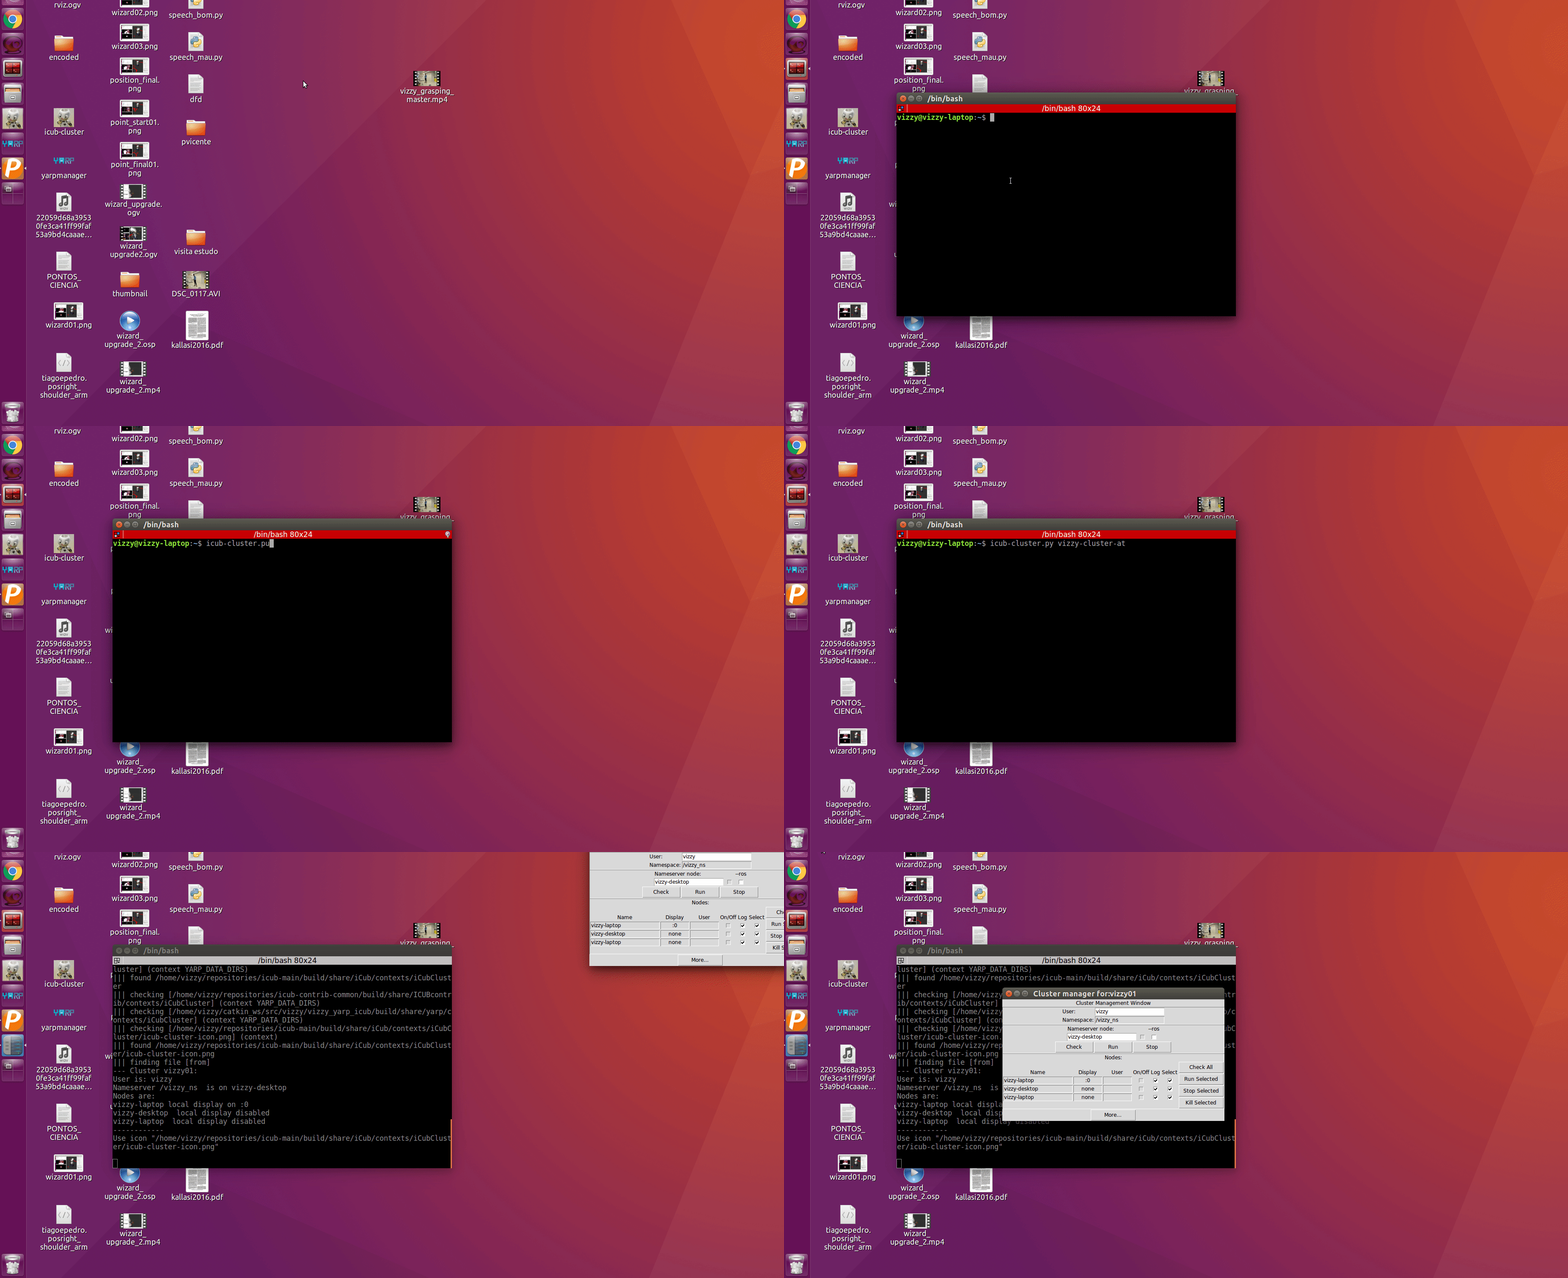
or use the desktop shortcut:
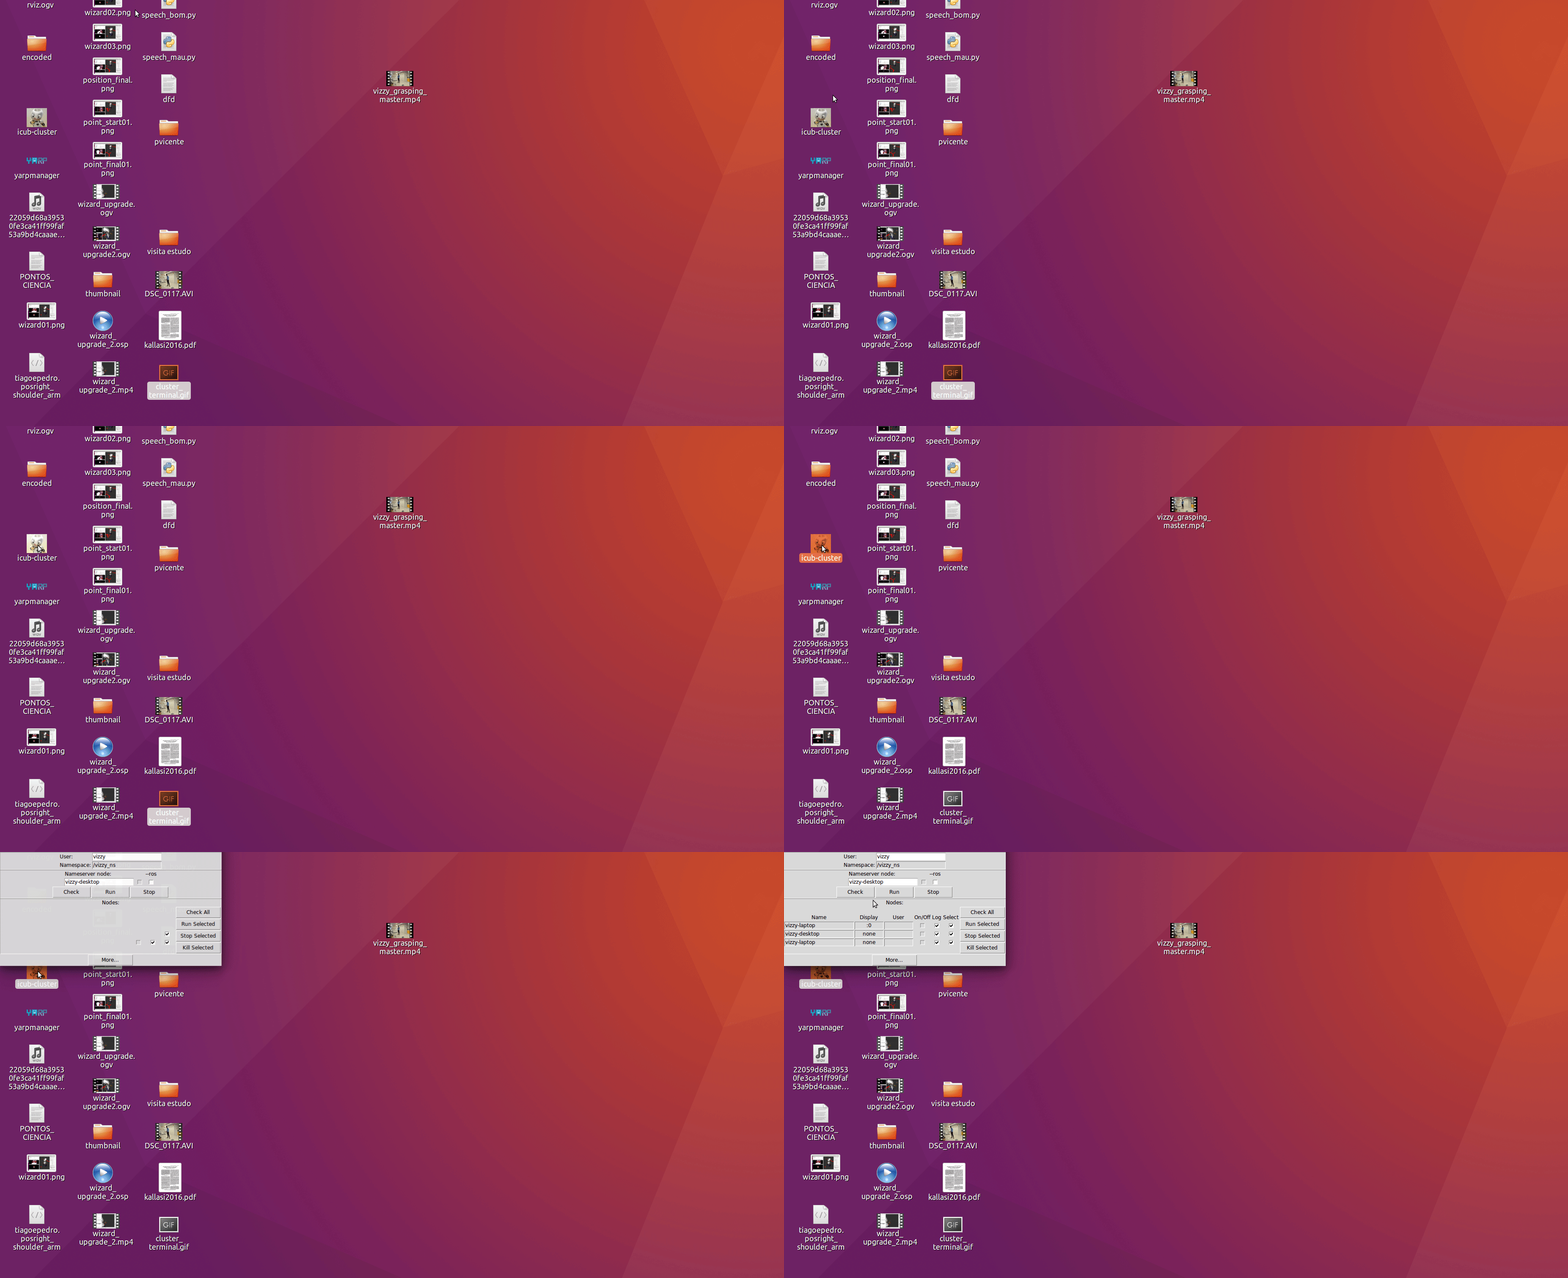
Then, click on More, click on the “vizzy-desktop” checkbox and type roscore in the framebox. Execute the command and close the small window.
Finally, click on the ros checkbox and run yarpserver (Run) and yarp run (Run selected) on vizzy’s laptop. Please verify that all the gray boxes have a green checkbox in them.
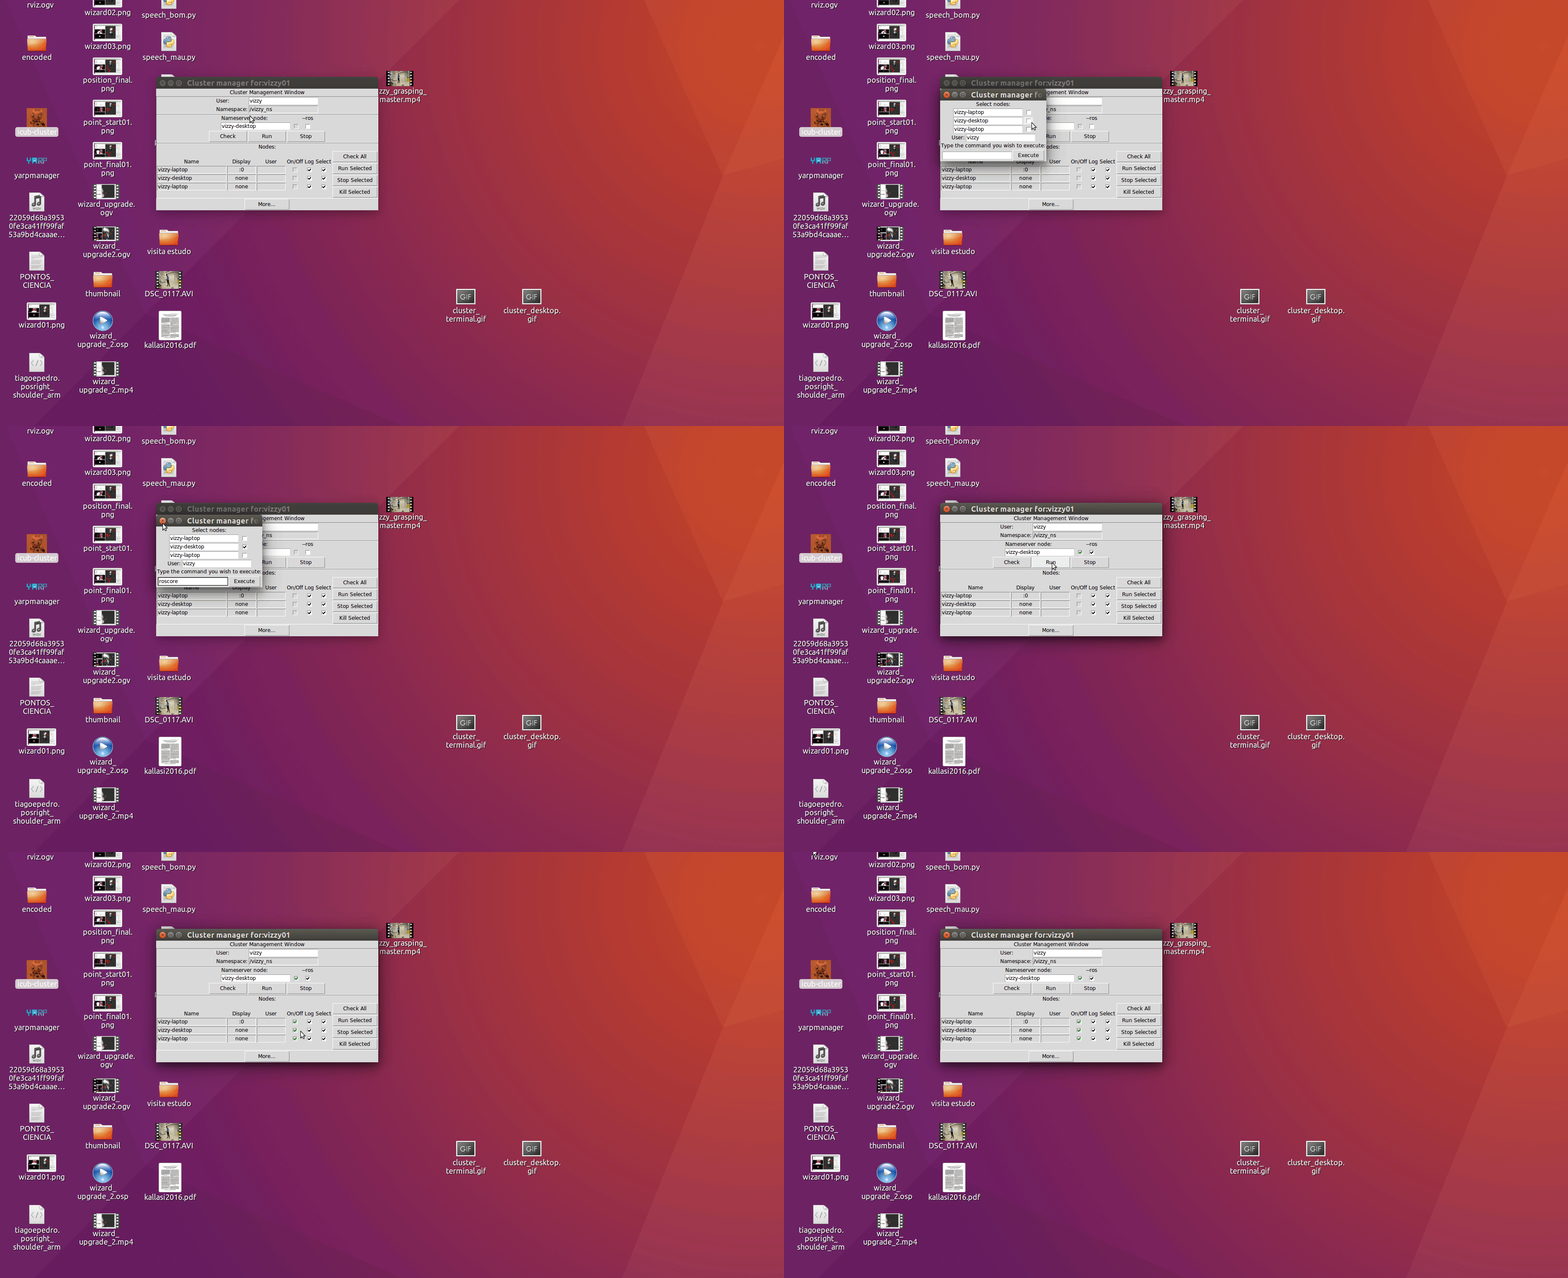
You can close this window afterwards if you want.
- yarpmanager (at laptop), graphical interface for running YARP modules
You can execute yarpmanager from the terminal with the following command:
yarpmanager --from robots/vizzy/ymanager.ini
or use the desktop shortcut:
An example of the GUI after issuing the command is in the Figure below. 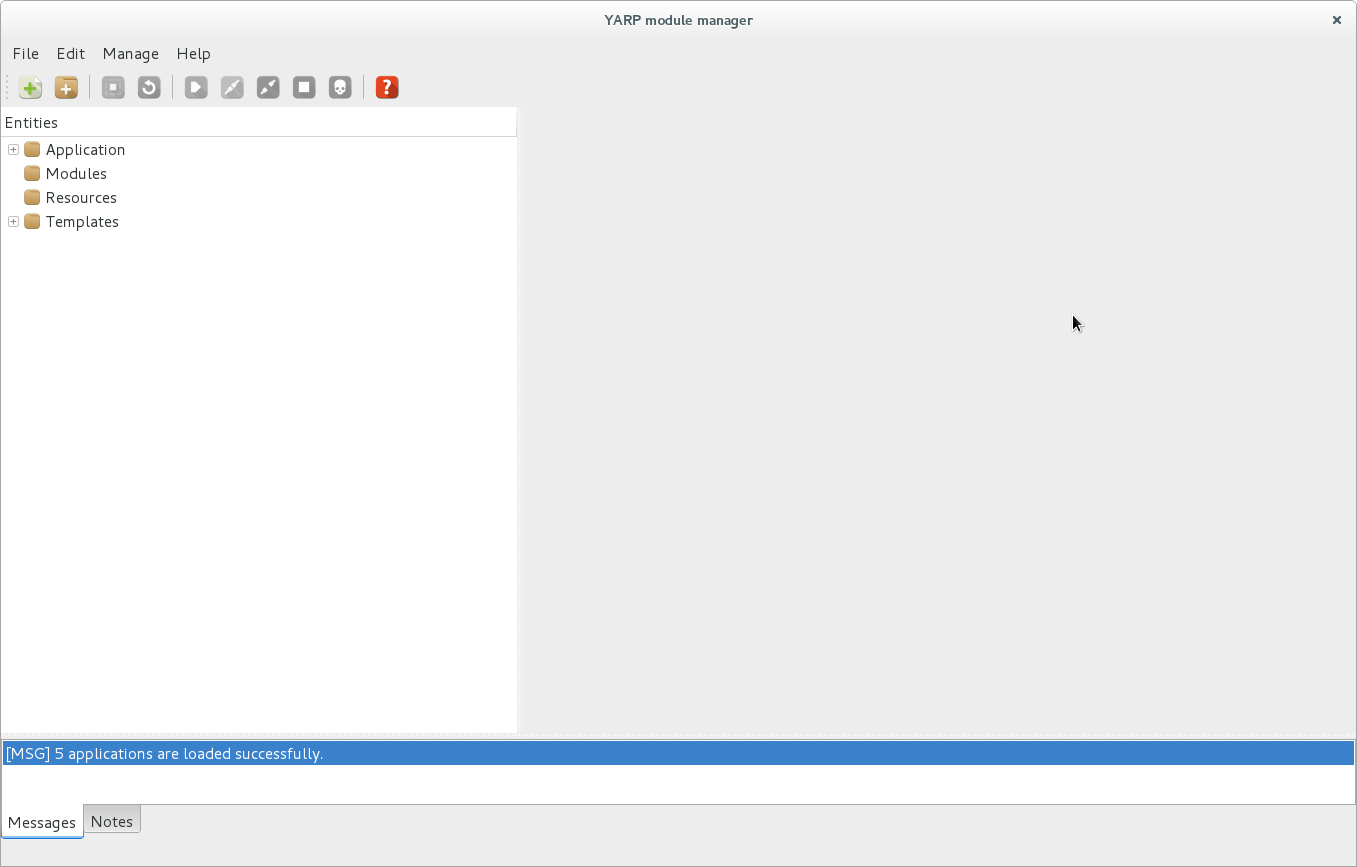 You can see several folders in the Entities box. The only one you will use is the Applications one.
After selecting the Applications folder, several Applications will show up. The current files in the vizzy-laptop laptop will display as follows
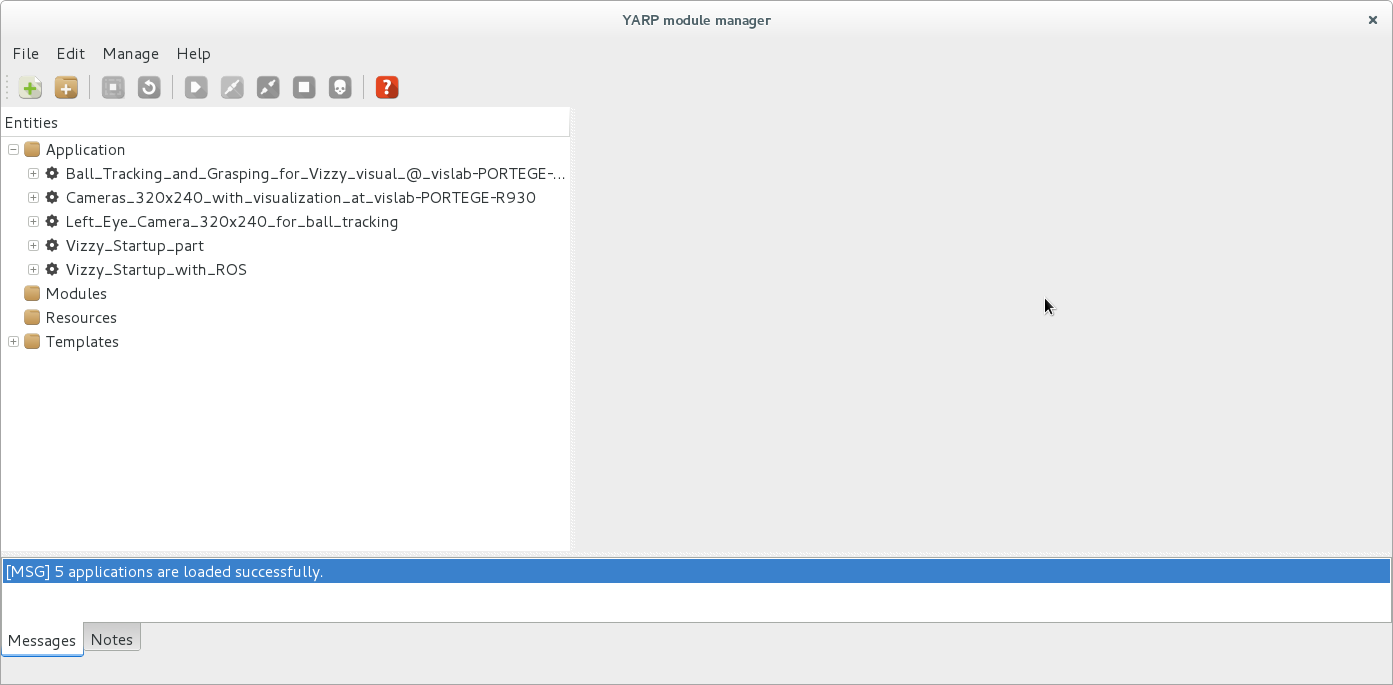
You can run a YARP module after opening an application window selecting the module and either clicking the Run selected button (green button) or right clicking the module and hitting run. The yarprobotinterface module will initiate the calibration process (the robot will move!):

Depending on the demo you want to run, you will select some of the Modules displayed. You can check the list of required YARP Modules for each demo on each demo section. You need to run the YARP applications before running the roslaunch!.
After running all the necessary yarp modules for your demo issue the following commands in a new terminal:
simpleClient --robot vizzy --part left_shoulder_arm
Once the application opens write:
  set poss (0 0 0 0 0 0 0 0)
  quit
And for the right arm:
  simpleClient --robot vizzy --part right_shoulder_arm
  set poss (0 0 0 0 0 0 0 0)
  quit
The above commands move the arms to a rest position for navigation.
The desired procedure is to have just one launcher that starts all the needed nodes for the demo (usually this should be done at vizzy-desktop, to avoid as much as possible sending lots of data through the wireless). As mentioned in the previous section, in addition to the roslaunch demo you need to run: (i) icub-cluster and (ii) yarpmanager applications.
Our rule of thumb is to have one launcher file for each demo. Before running a launcher, verify that the Segway is charged and on and all necessary yarp applications are running.
You should launch demos on vizzy-desktop. Therefore you need to connect to it first either through ssh with:
ssh vizzy@vizzy-desktop
OR mosh with:
mosh vizzy@vizzy-desktop
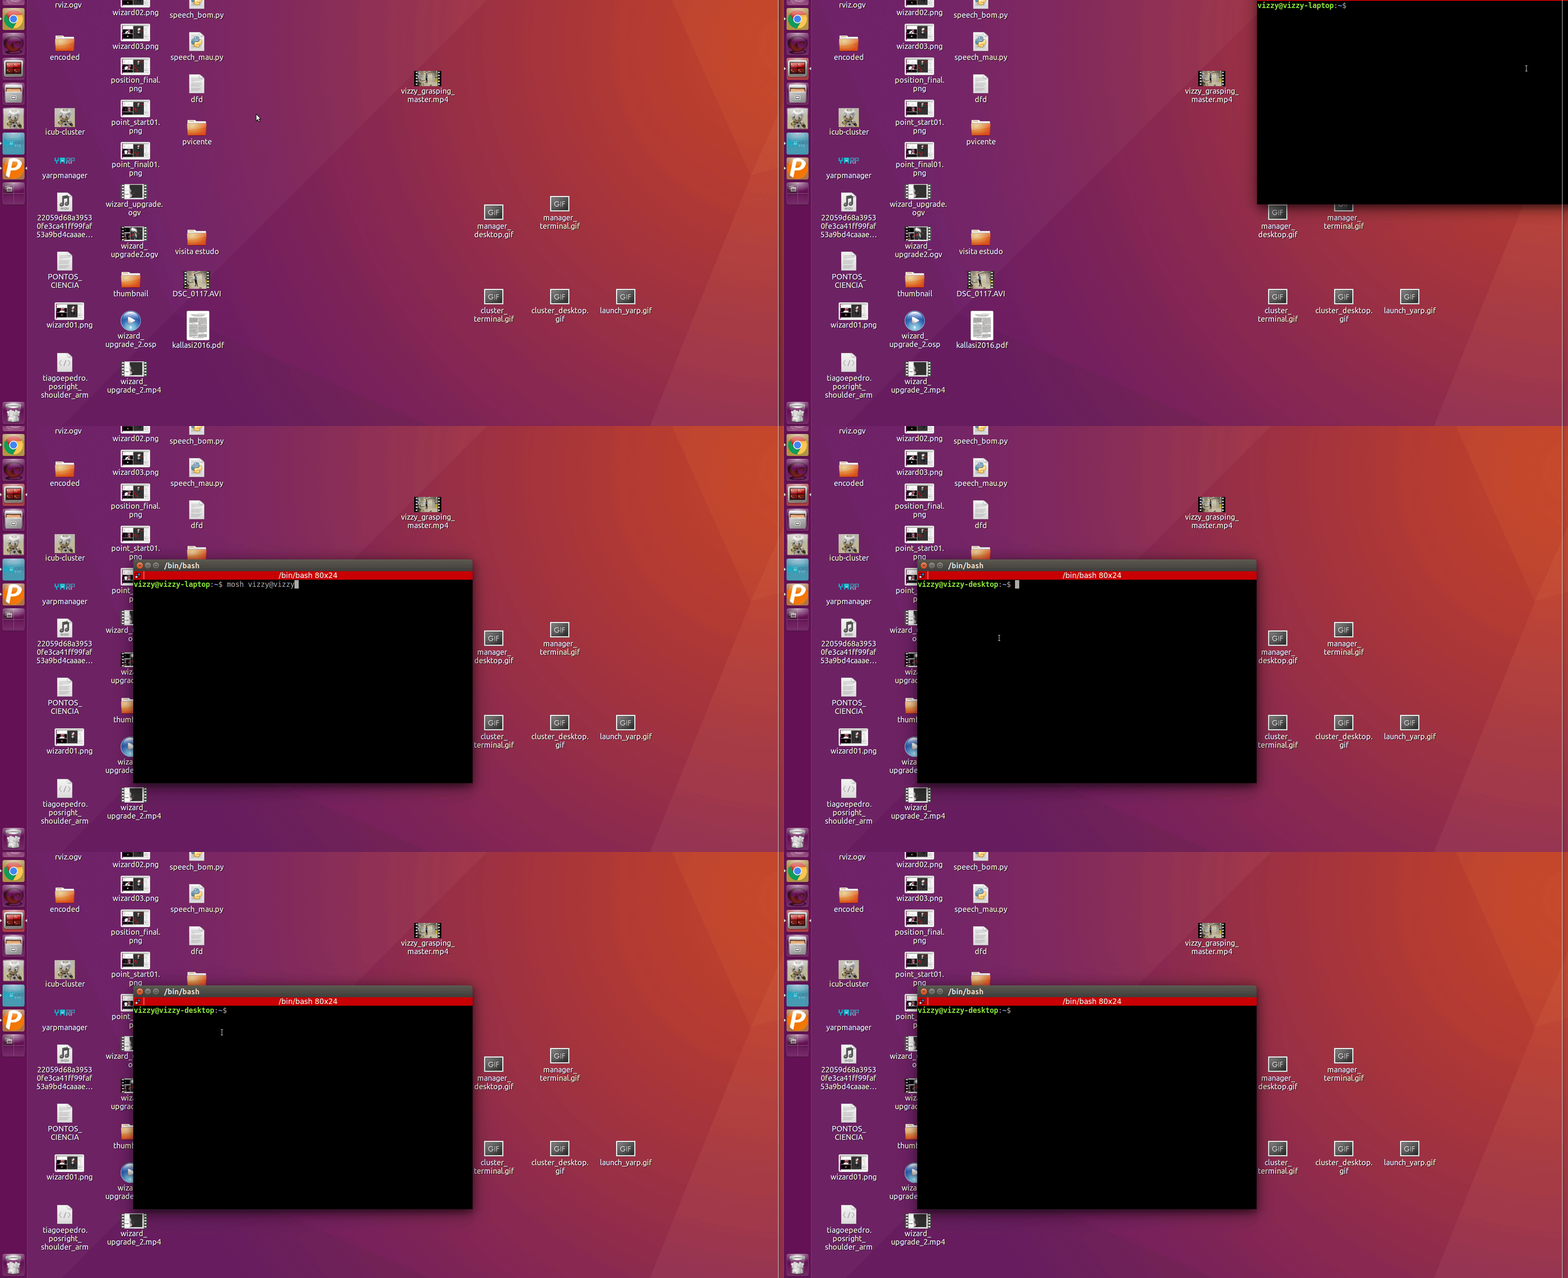
We recommend using mosh instead of ssh since it supports intermittent connectivity and roaming. This way, the demo will continue its execution on Vizzy without hanging even if the connection between Vizzy and the laptop is lost. The connection will also recover from losses and even IP changes. This is crucial for environments with a lot of Wi-Fi connections.
As stated before, the rule of thumb is to only run one launch file for each demo. Therefore you should choose ONLY ONE of the following demos:
TODO
Kill all running applications in the inverse order that they were launched. (Ctrl + C on terminal based applications, and stop button on yarp applications).
After turning everything off turn its time to turn the robot itself off. On a terminal connected to vizzy-desktop through ssh or mosh execute the following:
sudo shutdown -h now
After Vizzy's PC is turned off, turn the segway off (inverse instructions to turn on) and the board switches off. Finally disconnect the battery to power source cable (second image on this page) to make sure Vizzy's battery is not discharging.
If you need to directly control the torso, head and arm motors you can use the yarpmotorgui. You can execute it in vizzy-desktop (after ssh to vizzy-desktop) or vizzy-laptop with the following command
yarpmotorgui --robot vizzy --context vizzyRobotMotorGui --from vizzy_robot_motor_gui.ini
The ball tracking and grasping requires three yarpmanager applications:
- Vizzy_Startup_with_ROS
- Left_Eye_Camera_320x240_for_ball_tracking
- Ball_Tracking_and_Grasping_for_Vizzy_with_ROS_visual_@_vislab-PORTEGE-R930_both_arms
- Visualization in rViz.
The applications are listed in the execution order, that must be followed.
As the name suggests, the first one to double click with the left button of the mouse is Vizzy_Startup_with_ROS. After selecting it with the mouse, you should see the image as follows:
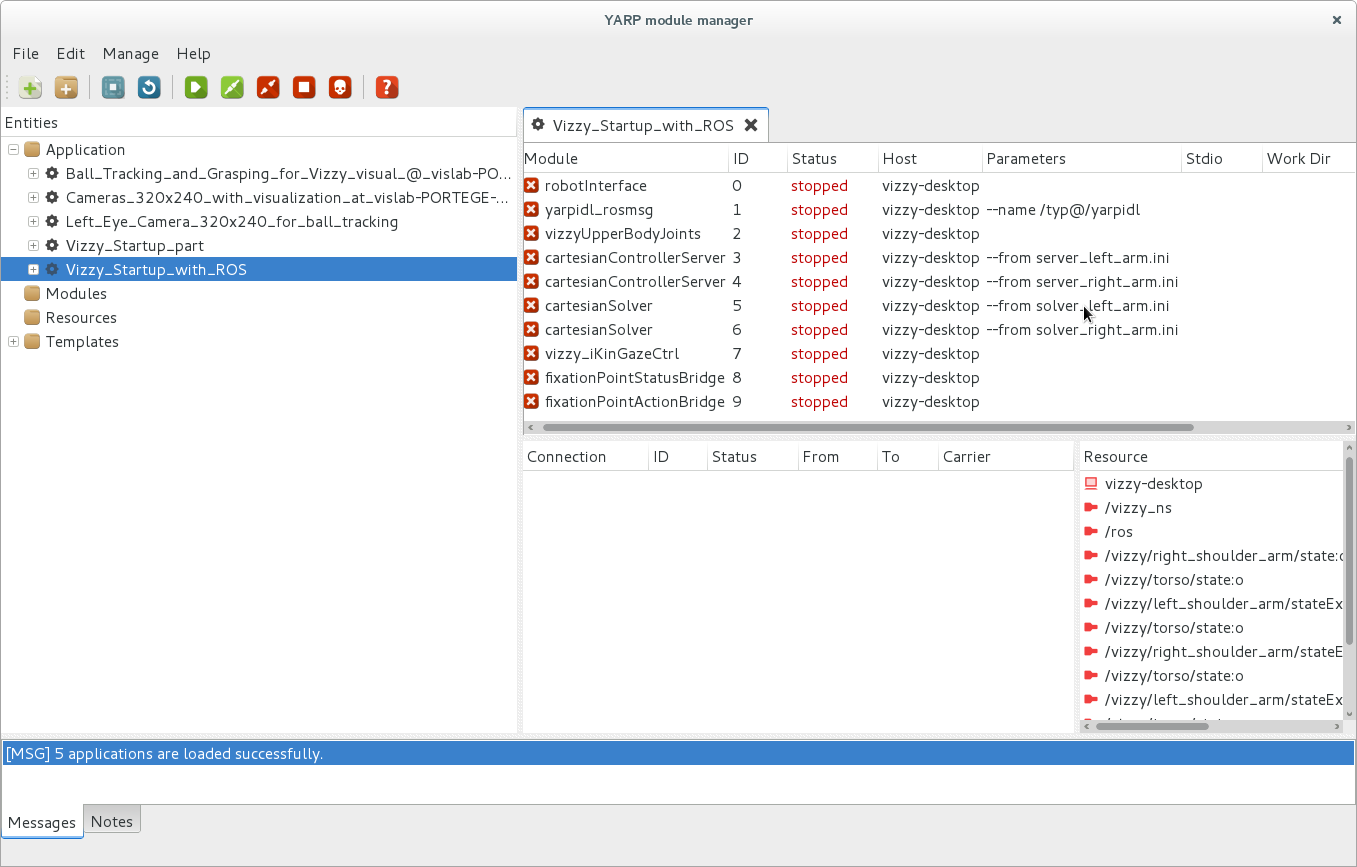 You can see several modules on the right side box. The buttons on the top allow you to (from right to left): Help, kill, stop, disconnect, connect, run and refresh. If you push any of those buttons, the corresponding action will be executed on all the modules of the selected application.
In the case of Vizzy_Startup_with_ROS, it is better not to run all the modules because of some dependencies that are not implemented yet. Thus, you have to select groups of modules with the mouse or the keyboard, then click the mouse-right-button and select the action. In the figure below
 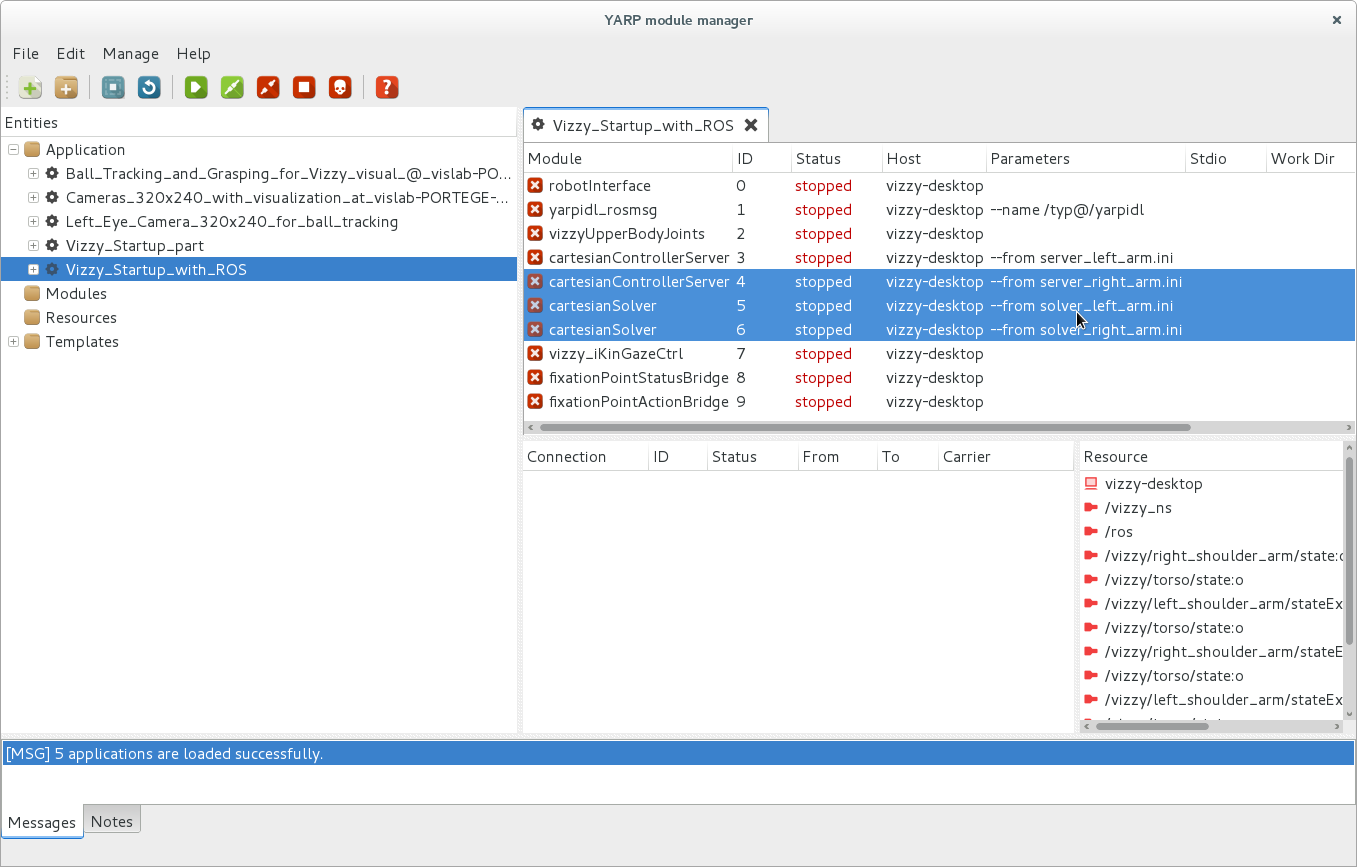 you can see an example of some selected modules
Running all modules of Vizzy_Startup_with_ROS: The order of the groups is as follows:
- robotInterface. Confirm that the power button of the power/control boards is on. After execution, Vizzy should have the head pointing straight forward and the eyes gazing at a very far point (Version and vergence 0). The arms should be symmetric, having the shoulder flexion a bit up (20deg) and the elbow flexion around 40 deg. Please wait until the calibration procedure is finished (i.e. no motor is moving anymore)
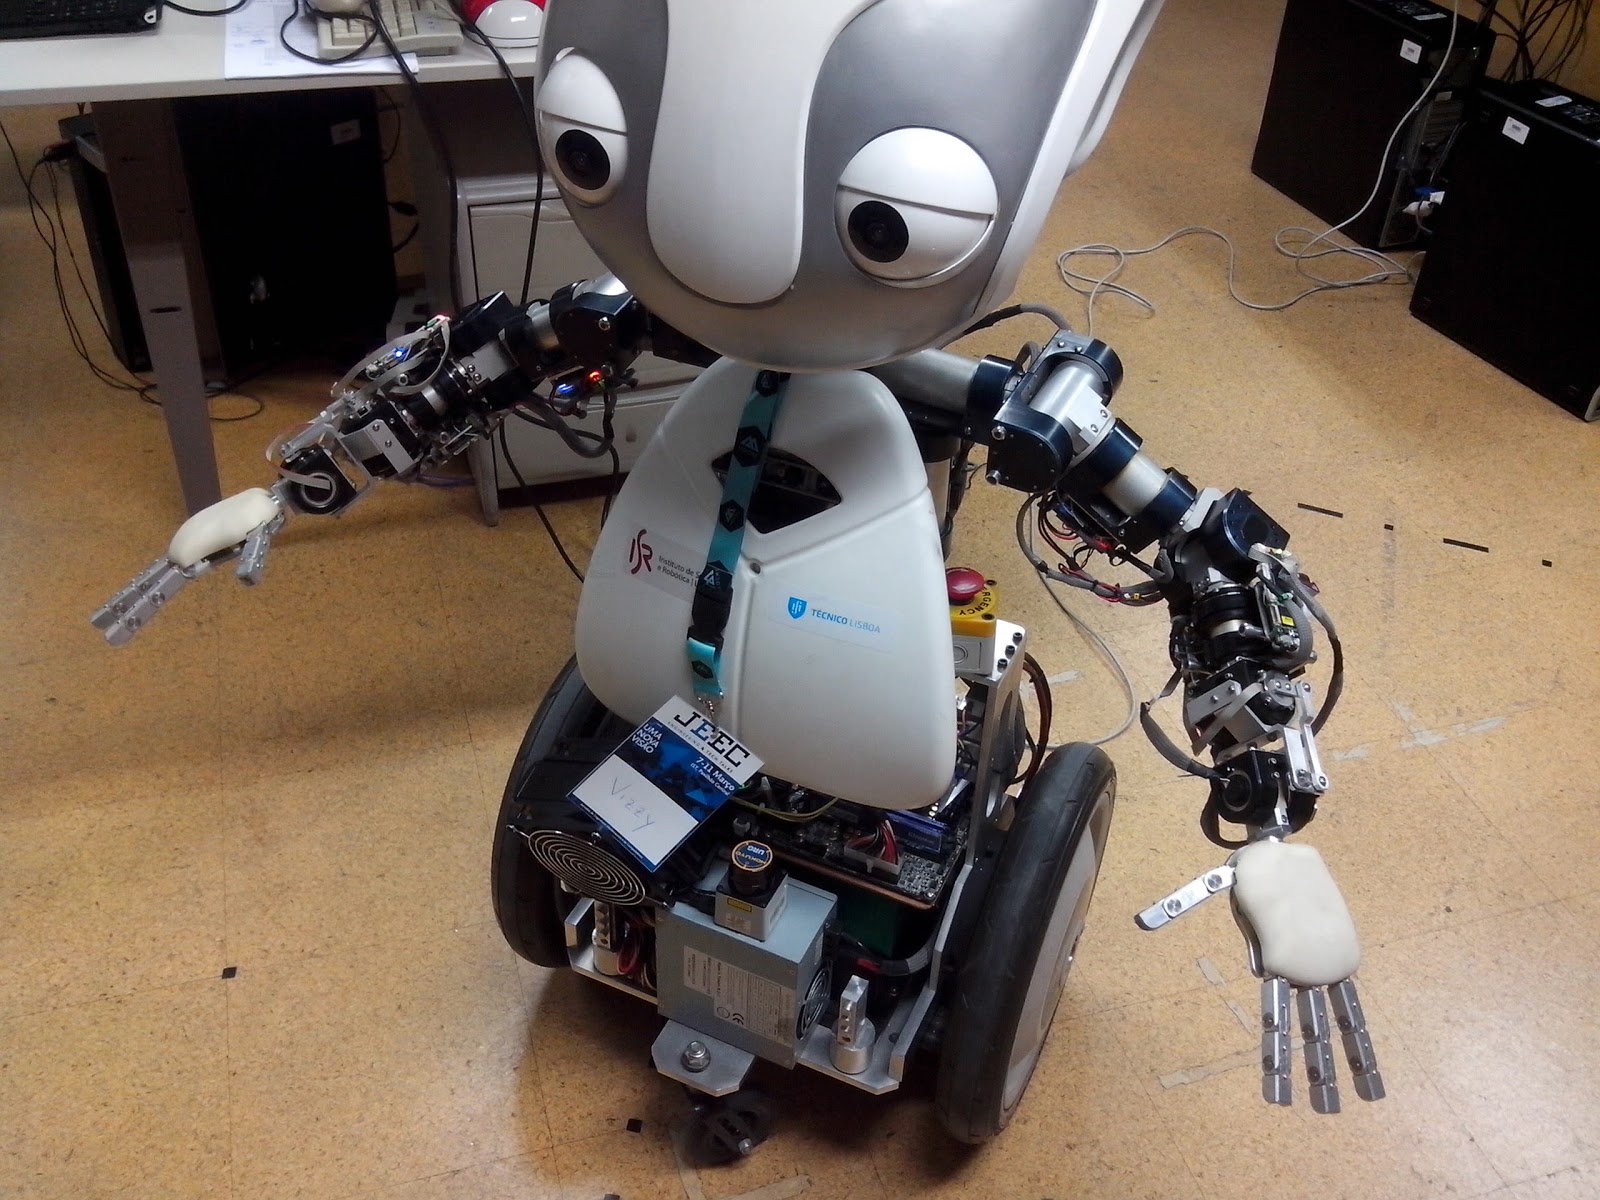
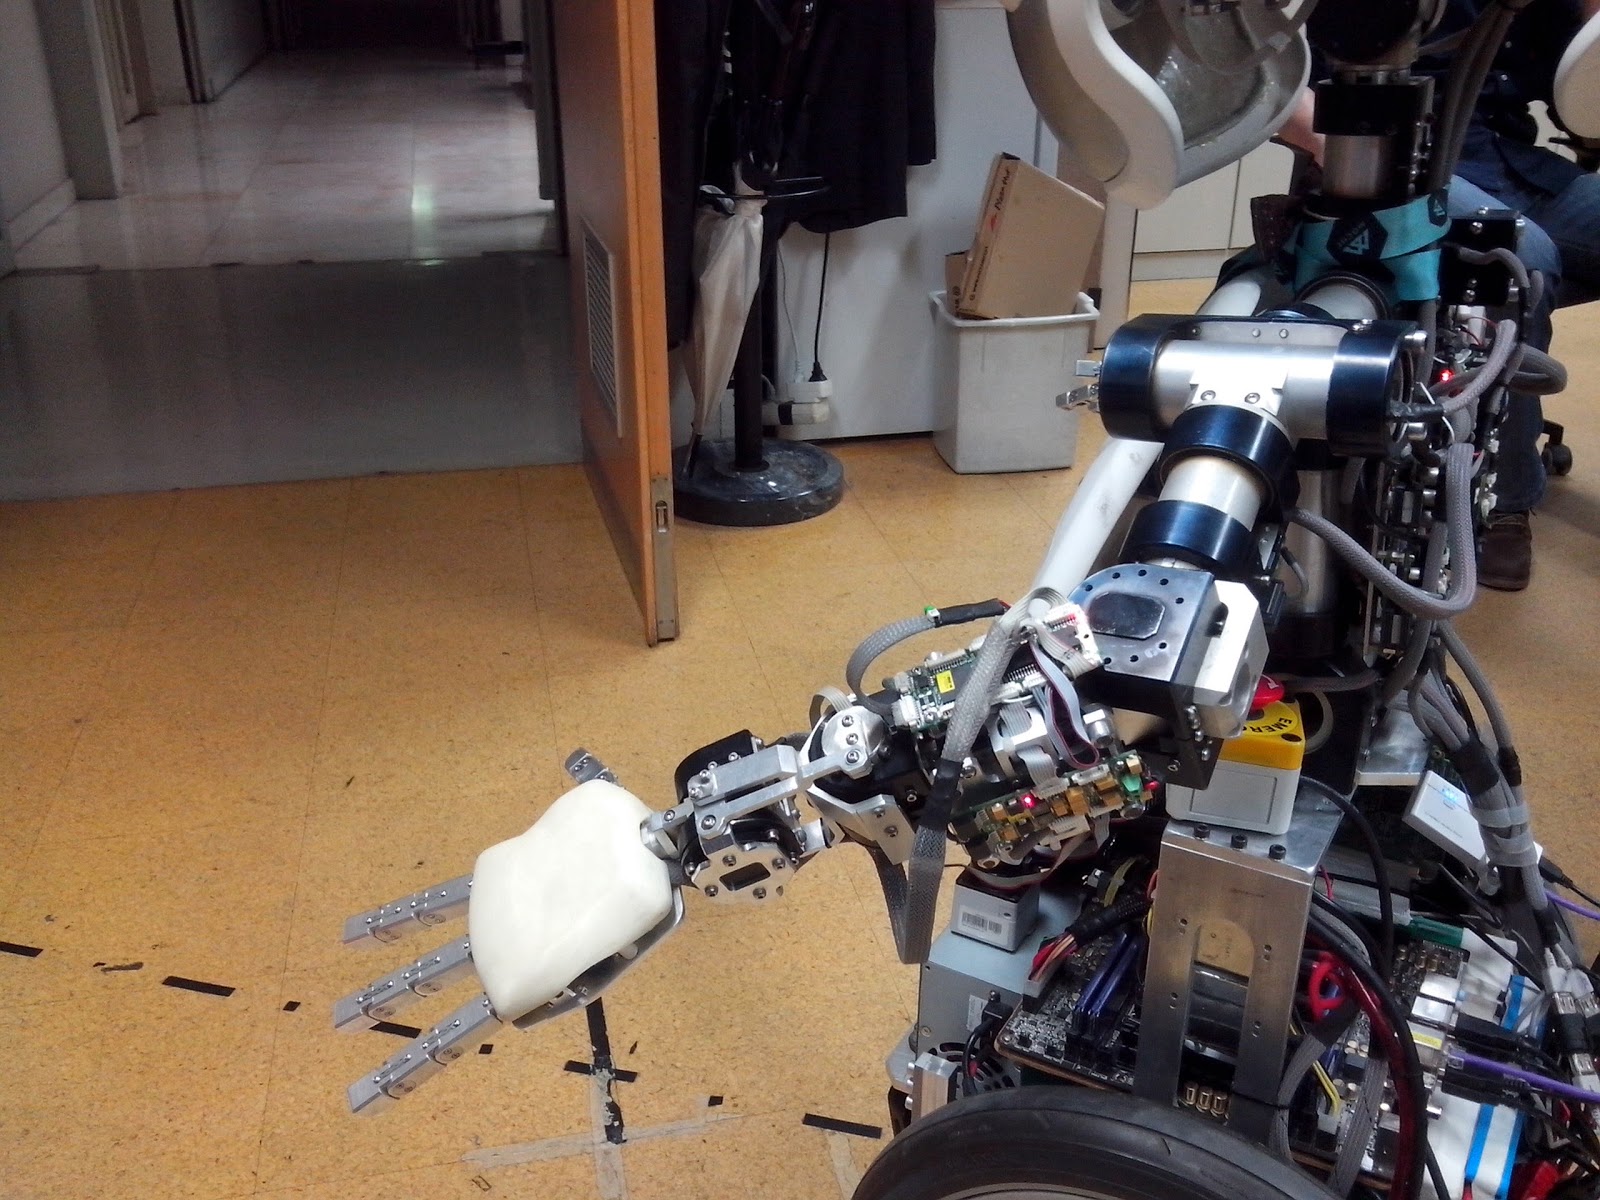
Pictures that show Vizzy’s pose after running successfully yarprobotinterface 2. yarpidl_rosmsg. Run them and wait for around 1 sec. 3. vizzyUpperBodyJoints. Run them and wait for around 2 secs. 4. cartesian* modules. Run them and wait for around 5 secs. (This one is not necessary for the following persons demo, just for the ball tracking and grasping) 5. vizzy_iKinGazeCtrl, fixationPointStatusBridge and fixationPointActionBridge. Run them and wait for around 5 secs. Note that you just need to run the modules (no connections needed)
Running all the modules of Left_Eye_Camera_320x240_for_ball_tracking: No groups here needed. Just push the run button and then the connect button.
Running all the modules of Ball_Tracking_and_Grasping_for_Vizzy_with_ROS_visual_@_vislab-PORTEGE-R930_both_arms: No groups here needed. Just push the run button, wait for around 10 secs and then push the connect button. Now if you place the red ball in front of Vizzy’s left camera, the robot should aim at grasping the ball if reachable.
Running visualization in rViz: This will help you to debug, so it is strongly recommended to run. In a terminal at the laptop, type:
rosrun rviz rviz
Then select the visualization file (.rviz) set for the ball tracker demo.
The router has a slot for a SIM card, so you if you want to use the internet of the SIM card, please execute in vizzy-desktop:
internet_SIM or /home/vizzy-desktop/vizzy-desktop-scripts/connect_to_SIM.sh (Recall that you have to unlock the SIM card in the router interface, http://10.10.1.80)
To go back to the lab configuration, execute in vizzy-desktop:
internet_ISR or /home/vizzy-desktop/vizzy-desktop-scripts/connect_to_ISR.sh (Recall that you have to plug the ethernet cable to the robot)
- Low battery/battery does not charge
- Segway does not turn on
- Control boards firmware initialization. Run canLoader
- Torn power/control cable
- Fingers are not at home position before the robot is shutdown (either normally or due to a trouble). You need to start the yarprobotinterface program with a configuration file that allows to move the fingers on negative encoder values. Issue the command
yarprobotinterface --from yarprobotinterfacecalibfingers.ini, then open the motor control GUI yarpmotorgui byyarpmotorgui --robot vizzy --context vizzyRobotMotorGui --from vizzy_robot_motor_gui.iniand move the finger to the correct home position. Remember to do a power off/power on cycle on the controlboards to reset the encoders. - Vizzy-desktop does not boot up properly. There are two known problems:
- The battery of the motherboard is discharged and the motherboard displays an error related with NVRAM settings before shuts down. Check the error in the error code file. If it is an NVRAM error, change the motherboard battery and restart the computer.
- After rebooting the disk several times on linux, there is a regular checkdisk that needs user intervention by pushing the key "S" to skip the check. Thus, you need to plug a keyboard before booting vizzy-desktop and wait for around 1 minute and then press the "S" key.
- If the clocks on vizzy-desktop and a networked device (vizzy-laptop for instance) are not synchronized tf's throw an exception (extrapolation into the future/past). The most successful setup until now, has Vizzy's laptop as an ntp server for Vizzy. To do that follow the following steps:
- Install ntpdate on Vizzy and on the laptop:
sudo apt install ntpdate && sudo apt install ntp - Edit the configuration file on laptop:
sudo vim /etc/ntp.confand on the last lines of the file add:
# Allow LAN machines to synchronize with this ntp server restrict 10.10.1.80 mask 255.255.255.0 nomodify notrap- Edit the configuration file on Vizzy:
sudo vim /etc/ntp.confand add the following server bellow the list of servers on# Specify one or more NTP servers.:
pool 10.10.1.82 iburst
-
Check the clock delay between vizzy-laptop and vizzy-desktop. On vizzy-desktop execute:
ntpdate -q 10.10.1.82The output should be something likeserver 10.10.1.80, stratum 3, offset -0.001962, delay 0.02850If the offset is greater than 1ms, you should synchronize the clock with the following commands on vizzy-desktop:sudo service ntp stopntpdate -q 10.10.1.82sudo service ntp startIt might take several trials to succeed.
- Install ntpdate on Vizzy and on the laptop:
Disable power save!
  iwconfig 2> /dev/null | grep "Power Management"
  Power Management:on
  cd /etc/NetworkManager/conf.d/
  sudo cp default-wifi-powersave-on.conf wifi-powersave-off.conf
  sudo vim wifi-powersave-off.conf
and edit the file contents to:
  [connection]
  wifi.powersave = 2
and then reboot!
