-
Notifications
You must be signed in to change notification settings - Fork 3
Adding a finish banner
We need to add three more dialogs before we can move on to more configuration-oriented topics: the finish banner and two progress banners. The finish banner informs users that the InCert process has finished. This dialog is relatively simple, but we will use advanced nested-banner layout techniques for our finish banner's content.
Setup
This tutorial assumes that you have completed the tutorial, Adding a ready to begin dialog, and have a version of the engine that will start and attempt to contact your web-server.
A note on examples
Our xml files are starting to get too long to include their full text inline in these tutorials. When you see this symbol  in the text, you can click on it to view the xml in question.
Creating the basic finish dialog and wiring it into the tasklist
- Add the following to the
Bannersblock of your banners.xml file:
<SimpleBanner name="FinishBanner" height="450" width="500" noCloseQuestion="true">
  <Content>
    <SimpleParagraph>
      <Content>
        <DirectTextContent />
      </Content>
    </SimpleParagraph>
  </Content>
  <Buttons>
    <ResultButton>
      <Target>NextButton</Target>
      <Text>Exit</Text>
      <IsCancelButton>true</IsCancelButton>
      <Result>ControlResults.ExitUtilityResult</Result>
    </ResultButton>
    <ResultButton>
      <Target>BackButton</Target>
      <Text>Restart</Text>
      <IsDefaultButton>true</IsDefaultButton>
      <Result>ControlResults.RestartComputerResult</Result>
    </ResultButton>
    <UrlButton>
      <Target>HelpButton</Target>
      <Text>Help</Text>
      <Value>https://certdev0.incommontest.org/incommon/index.html</Value>
    </UrlButton>
  </Buttons>
 </SimpleBanner>
This creates the basic frame for your finish banner. There are three minor things to note here:
  1. We are using the `noCloseQuestion` attribute to specify that the dialog should not prompt users to confirm closing the engine if they click the close button. It doesn't make sense to prompt the user here -- this dialog just exits the utility anyway.
  1. We are assigning a `ControlResults.ExitUtilityResult` to the next button.  This will cause the engine to exit when the user clicks the next button (which we are renaming to 'Exit' here).
  1. We are assigning a  `ControlResults.RestartComputerResult` to the back button.  This will cause the engine to restart the computer when the user clicks the back button (which we are renaming to 'Restart' here).
We will be adding more content to our finish banner below.
- Add the following xml block to the end of
mainrole-branch in yourtasklist.xmlfile:
<UserInterface.ShowBorderedBannerModal>
  <Properties>
    <Dialog>Main dialog</Dialog>
    <Banner>FinishBanner</Banner>
  </Properties>
</UserInterface.ShowBorderedBannerModal>- Upload tasklist.xml
 and banners.xml
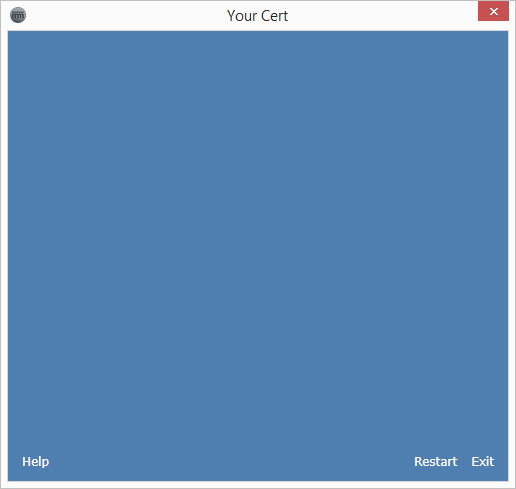
  to your server and run the engine. The engine should now show our finish dialog after we authenticate, accept the license agreement, and click start on the ready-to-begin dialog:

Warning: if you click 'Restart' here, it will restart your computer.
-
Now let's add some content to our finish banner. To do this, add the following to the
Bannersblock of your banners.xml file:
- Now, modify your
FinishBannerxml to includefinish banner.titleandfinish banner.textnested banners:
<SimpleBanner name="FinishBanner" height="450" width="500" noCloseQuestion="true">
  <Content>
    <ContentBlockParagraph borderSize="0" banner="finish banner.title" verticalAlignment="Top" margin="20,53,40,0"  />
    <ContentBlockParagraph borderSize="0" banner="finish banner.text" verticalAlignment="Top" margin="95,0,40,0" />
  </Content>
  <Buttons>
    <ResultButton>
      <Target>NextButton</Target>
      <Text>Exit</Text>
      <IsCancelButton>true</IsCancelButton>
      <Result>ControlResults.ExitUtilityResult</Result>
    </ResultButton>
    <ResultButton>
      <Target>BackButton</Target>
      <Text>Restart</Text>
      <IsDefaultButton>true</IsDefaultButton>
      <Result>ControlResults.RestartComputerResult</Result>
    </ResultButton>
    <UrlButton>
      <Target>HelpButton</Target>
      <Text>Help</Text>
      <Value>https://certdev0.incommontest.org/incommon/index.html</Value>
    </UrlButton>
  </Buttons>
</SimpleBanner>- Upload tasklist.xml
 and banners.xml
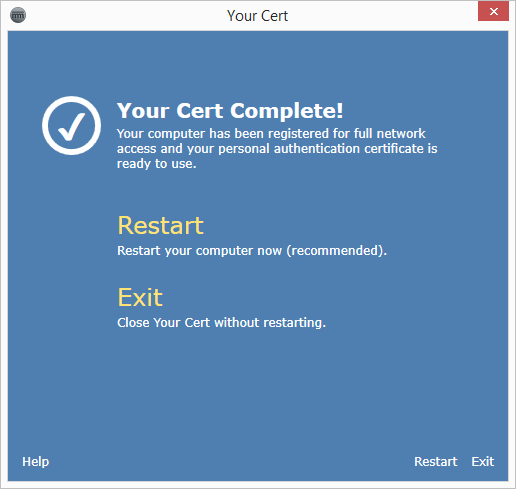
  to your server and run the engine. Our finish dialog should now include content:

Here, nesting content banners allows us to align our two blocks of text content to the right of our checkmark glyph. Nested banners can also be used to group layout content in much the same way that nested task branches can be used to group tasks.
The various buttons and links should all work. Again, be forewarned that clicking restart will restart your computer.
Conclusion
In this tutorial, we experimented with using nested banners to realize more complex banner layouts. We also learned how to assign control results ('ControlResults.ExitUtilityResult' and ControlResults.RestartComputerResult) to dialog buttons that will cause the engine to exit and restart the user's computer.