-
Notifications
You must be signed in to change notification settings - Fork 102
Getting Started
Welcome to the Getting Started guide for the Knowledge application! In this guide, you'll find step-by-step instructions and guidance for setting up and using the Knowledge application for the first time.
- Download the latest version of Knowledge for your preferred operating system (macOS, Windows, or Linux).
- Install the Knowledge application using the downloaded file. Follow the installation prompts and instructions specific to your operating system.
Open the Knowledge application by double-clicking the icon or running the installed executable file. You'll be greeted by a tutorial that introduces you to Sources, Projects, and other fundamental concepts. Take a moment to familiarize yourself with these concepts.
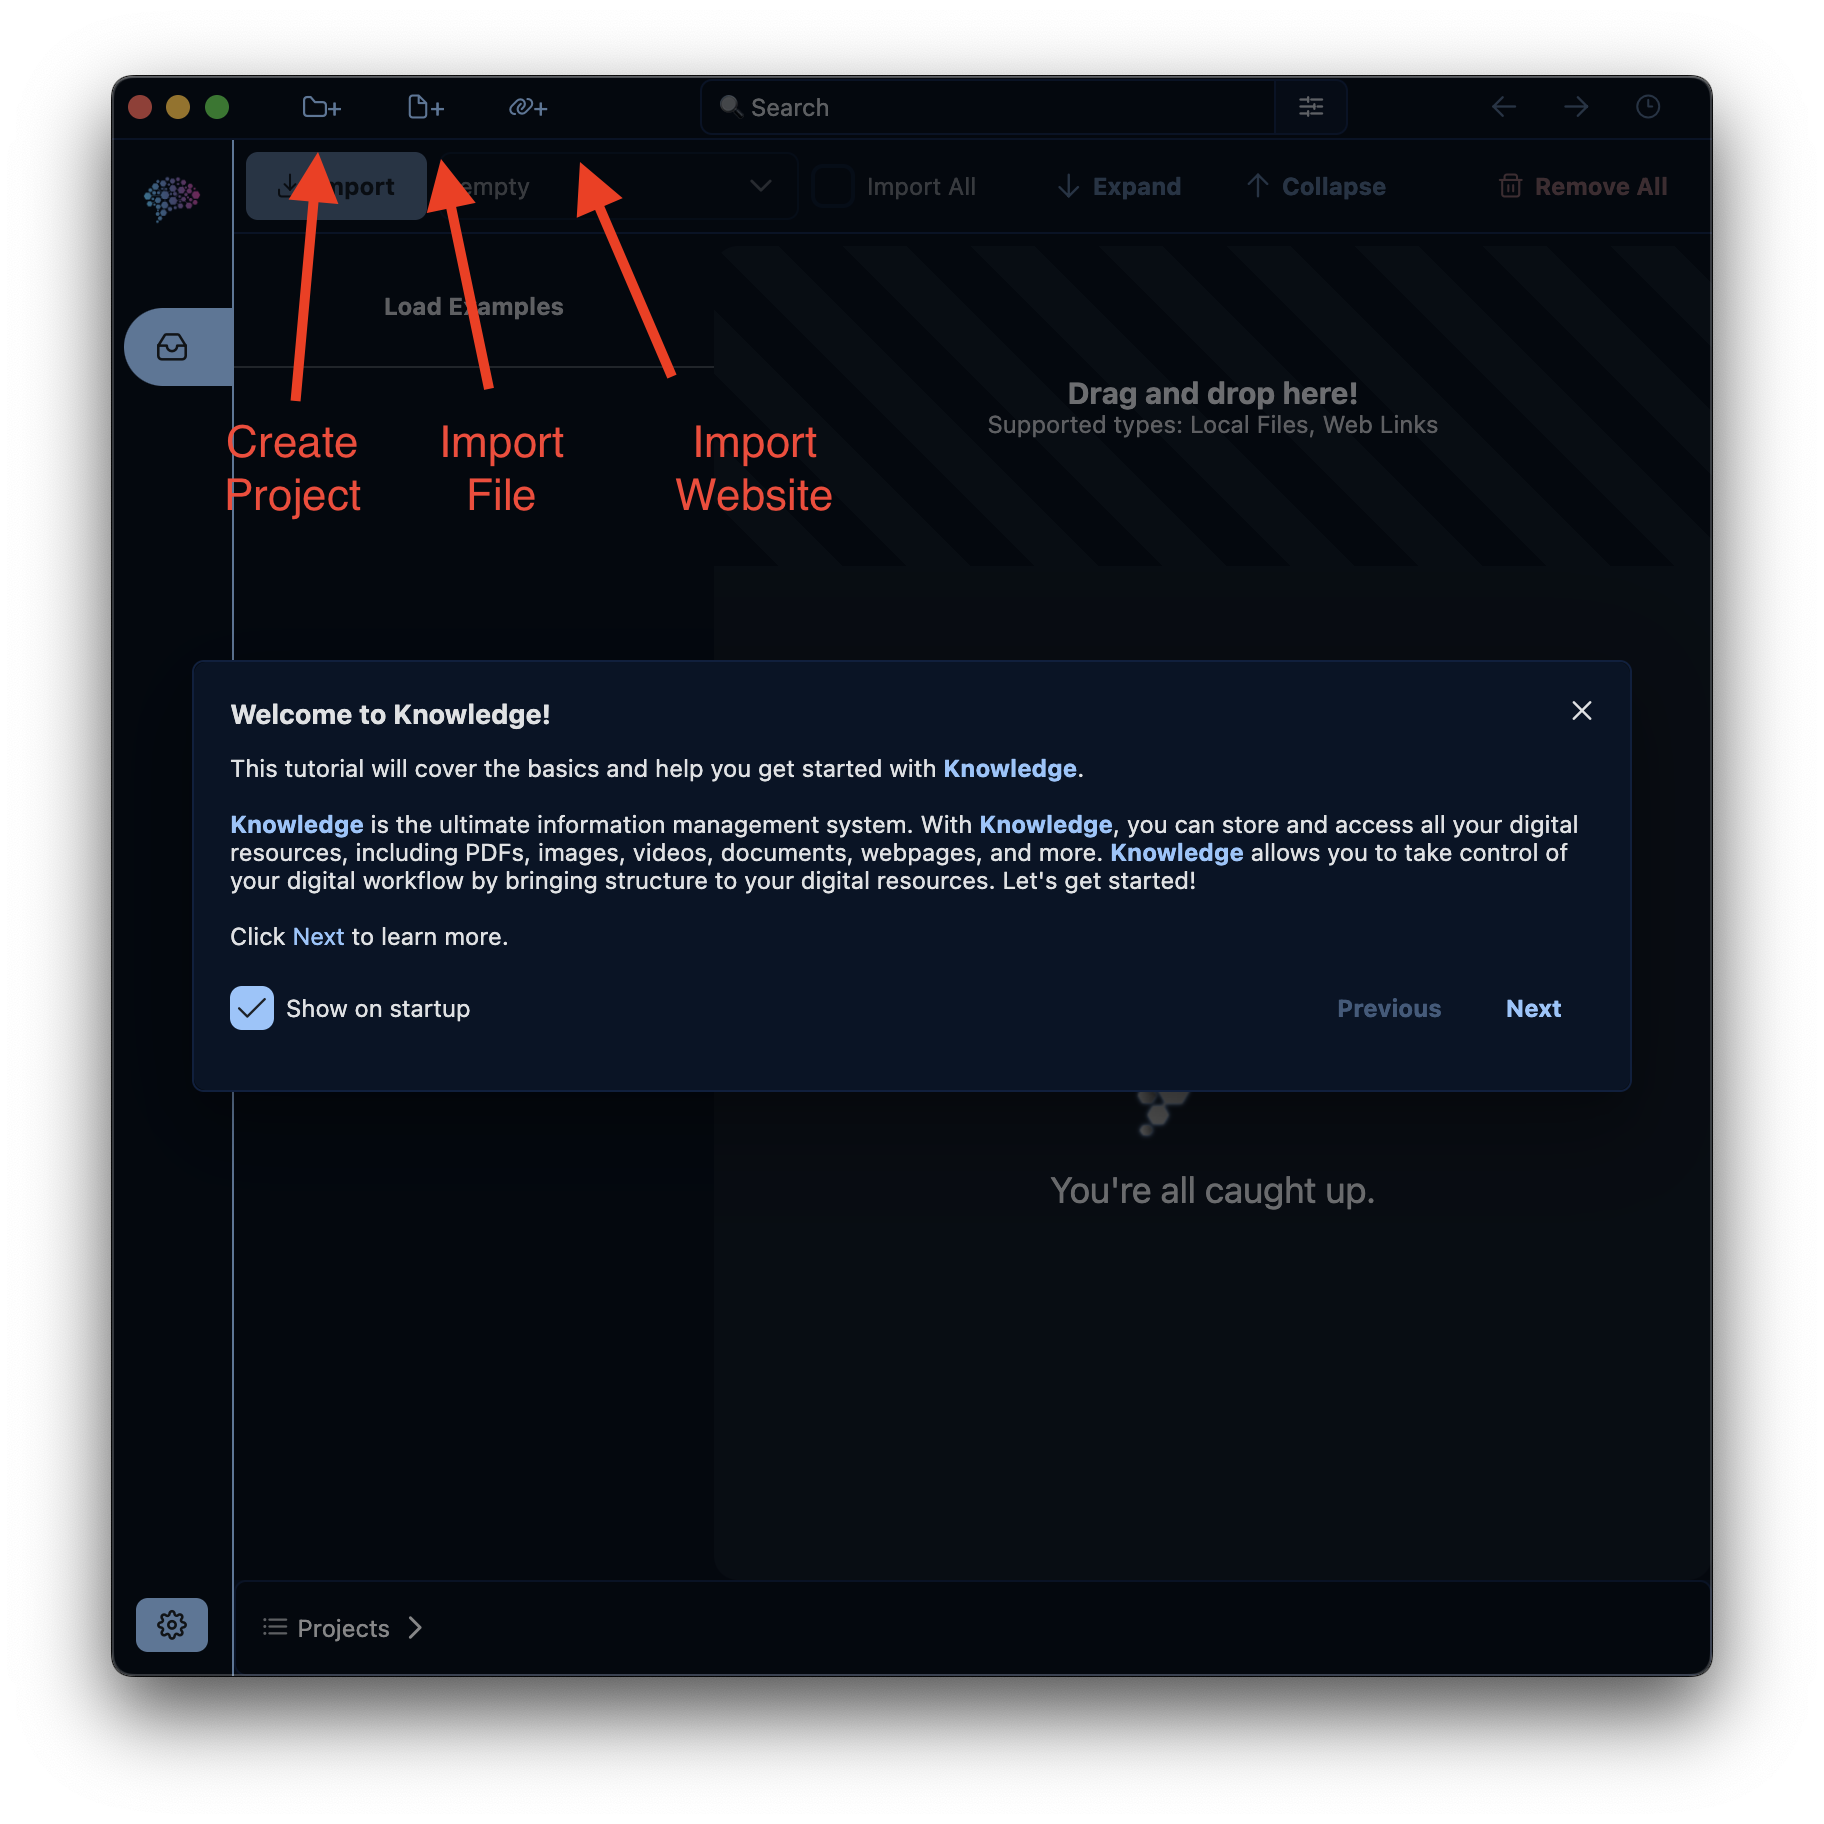
Before you can start adding Sources, you must create a Project. A Project is required to save Sources. To create a Project, click on the "Create Project" button, provide a name for your Project, and click "Create".

With a Project created, you can now begin importing Sources. Sources can be imported using the following methods:
- Click the "Import Website" button and copy/paste a link into the provided field.
- Drag a link into the Knowledge application window.
- Drag a file into the Knowledge application window.
- Click the "Import File" button and select a file from the dialog.
Read the Sources page for information on advanced import methods, including the Chrome extension or "Autoscan"
When a Source is first imported, it is sent to the Inbox view. The Inbox view displays a badge with the number of Sources it contains. This badge is present on the Inbox icon at all times. From the Inbox view, you can preview the Source and even chat with it directly.
To categorize a Source into a Project:
- Select the desired Project from the drop-down menu in the Inbox view and click "Import".
- Alternatively, you can select "Import All" and click the "Import" button to import all Sources in the Inbox to the selected Project.
Now that you've added Sources to a Project, you can explore the other views available in Knowledge.
These views include:
- Graph
- Table
- Grid
- Calendar
- Chat
Each view provides a unique way of interacting with your Sources and Projects.
Congratulations! You've completed the Getting Started guide for the Knowledge application. Feel free to explore the other sections in the wiki to learn more about the features and functionalities of Knowledge.