-
Notifications
You must be signed in to change notification settings - Fork 129
HW Tests
This section will mainly focus on the system requirements, setting-up and running hardware tests for reference projects.
Hardware requirements
- You should have a fully functional NetFPGA-10G machine. Please refer to the Getting started guide and [production test manual] (https://github.com/NetFPGA/NetFPGA-public/wiki/Production%20Test%20Manual) for more help.
- Please enable the NetFPGA board for programming through PCIe, this will save a lot of time and makes things easy while running HW tests for different reference projects.
The following are the components required for doing the HW tests:
- NetFPGA-10G card
- 10G NIC card
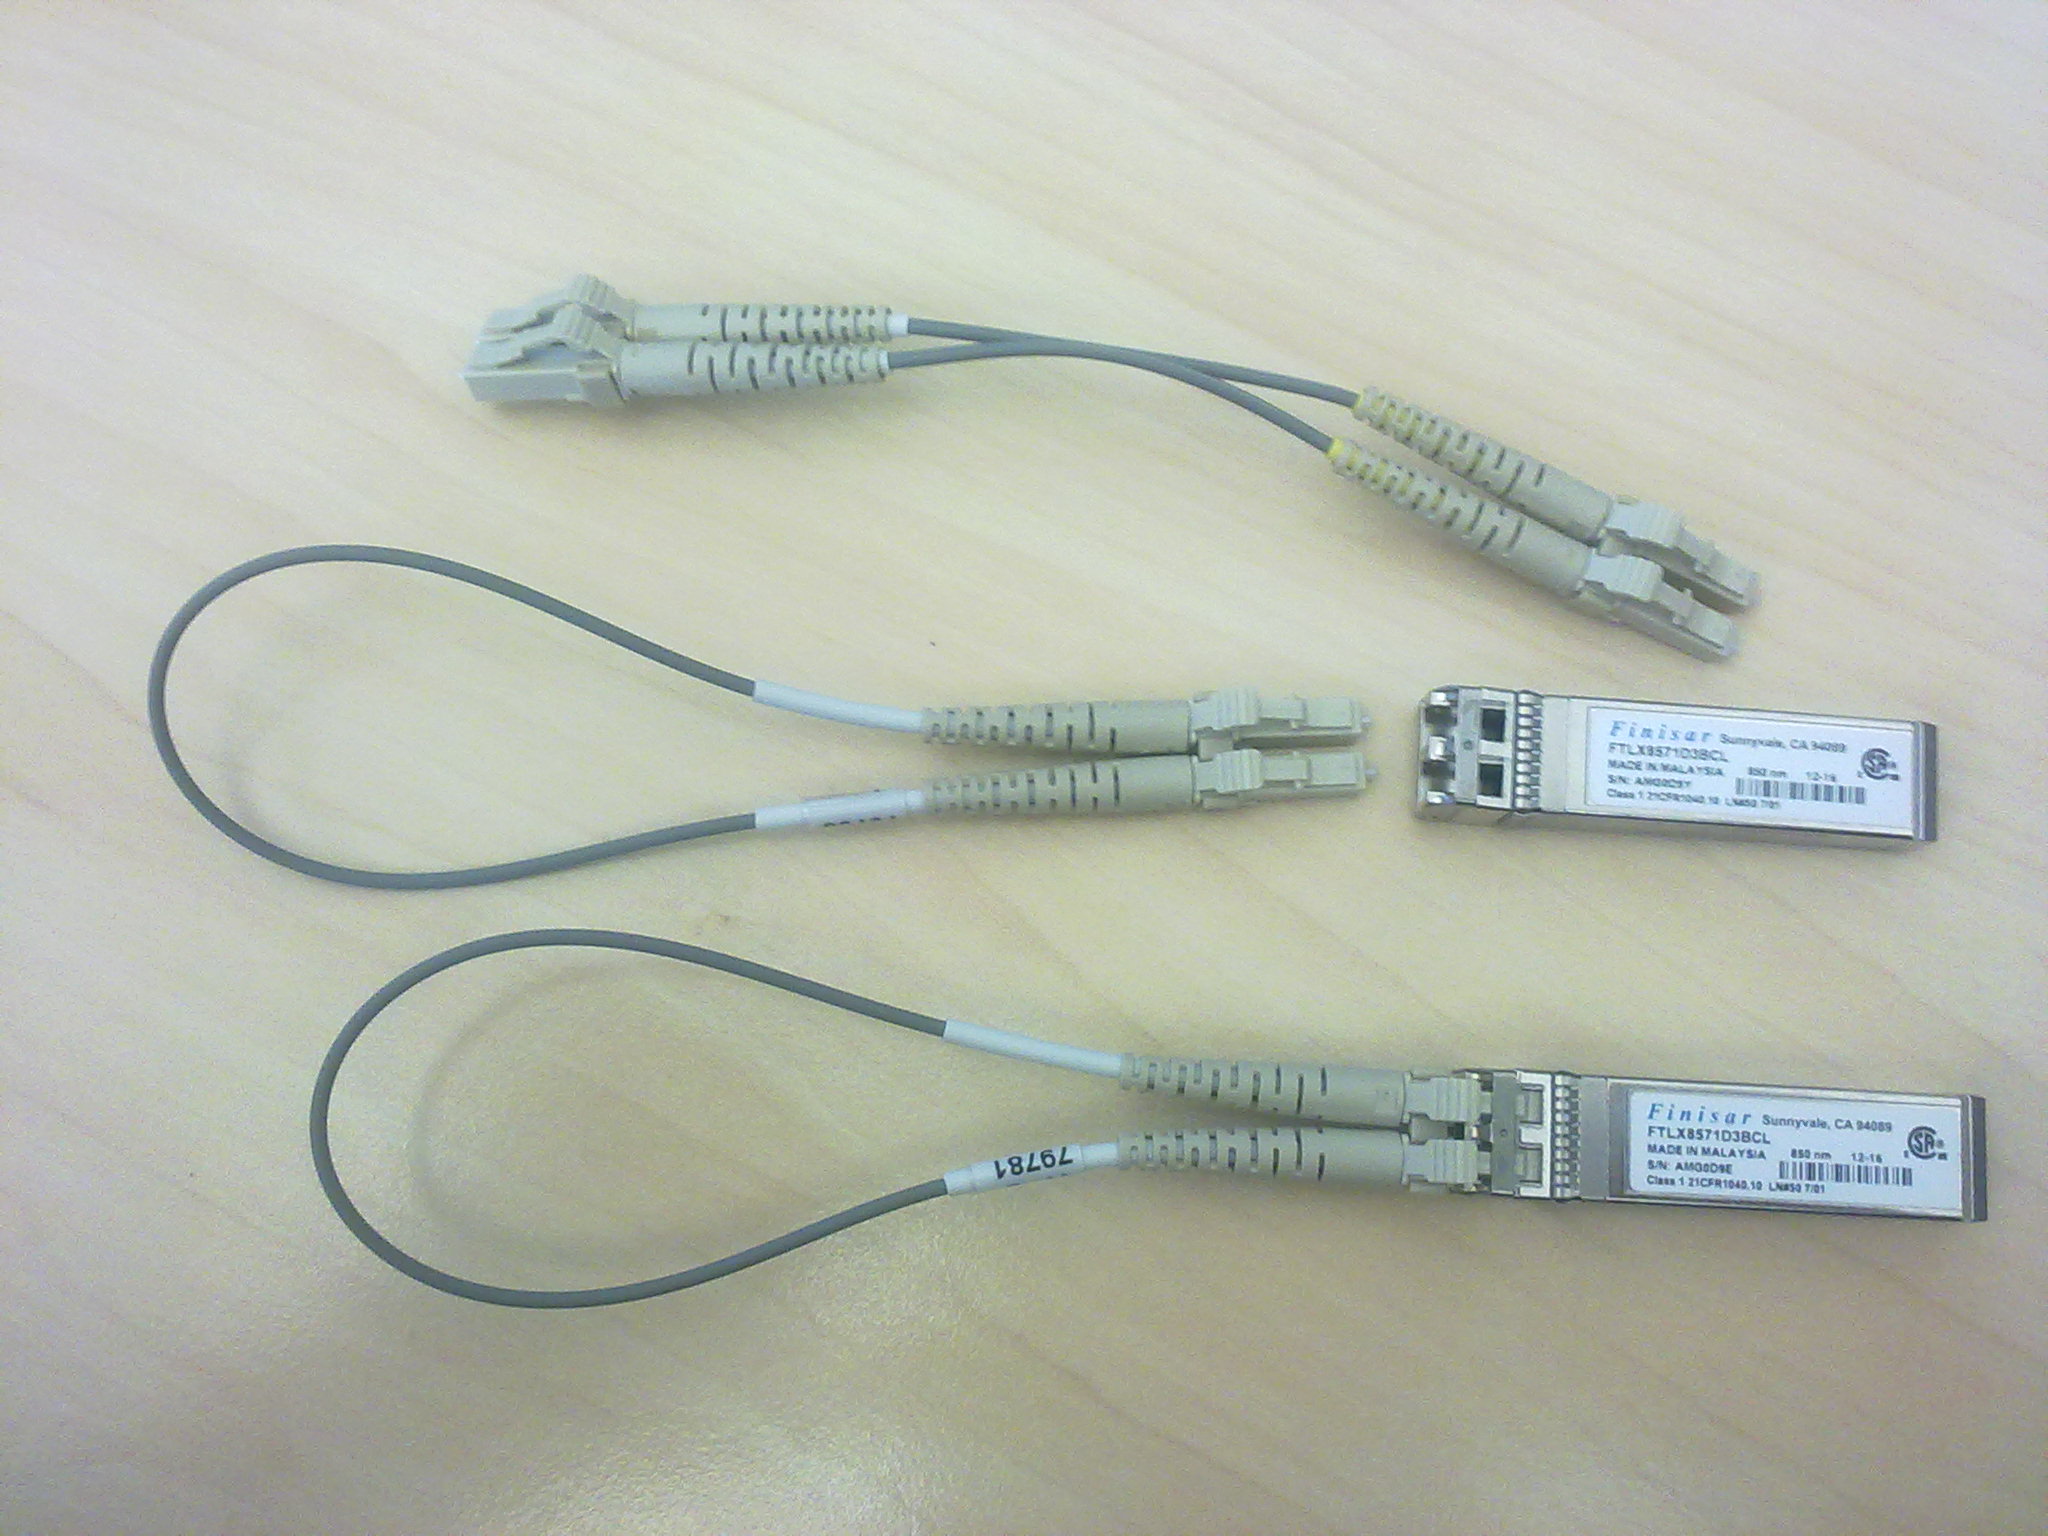
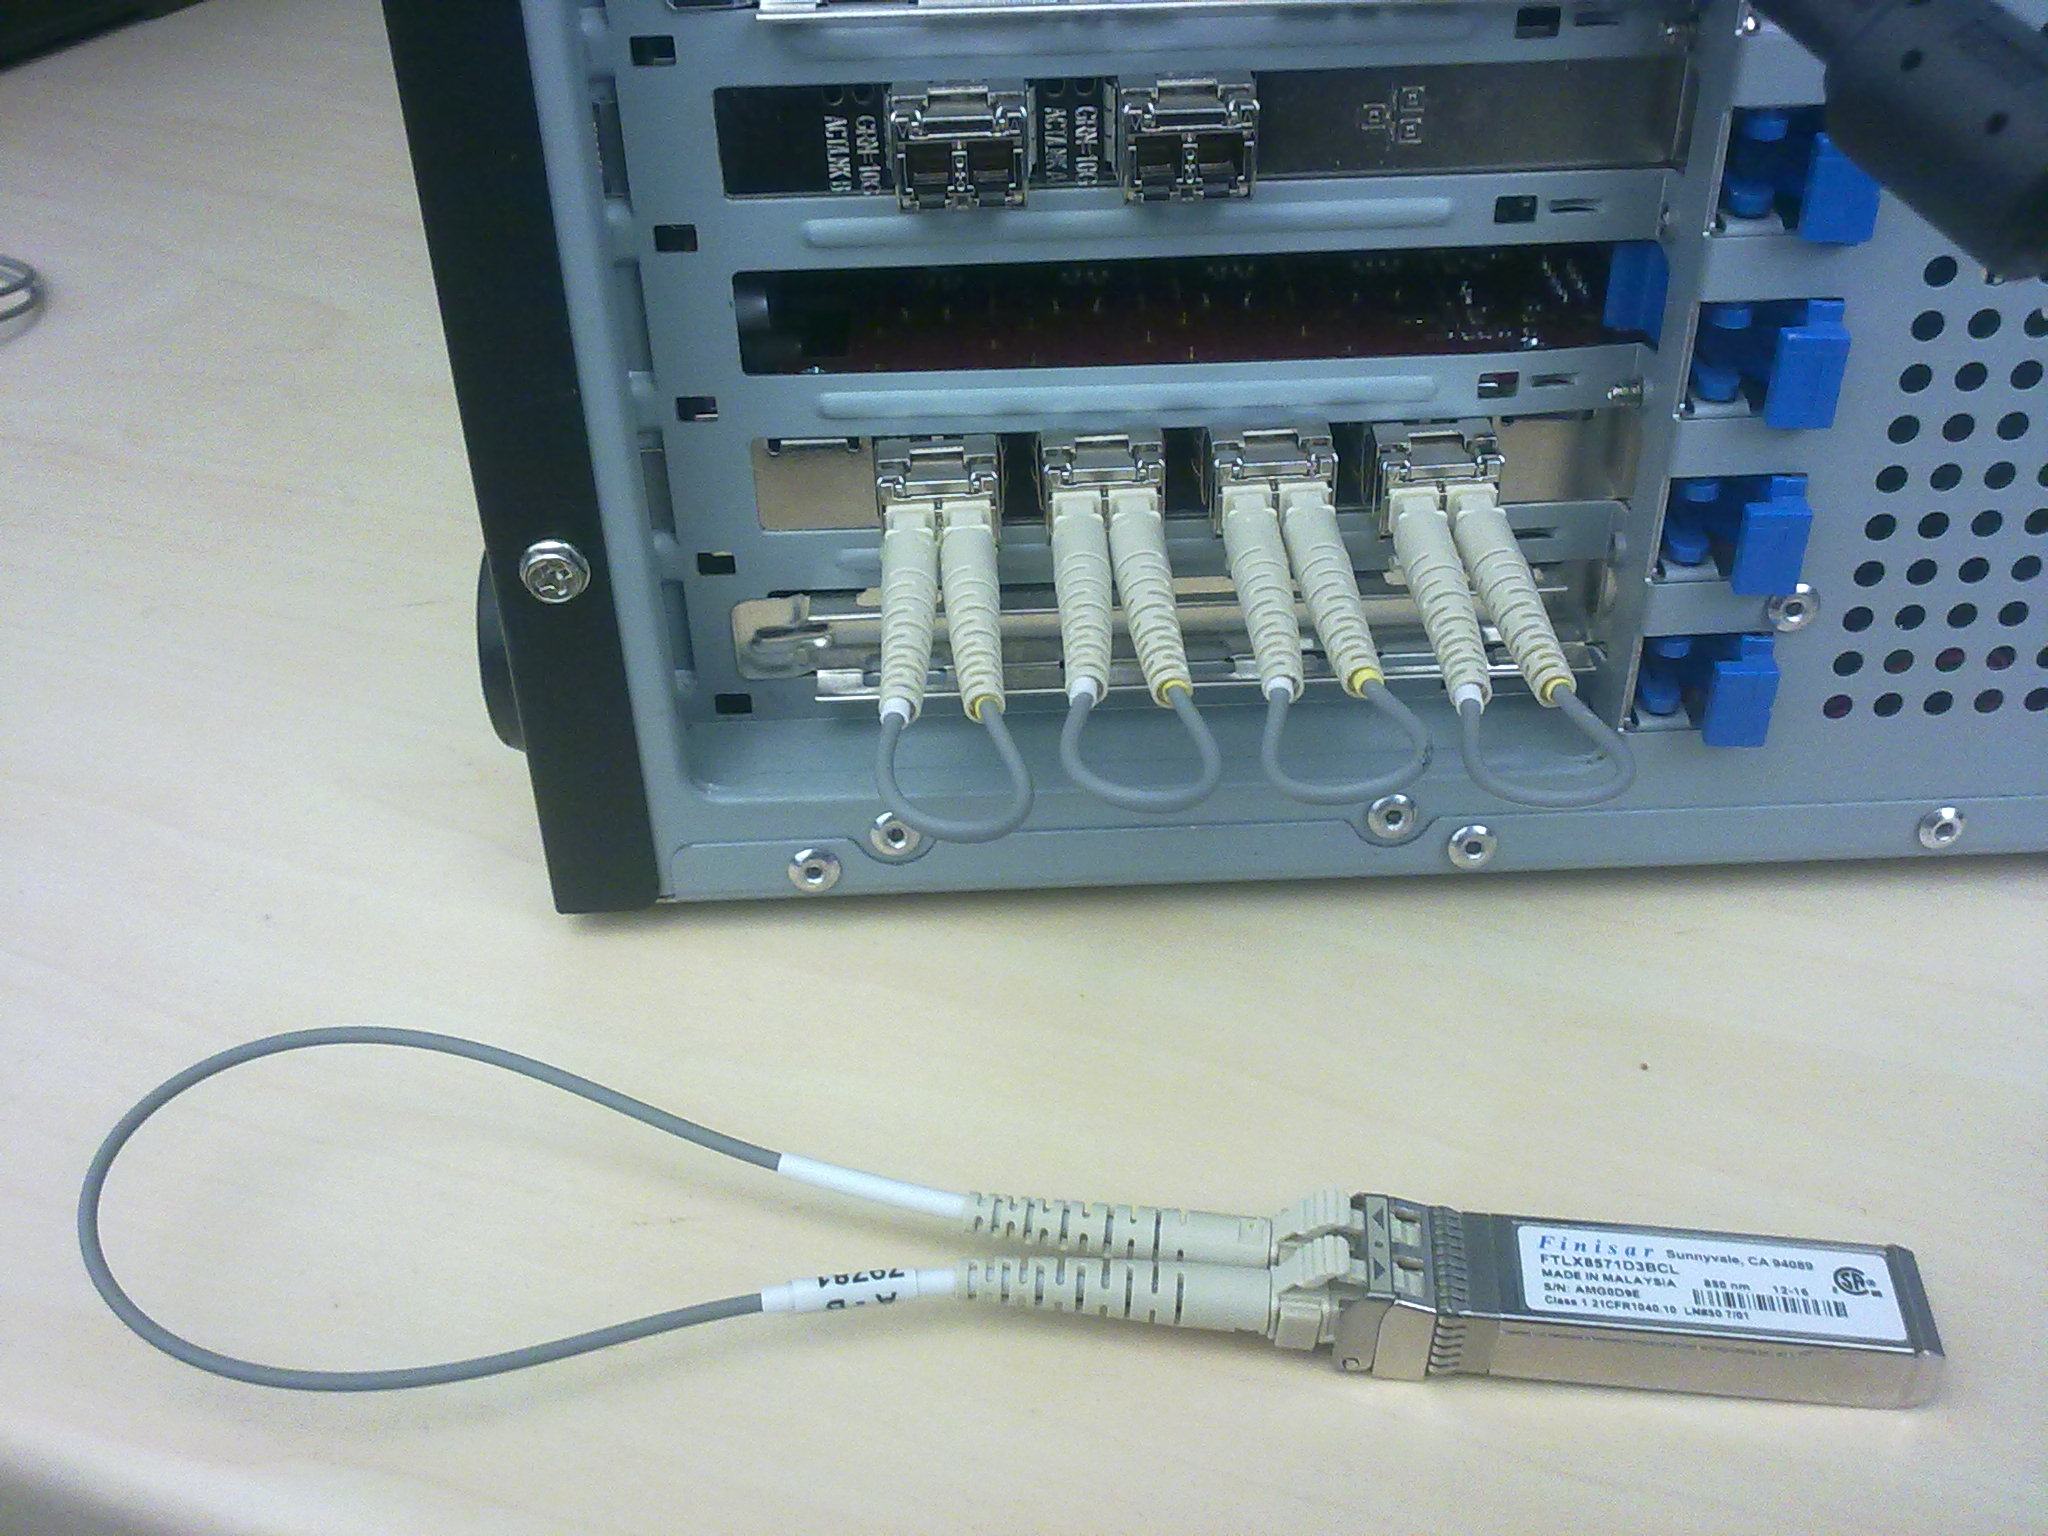
- SFP+ transceivers
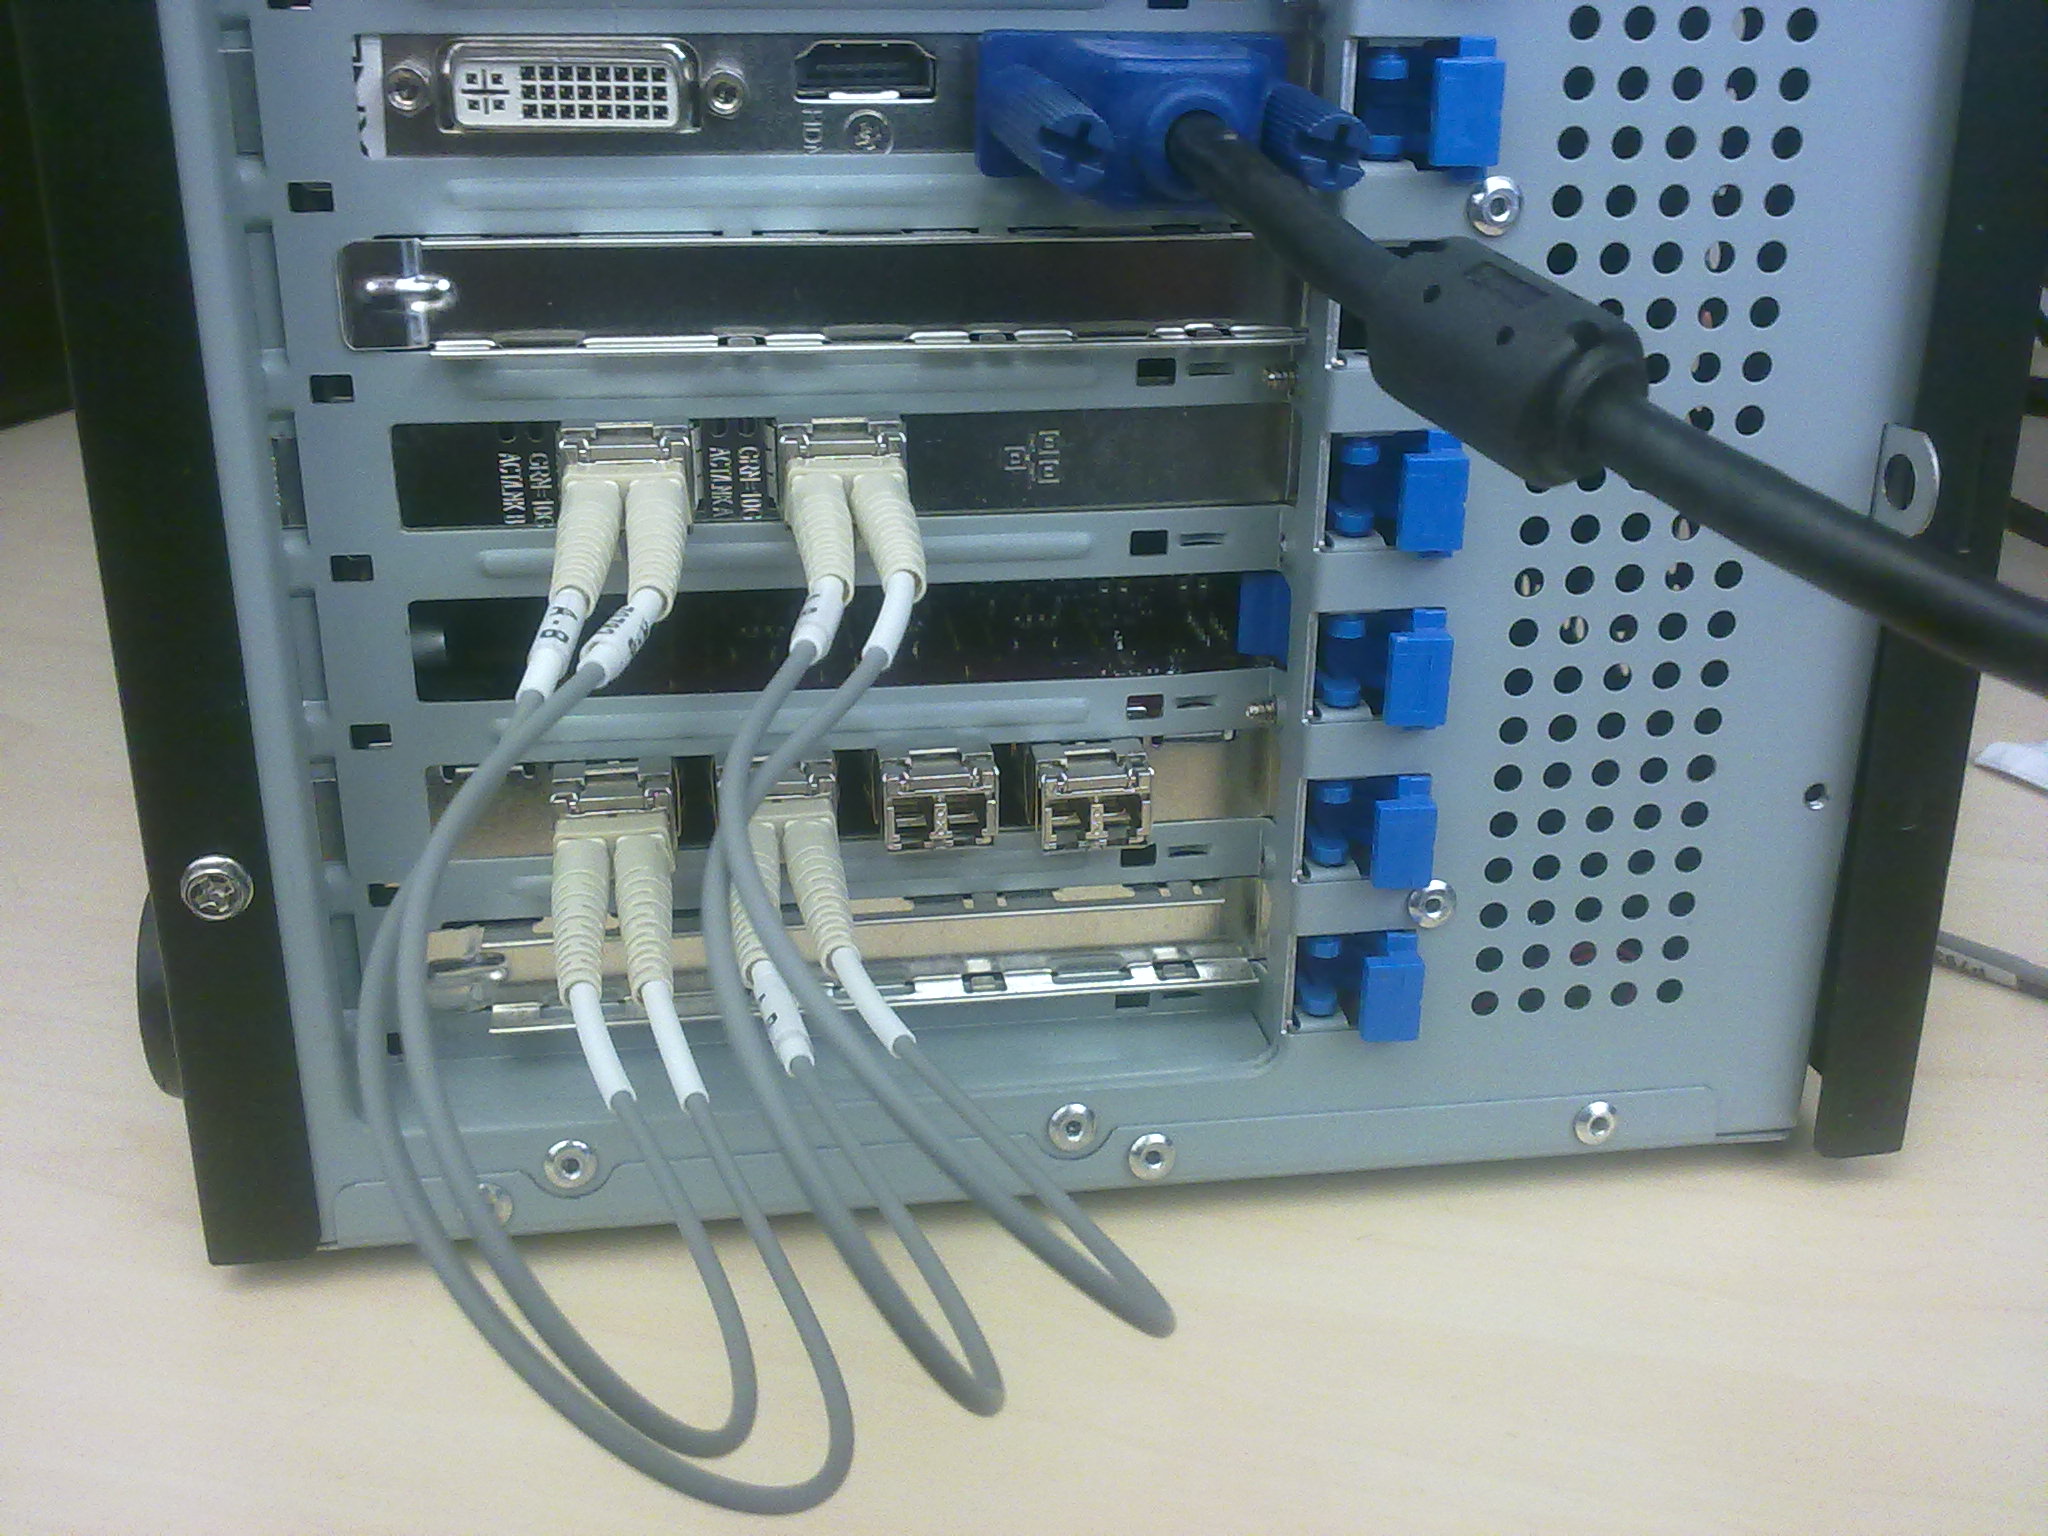
- fiber optical cables (loopback and crossover)

While doing the HW Tests users have to be very careful in getting the connections right. Else the test won't pass and will report an error. Following guidelines are suggested but many more can be included.
- Ensure that the SFP+ transceviers are properly connected to the SFP+ cage of the NetFPGA board.
- Check if the fiber connections are intact. Take proper precautions and handle the fiber with care, as any damage to them can result in failed tests.
Software requirements
- Make sure you clone the latest version of the NetFPGA package. Please ensure that you have the necessary packages installed. The current HW testing infrastructure is Python based.
git clone https://github.com/NetFPGA/NetFPGA-10G-live.git
Note: Update your bashrc with the bashrc_addon_NetFPGA provided in your clone.
- Do a make cores.
[root@nf-test109 ~]# cd $NF_ROOT
[root@nf-test109 NetFPGA-10G-live]# make cores
- Do a Make on the HW Test library that creates a shared library which is used by the python infrastructure to access the registers.
[root@nf-test109 NetFPGA-10G-live]# make hwtestlib
You can remove the files by doing make hwtestlibclean
- Build the driver for the NetFPGA 10G board.
[root@nf-test109 ~]# cd $NF_ROOT
[root@nf-test109 NetFPGA-10G-live]# cd projects/reference_nic/sw/host/driver/
[root@nf-test109 driver]# make
- Do a make on the project of your interest.You can do a make regs after the make on the project if it has register infrastructure for the output port lookup (reference_switch, reference_switch_lite, reference_router).
[root@nf-test109 driver]# cd $NF_DESIGN_DIR
[root@nf-test109 reference_switch_lite]# make
[root@nf-test109 reference_switch_lite]# cd hw
[root@nf-test109 hw]# make regs
You can remove the files by doing make regsclean. If you want the run the HW tests with the preexisting bitfile provided in the base repo.
[root@nf-test109 driver]# cd $NF_DESIGN_DIR
[root@nf-test109 reference_switch_lite]# make regs
When you do make regs, the Xilinx tool libgen, generates xparameters.h which gives a register map of the design (contains the base address and the offset). This xparameters.h is fed as input to the python file xparameters2regdefines.py, that generates reg_defines.h file which has the complete address map (baseaddress+offfset for each register). This reg_defines.h is used by the register monitoring sw system. This reg_defines.h is parsed by the python_parser.py to create reg_defines_{project_name}.py, which is a project specific python library containing the register map. So that the HW tests can reference the register by name instead of hard-coding address values.
- Program the FPGA with the desired bit file by running impact_run.sh script. The following assumes that you are running impact in batch mode.Check if your tool chain is capable of running impact in batch mode, do the following by running
impact -batch
. If it doesn't support you can try programming via GUI mode or do a re-installation of the Xilinx as suggested in the reference operating system section. The script impact_run.sh will remove the driver if already loaded, program the FPGA, does a PCI rescan and inserts the nf10 driver again.
[root@nf-test109 driver]# cd $NF_ROOT
[root@nf-test109 NetFPGA-10G-live]# cd tools/scripts/
[root@nf-test109 scripts]# ./impact_run.sh ../../projects/reference_switch_lite/bitfiles/reference_switch_lite.bit
- This section assumes that you are using impact in GUI mode. Program the FPGA with the desired bitfile by running impact.
source /your/xilinx/path/for/settings64.sh
impact
PCI rescanning for loading the configuration. More details here
cd NetFPGA-10G-live/tools/scripts
./pci_rescan_run.sh
- Check if the bit file is loaded
[root@nf-test109 scripts]# lspci –d *:4244 –vxx
If you don't see the device, you need to reprogram the FPGA.
- If the driver is not already loaded. Then you need to follow the following steps
[root@nf-test109 scripts]# cd $NF_DESIGN_DIR
[root@nf-test109 reference_nic]# cd sw/host/driver
[root@nf-test109 driver]# make
- Run dmesg to confirm if the driver is properly loaded. If properly loaded, you should see nf10 device ready.
- All the tests for the project should be inside the specific project folder. For example all the tests inside the reference_switch_lite project can be seen by going inside the test folder.
cd NetFPGA-10G-live/projects/reference_switch_lite/test
The following shows the tree structure of the test folder.
 test
    ├── both_learning_sw
    │   └── run.py
    ├── both_simple_broadcast
    │   └── run.py
    ├── connections
    │   └── conn
    └── global
        └── setup
2.connections is the connections folder, where connections file for the project can be placed. A connection file specifies how the network interfaces are physically connected. The connection file is formatted with one connection per line, where the connection is specified by nfX:ethY, denoting that the interface nfX should be physically connected to ethY.nfX are the interfaces of NetFPGA and ethY are the interfaces of 10G NIC. For example for internal loopback, for all the nfX interfaces are connected to each other, the corresponding conn file will have the following configuration.
nf0:nf0
nf1:nf1
nf2:nf2
nf3:nf3

For tests in reference_switch, reference_switch_lite and reference_router, nfX are connnected to ethX interfaces, the corresponding conn file will have the following configuration.
nf0:eth2
nf1:eth3
nf2:
nf3:

Note: nf0 is the interface of NetFPGA-10G card closest to the PCIe and nf3 is the farthest from the PCIe. Similarly, eth2 is the interface of 10G-NIC card closest to the PCIe and eth3 is the farthest. Please ensure that you change this according to your system configuration.
3.global is the folder which contains the setup script. The script is used to configure the IP address for the interfaces while running the hardware tests. The IP's are hard-coded in this file. But the user has to remain concious that they will have to change the file if their interfaces are different(having a different X in ethX) or if they want to configure different IP address for the interfaces.
4.All the tests for the project have a specific naming convention. Test directories should be named both_<major><minor> if they can be run in both simulation and hardware, hw<major><minor> if they can be run only on hardware and sim<major>_<minor> if they can be run only as simulation. Neither major or minor can have underscores in their name, nor can they be left blank. Inside each specific test folder, there is a run.py.
5.run.py is the executable scripts which runs the test. The run.py calls other functions in the NFTest library. It is important to know what arguments needs to be passed to the run.py along with the tests, so that the system can perform the tests as simulation only, hardware only or both.
1.Make sure the bashrc_addon_NetFPGA_10G is updated in your system.
2.Check if the variables like NF_ROOT,NF_DESIGN_DIR are set in the right path. Try to do an echo $NF_ROOT , echo $NF_DESIGN_DIR refer to the place you want
3.Running the test
The top level file nf_test.py file can be found inside NetFPGA-10G-live/tools/bin.
Tests are run using the nf_test.py command followed by the arguments indicating if it is a HW or sim test and what is the specific test that we would like to run. So when running the test, test mode should be specified (sim or hw). Other parameters include
- -- major <string>
- -- minor <string>
For instance : ./nf_test.py hw --major loopback --minor maxsize . For a complete list of arguments type nf_test.py --help
You can also use the register monitoring system to view the contents of the register and how it is affected by running a specific test.
The HW tests have been updated to include the regread_expect functionality.
- We have nf10_lib.c which has the following functions regread, regwrite and regread_expect. This can be found inside NetFPGA-10G-live/tools/lib . There is a Makefile which creates a shared library (nf10_lib.so) of nf10_lib.c and import them using ctypes in python Following are the use case for the functions in python inside the run.py
For asserting the reset_counter to 1 for clearing the registers
nf10_lib.regwrite(RESET_CNTRS(), 0x1)
For asseting the reset_counter to 0 for enable the counters to increment
nf10_lib.regwrite(RESET_CNTRS(), 0x0)
For regread_expect value of 0 in lut_hit and 10 in lut_miss registers
rres1= nf10_lib.regread_expect(SWITCH_OP_LUT_NUM_HITS_REG(), 0x0)
rres2=nf10_lib.regread_expect(SWITCH_OP_LUT_NUM_MISSES_REG(), 0xa)
2.In the current implementation if the HW Test fails, we can track down if the errors were due to:
- packet loss and barriers related errors
- reg read errors
1.Set the design environment variables in bashrc (look at the bashrc_addon in the NetFPGA package for details). By default variables assume that the NetFPGA package is installed in root. Following are the default contents of the bashrc
export NF_ROOT=${HOME}/NetFPGA-10G-live
export NF_DESIGN_DIR=${NF_ROOT}/projects/reference_nic
export NF_WORK_DIR=/tmp/${USER}
export PYTHONPATH=${NF_ROOT}/lib/python:${NF_DESIGN_DIR}/lib/Python:
export LD_LIBRARY_PATH=${NF_ROOT}/lib/java/NetFPGAFrontEnd/bin:${LD_LIBRARY_PATH}
2.Ensure the bitfile is loaded properly.
3.Modify the conn file based on your system interfaces.
4.Modify setup file is available to configure the right IP for your interfaces. Following are the default IP address and the interface names. In my work station there are two RJ-45 interfaces (eth0 and eth1), followed by the interfaces for 10G NICs (eth2 and eth3) that is the reason for the following interface names. If you have different interface names, instead of changing the interface names for all projects, you can edit the interface names in /etc/udev/rules.d/70-persistent-net.rules. Please refer to Fedora documentation for more details.
"eth2","192.168.100.1"
"eth3","192.168.101.1"
"nf0","192.168.200.1"
"nf1","192.168.201.1"
"nf2","192.168.202.1"
"nf3","192.168.203.1"
5.Make sure you do a make hwtestlib on the NetFPGA-10G-live/ so that the shared library (nf10_lib.so) is created. This important for running HW tests.
6.Ensure that the nf10 driver is loaded. For the NetFPGA, the generic driver can be found inside the reference_nic project (inside reference_nic/sw/host/driver). Do a make and you should be able to see the nf10.ko. Insert the driver by running the following command
cd /go/to/the/driver/path
insmod nf10.ko
7.Check if your hardware connections are intact.
8.Check if the setup and the run.py files are in the proper modes (executables). If not when you run the HW tests, it will give you a "permission denied" error and the "interface not UP" errors.